

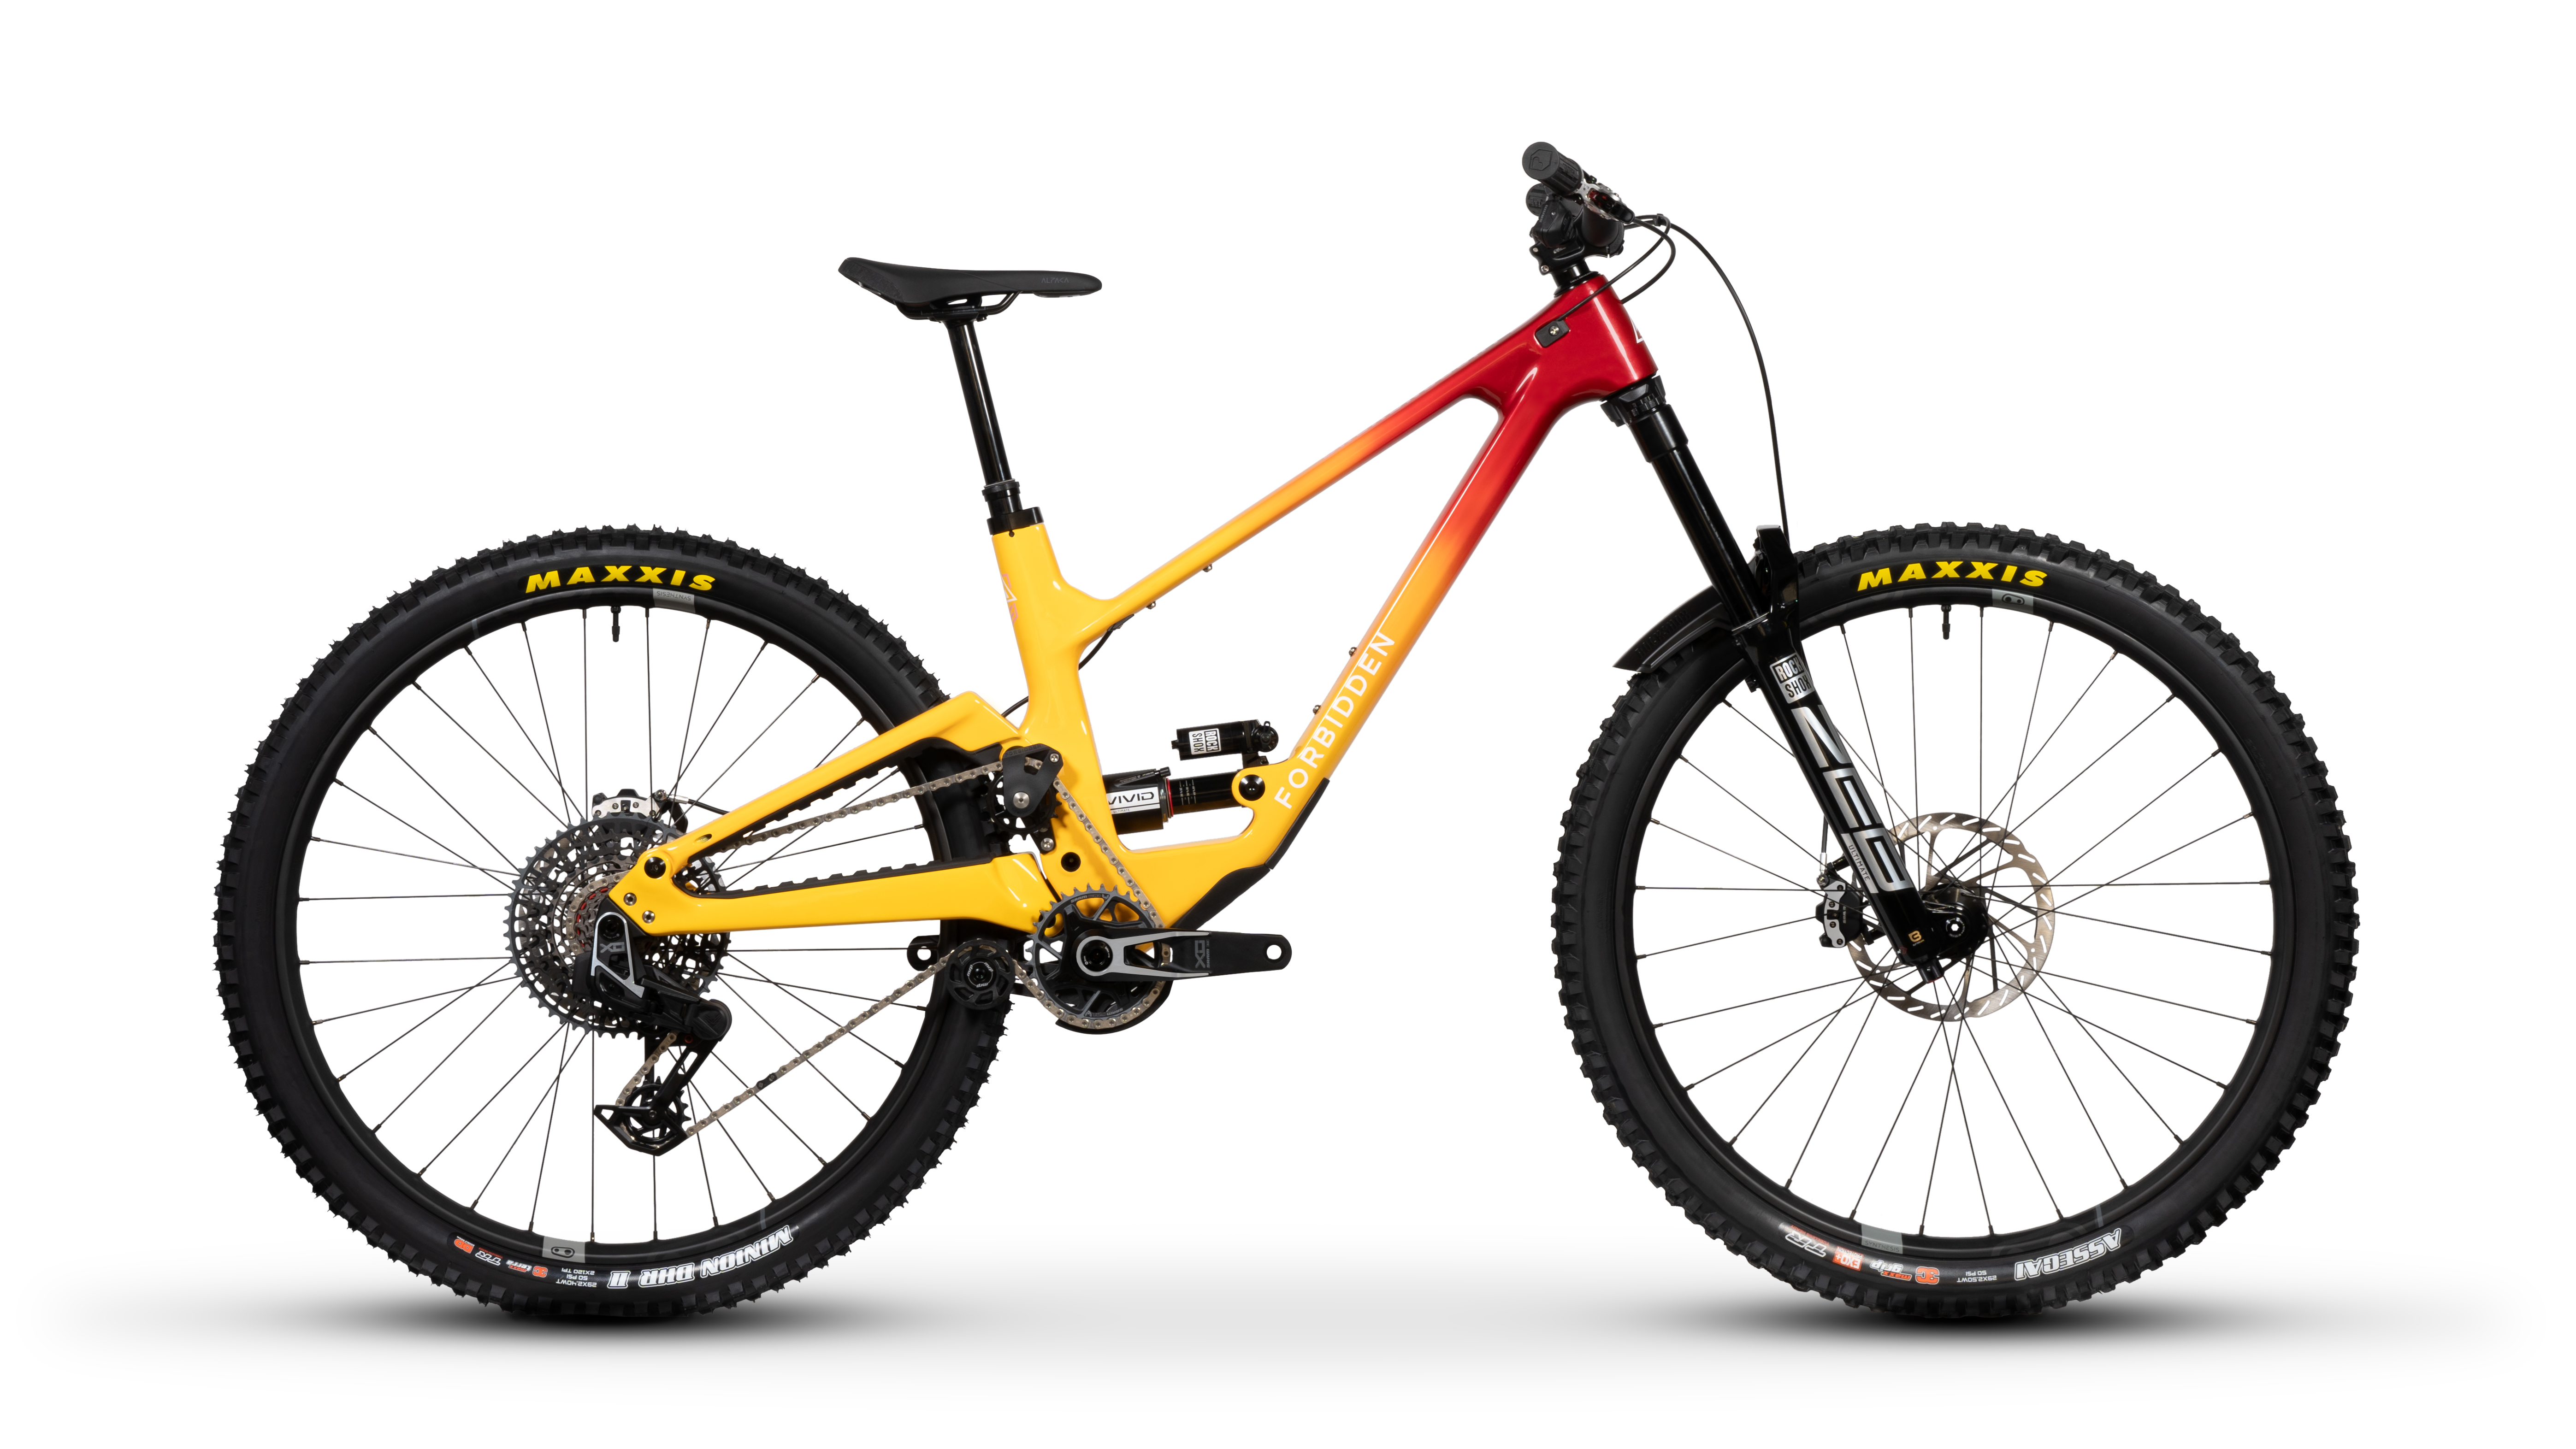
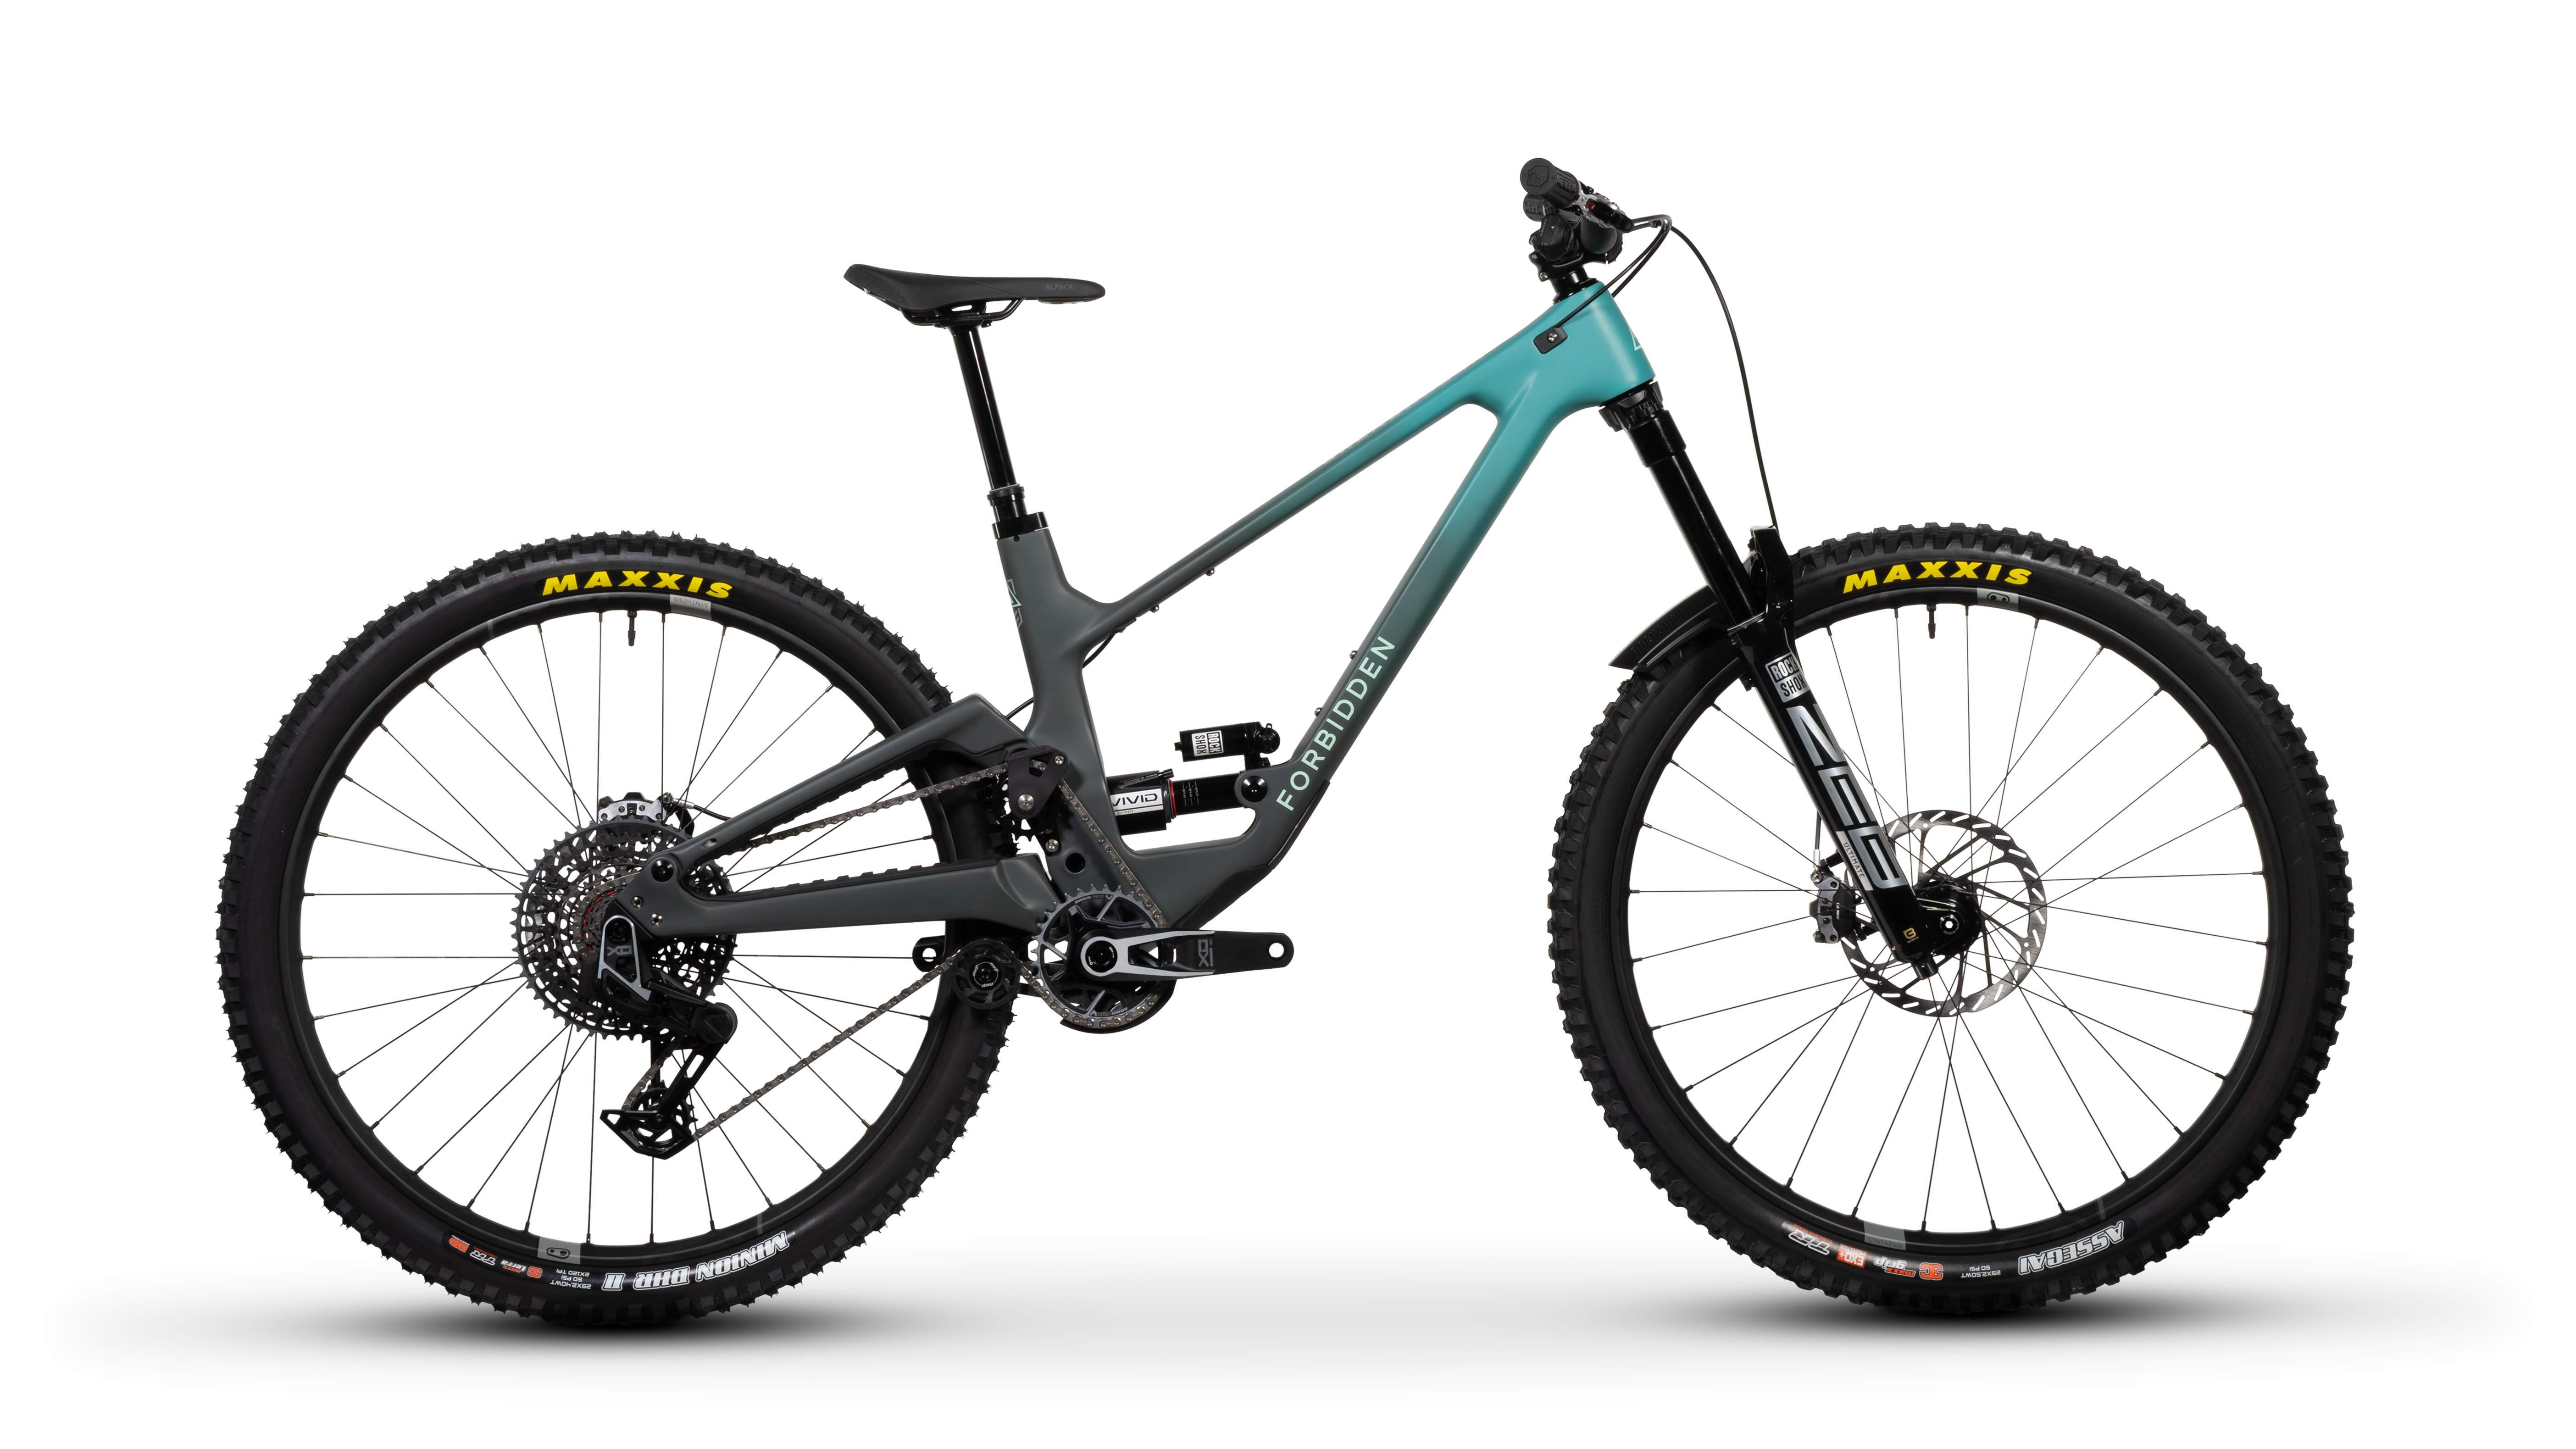
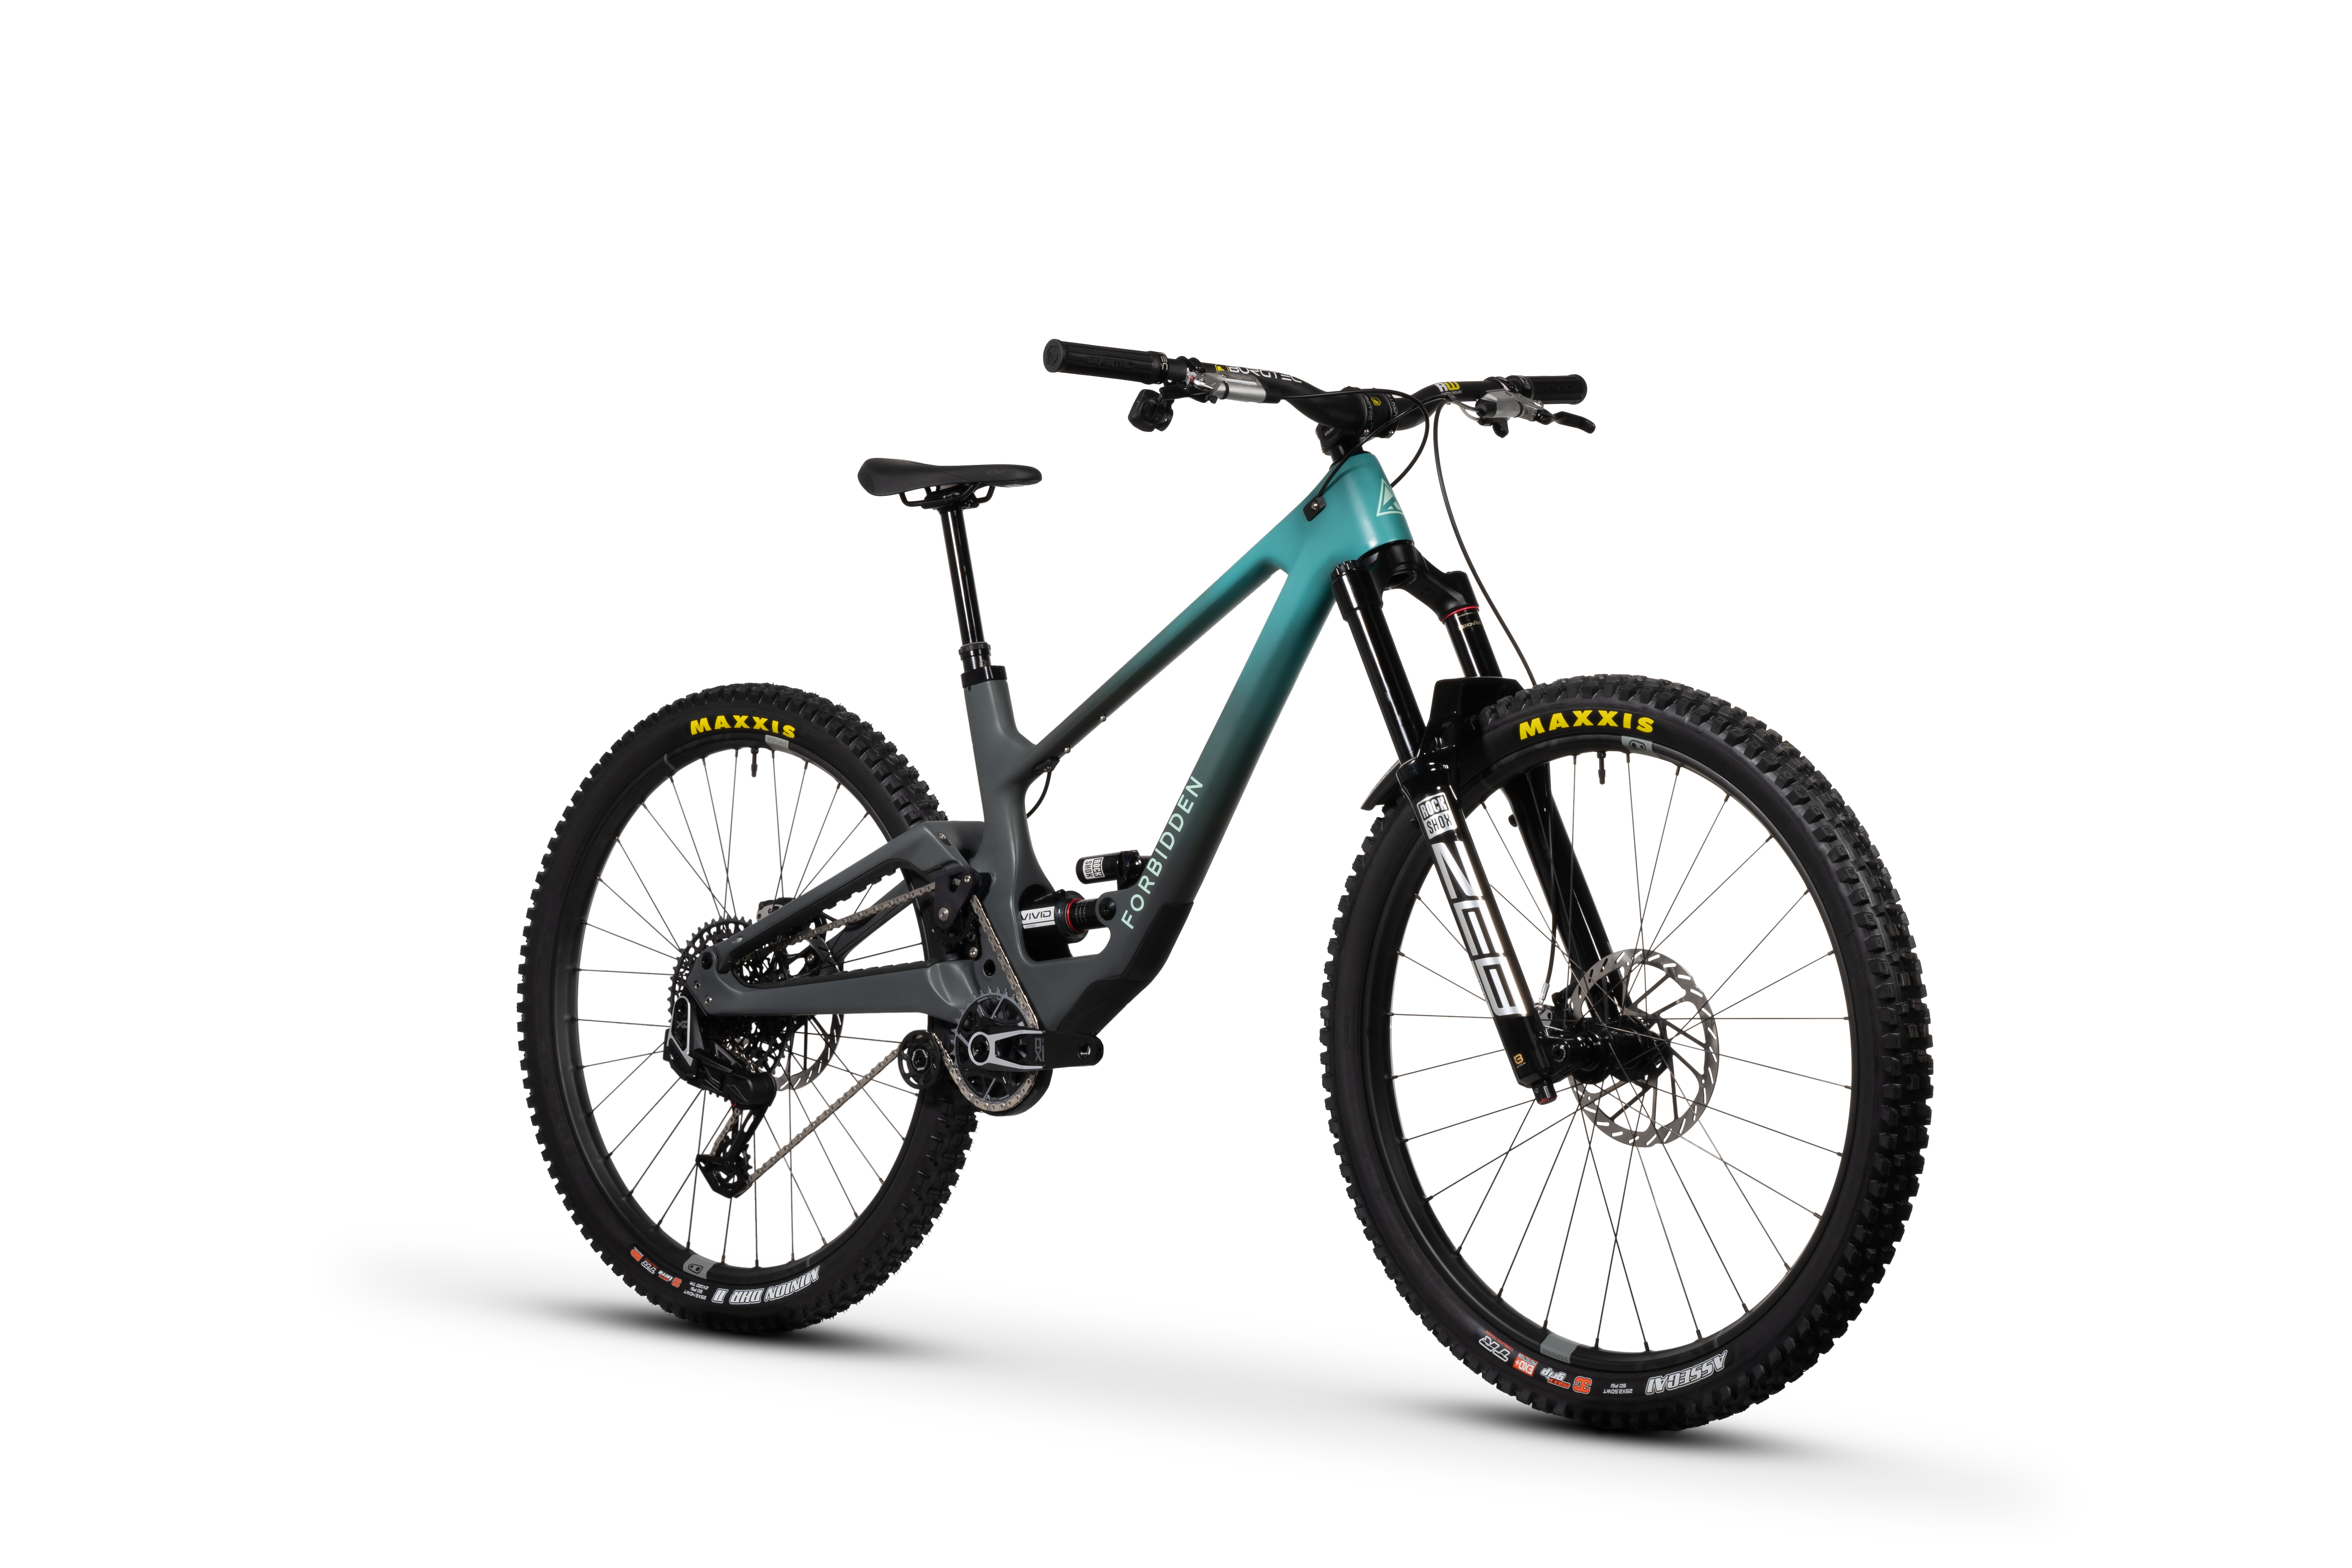
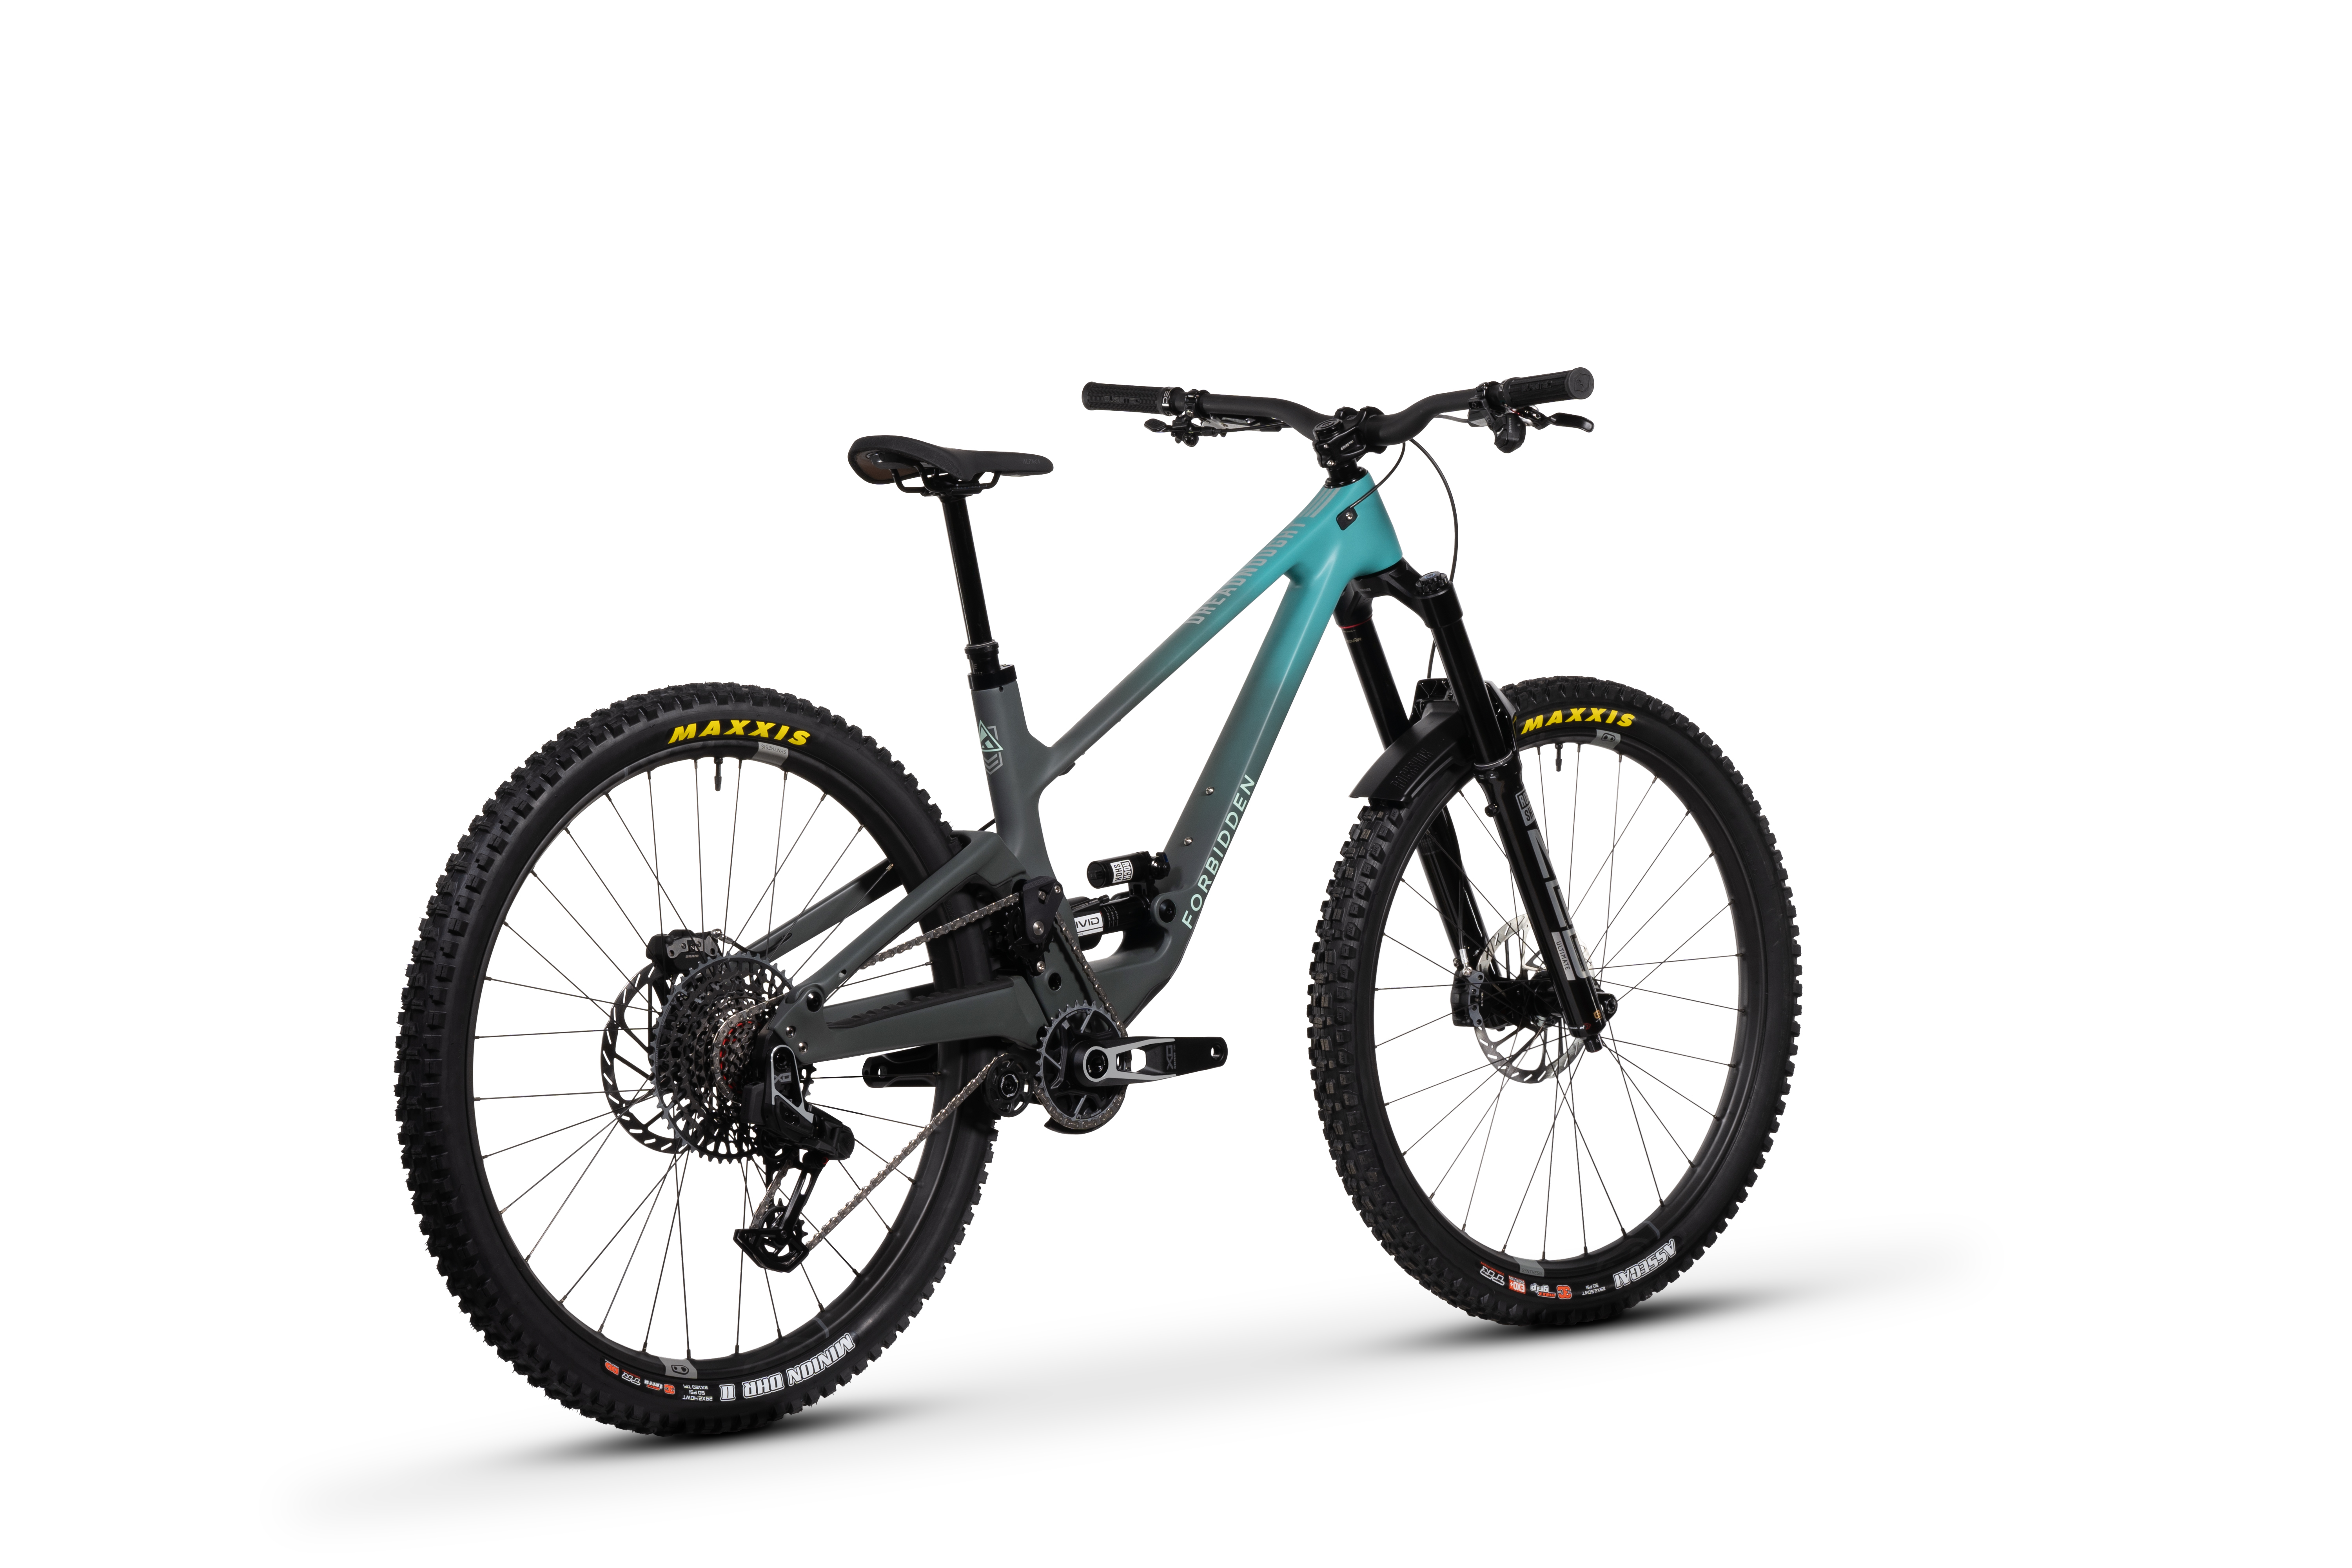
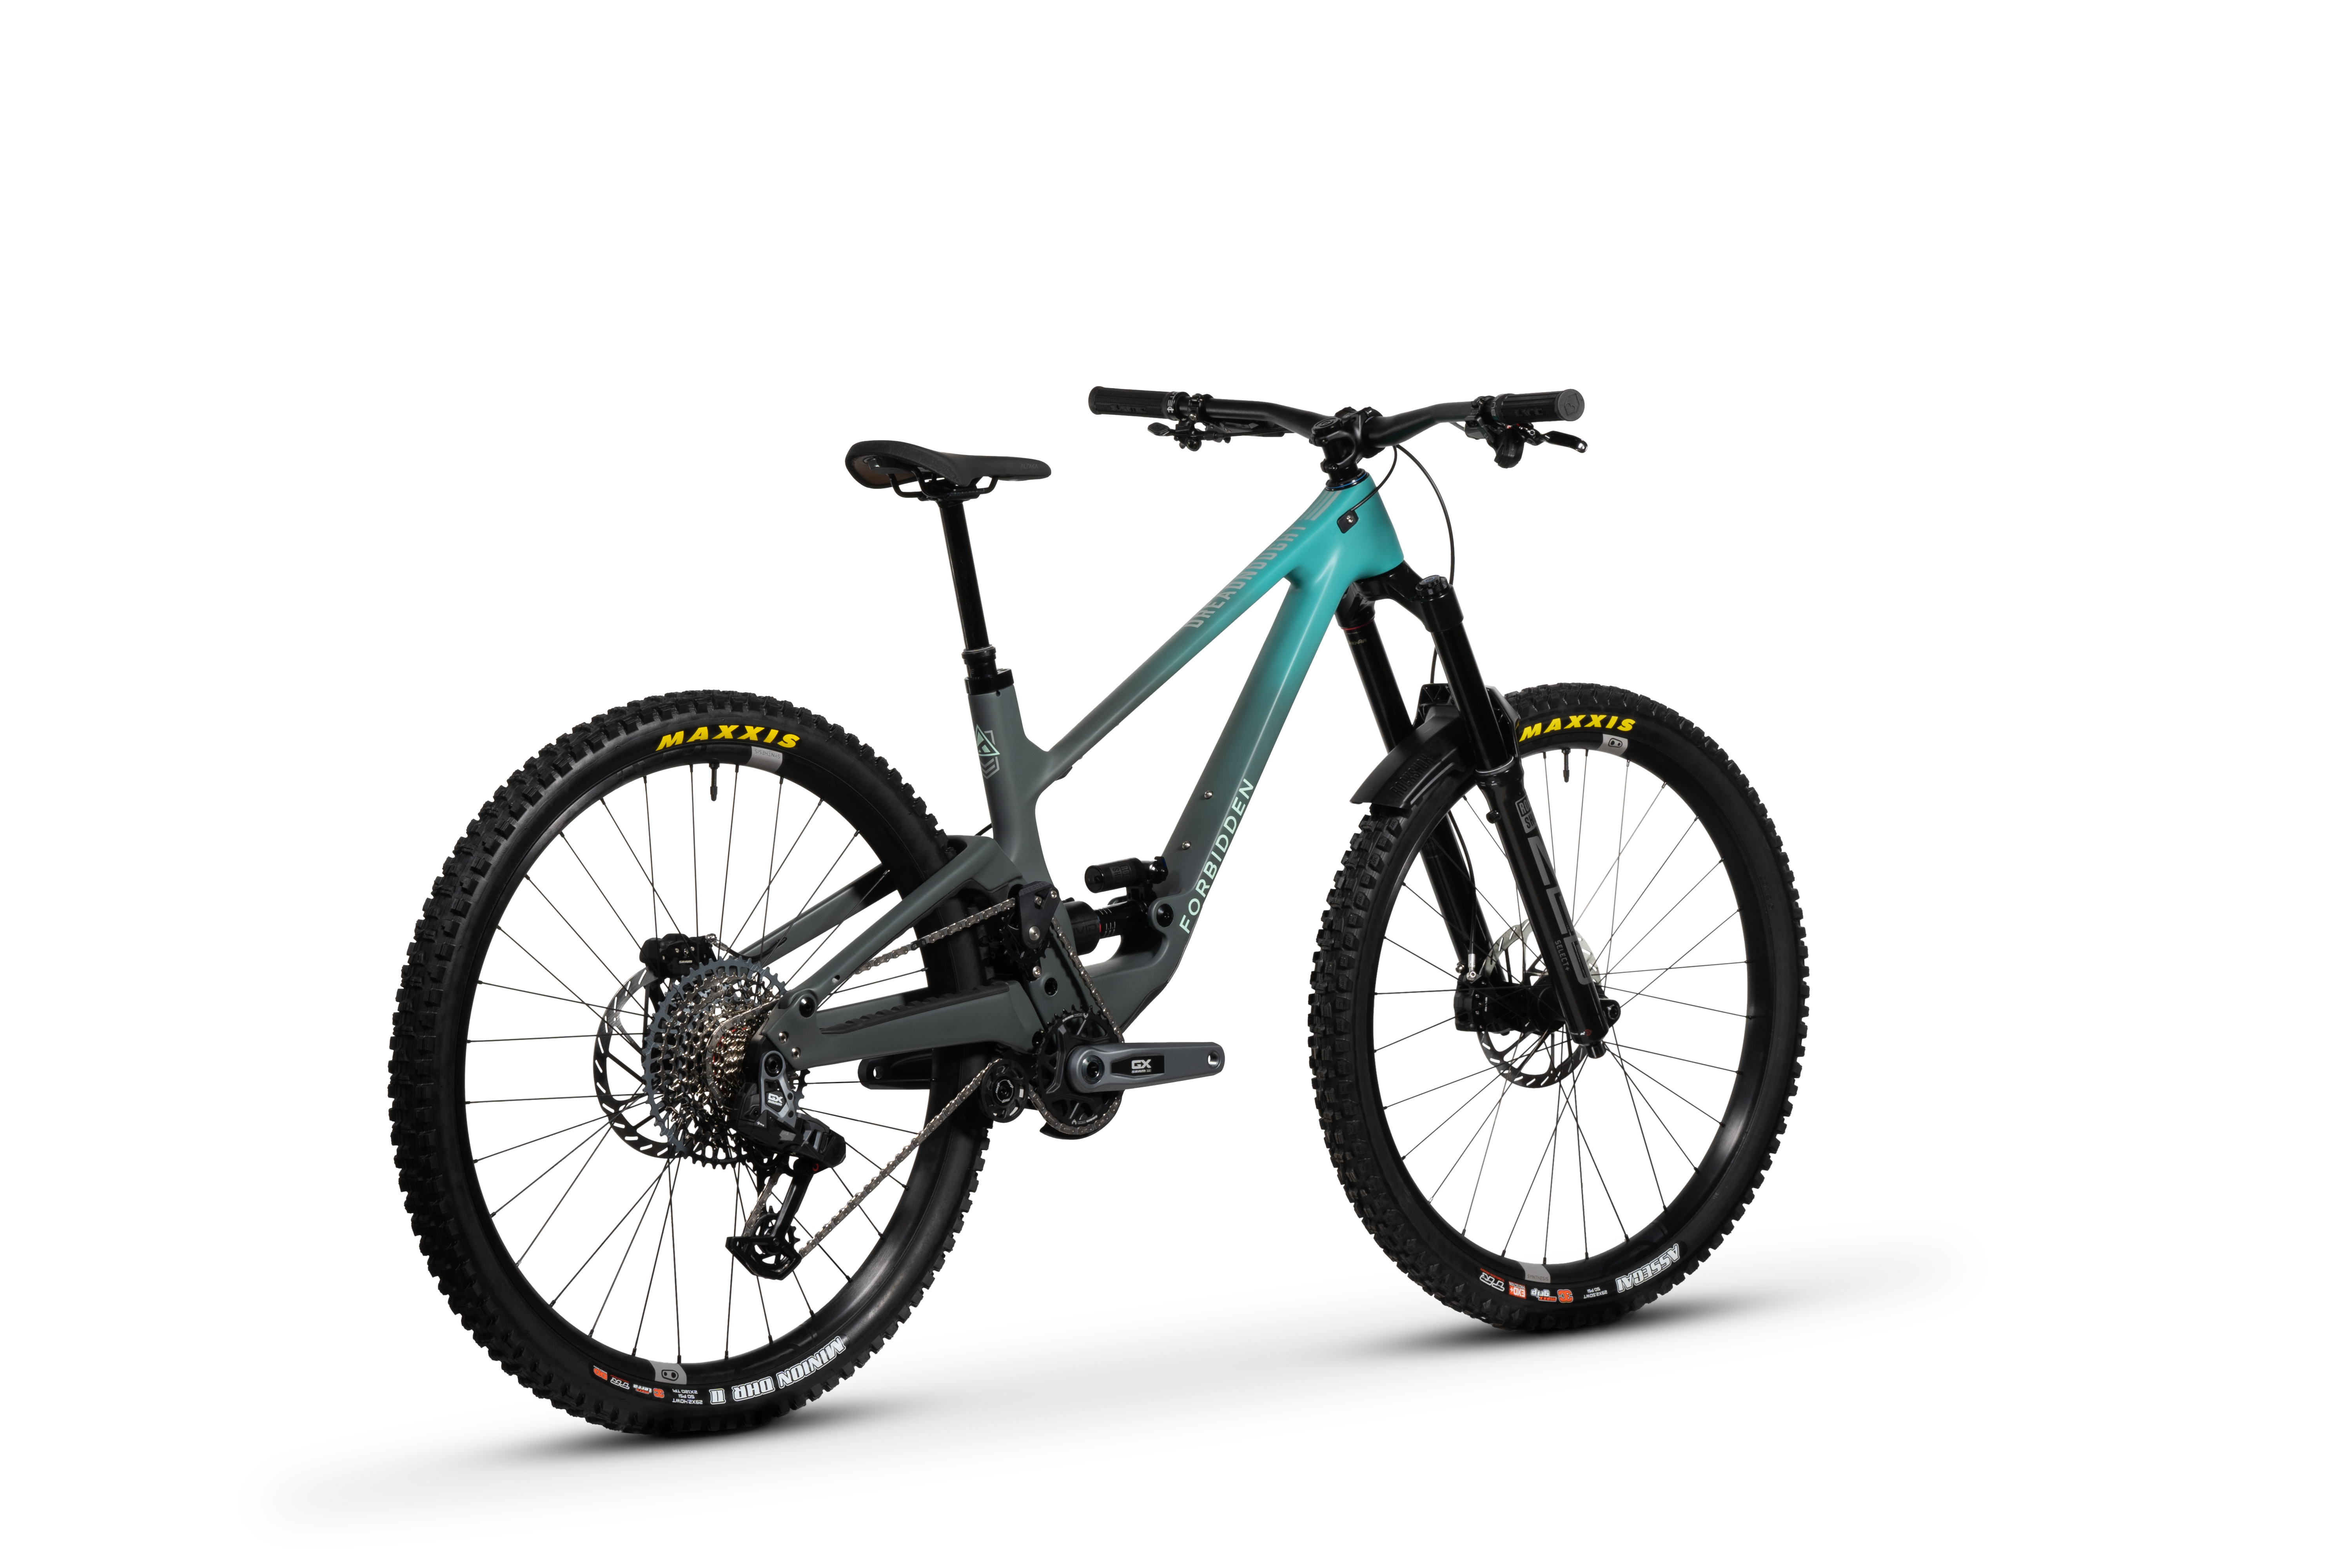
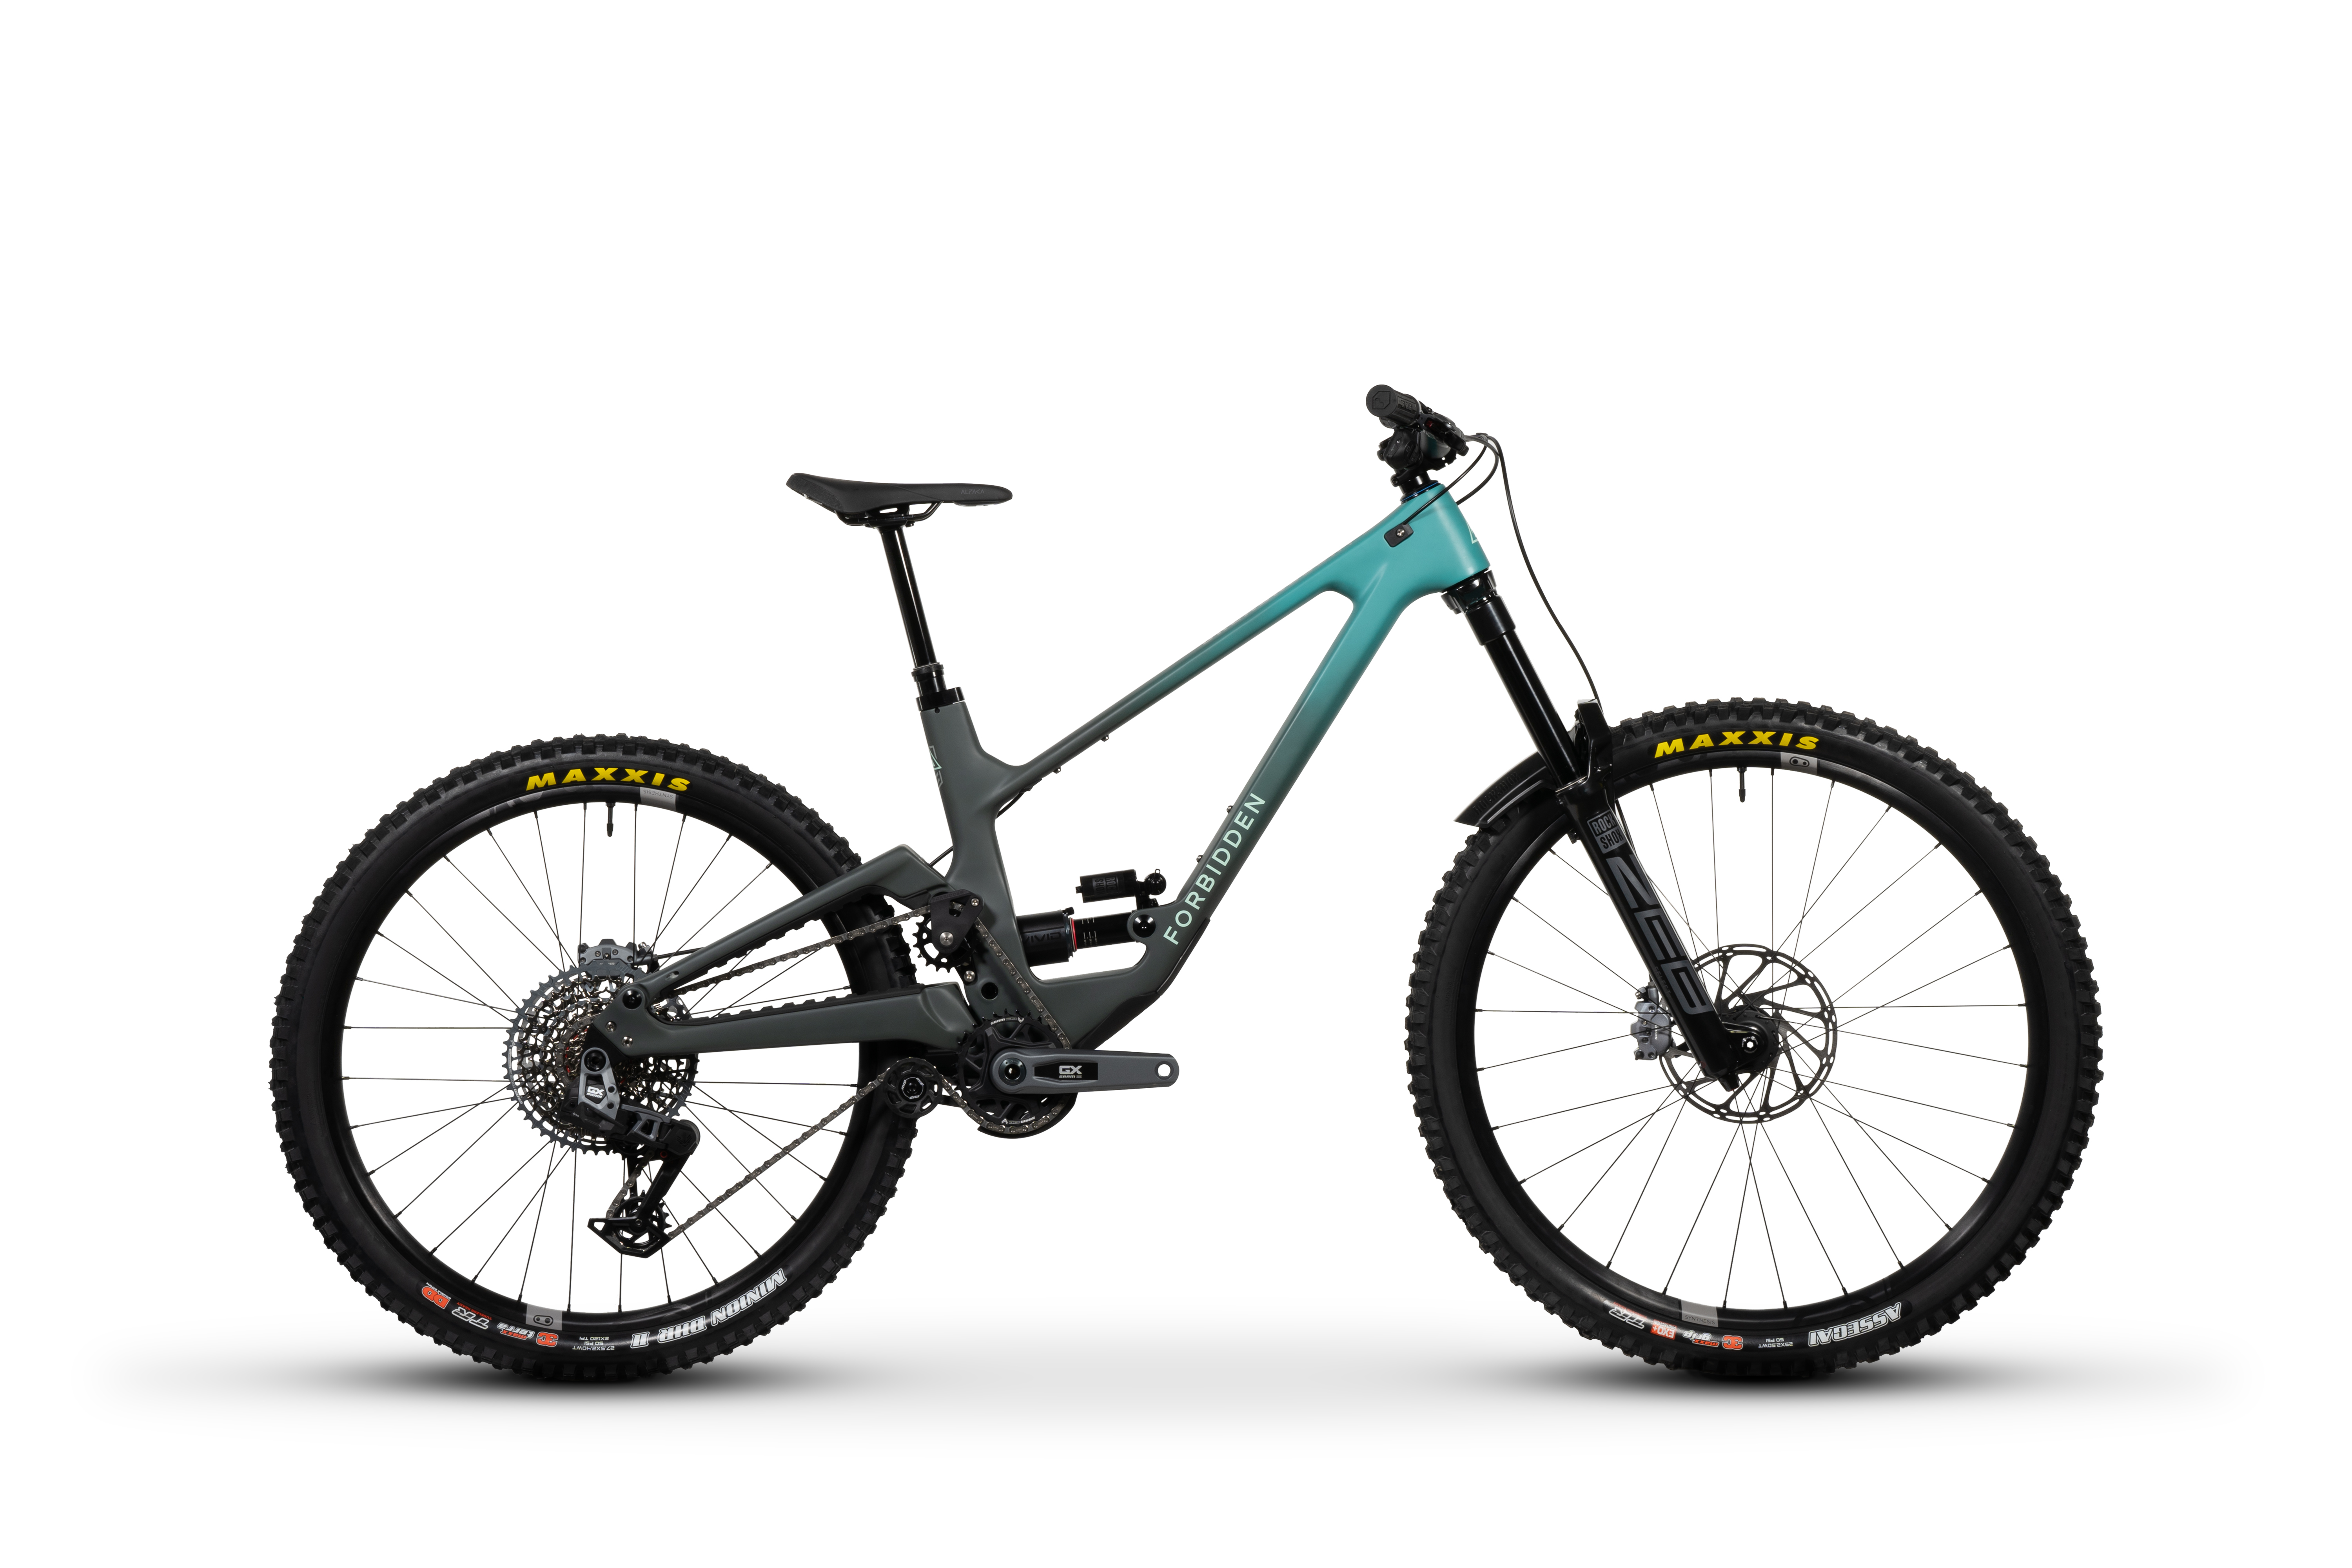
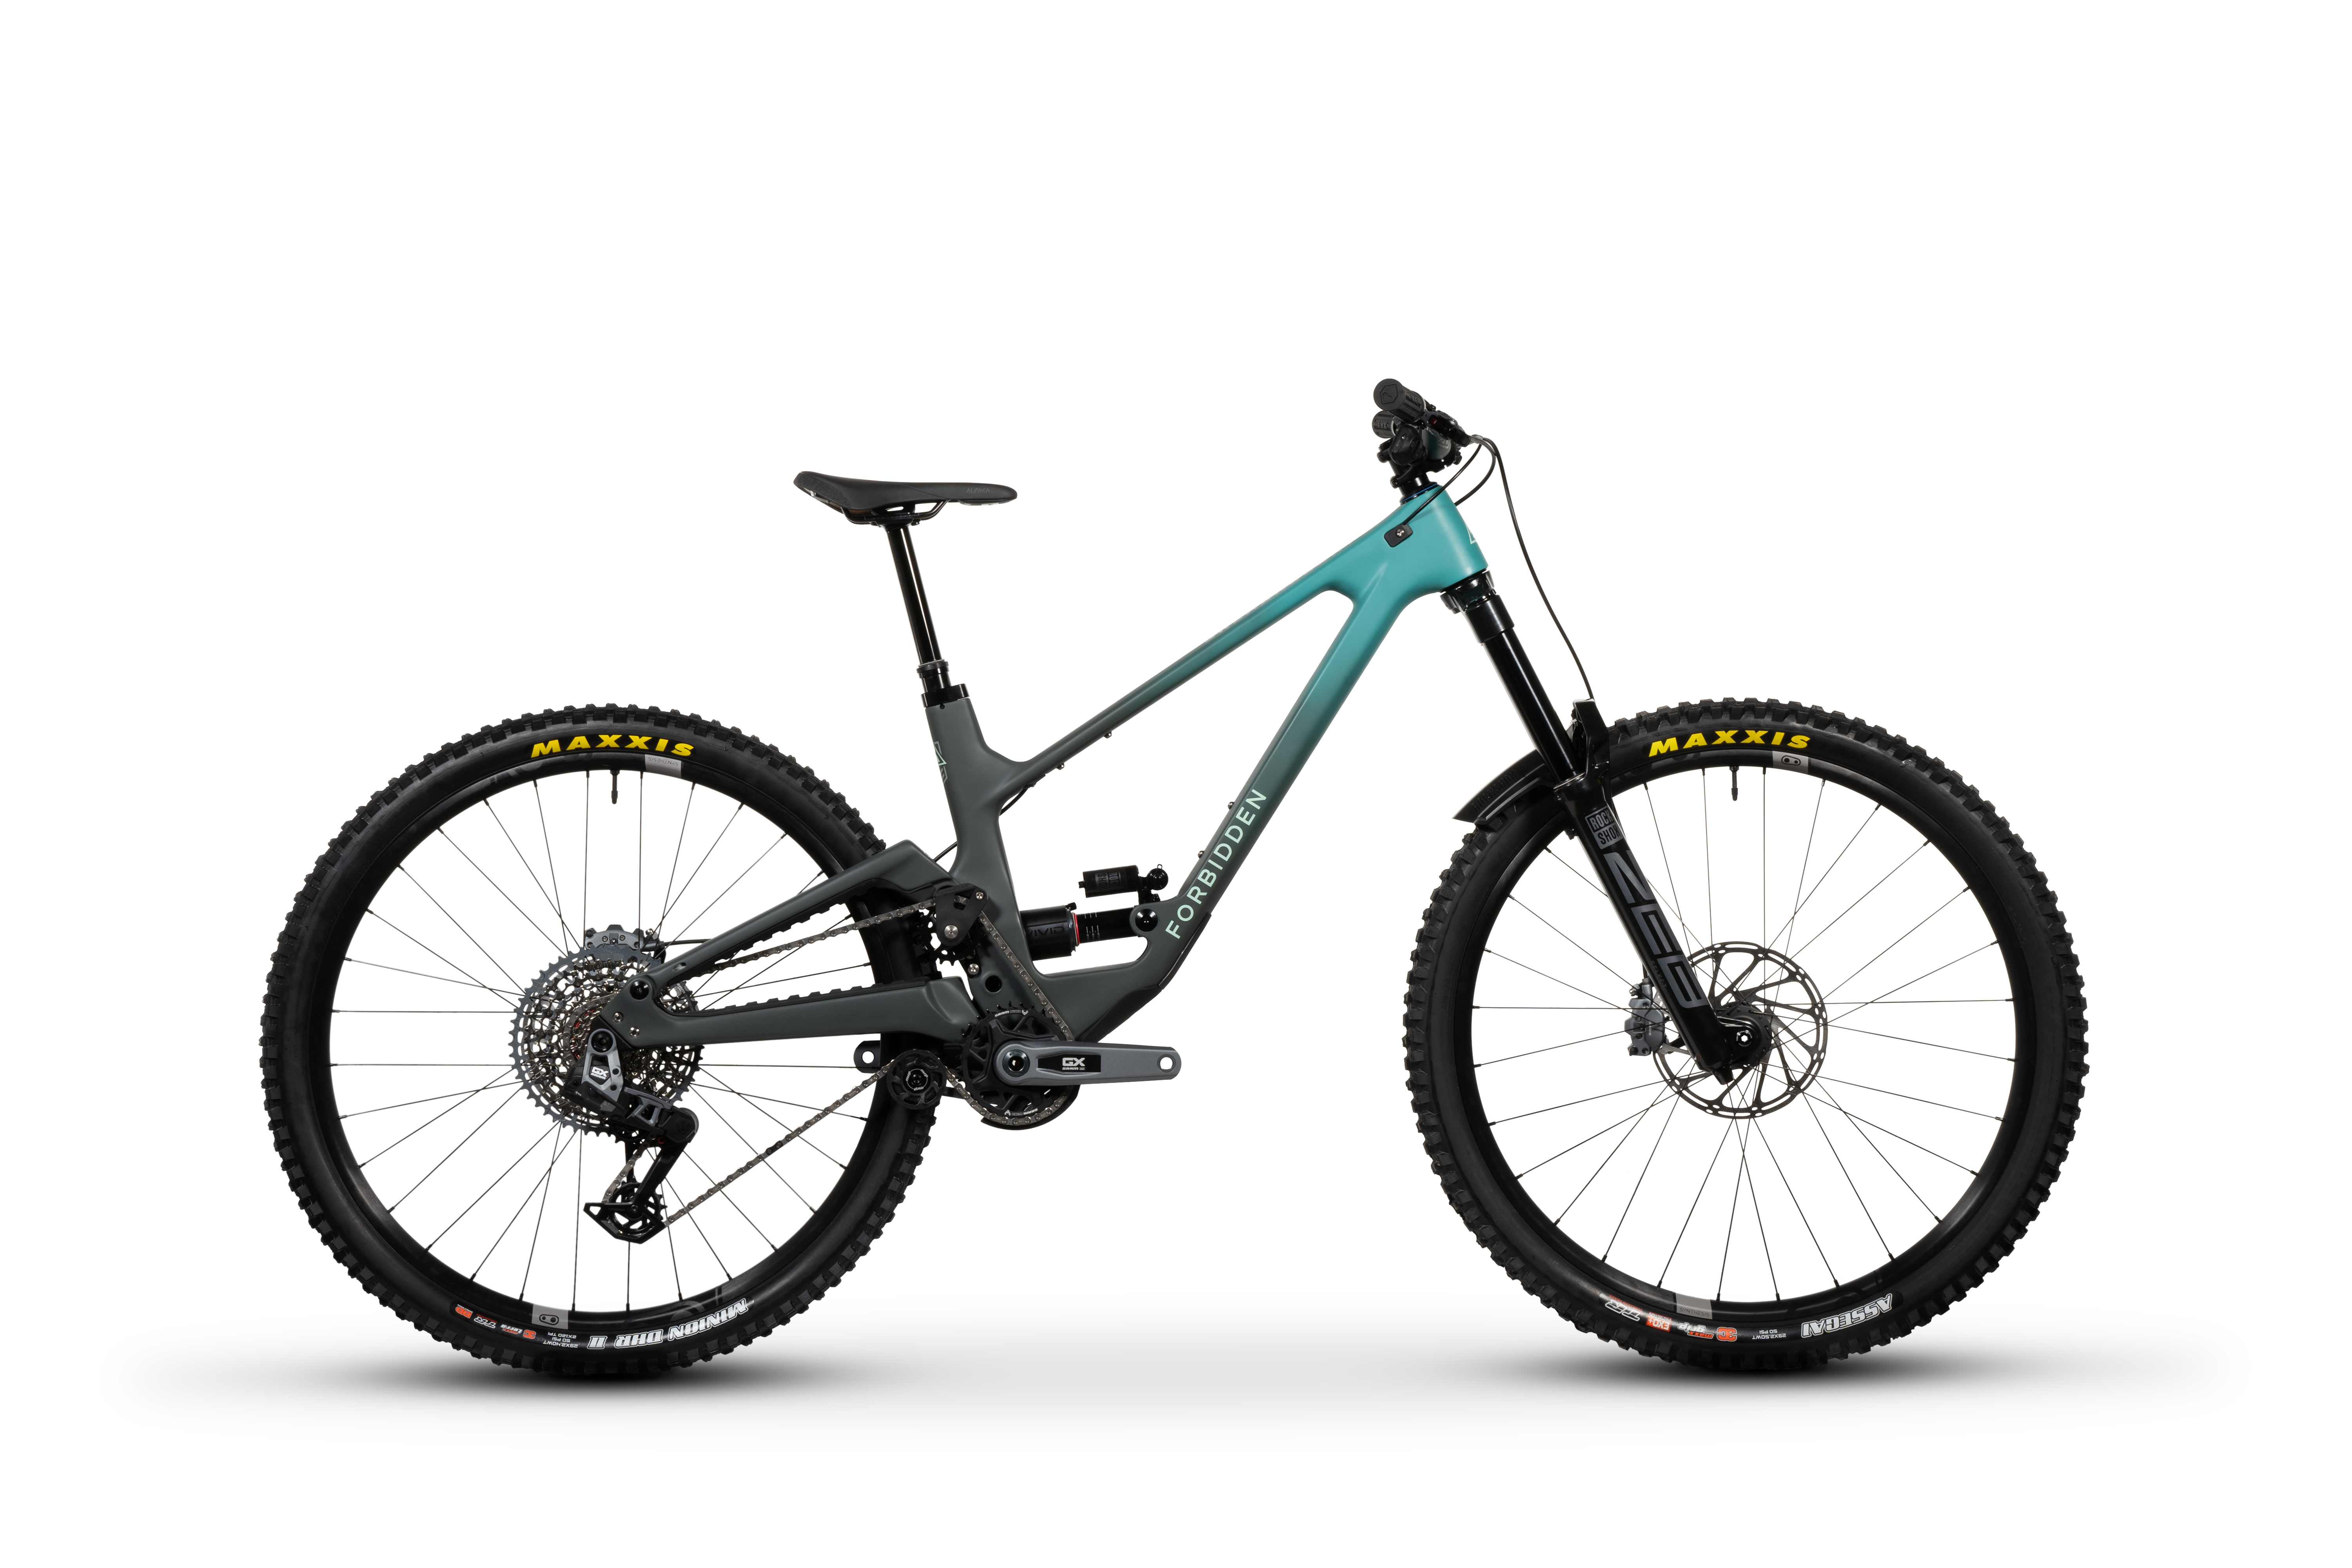
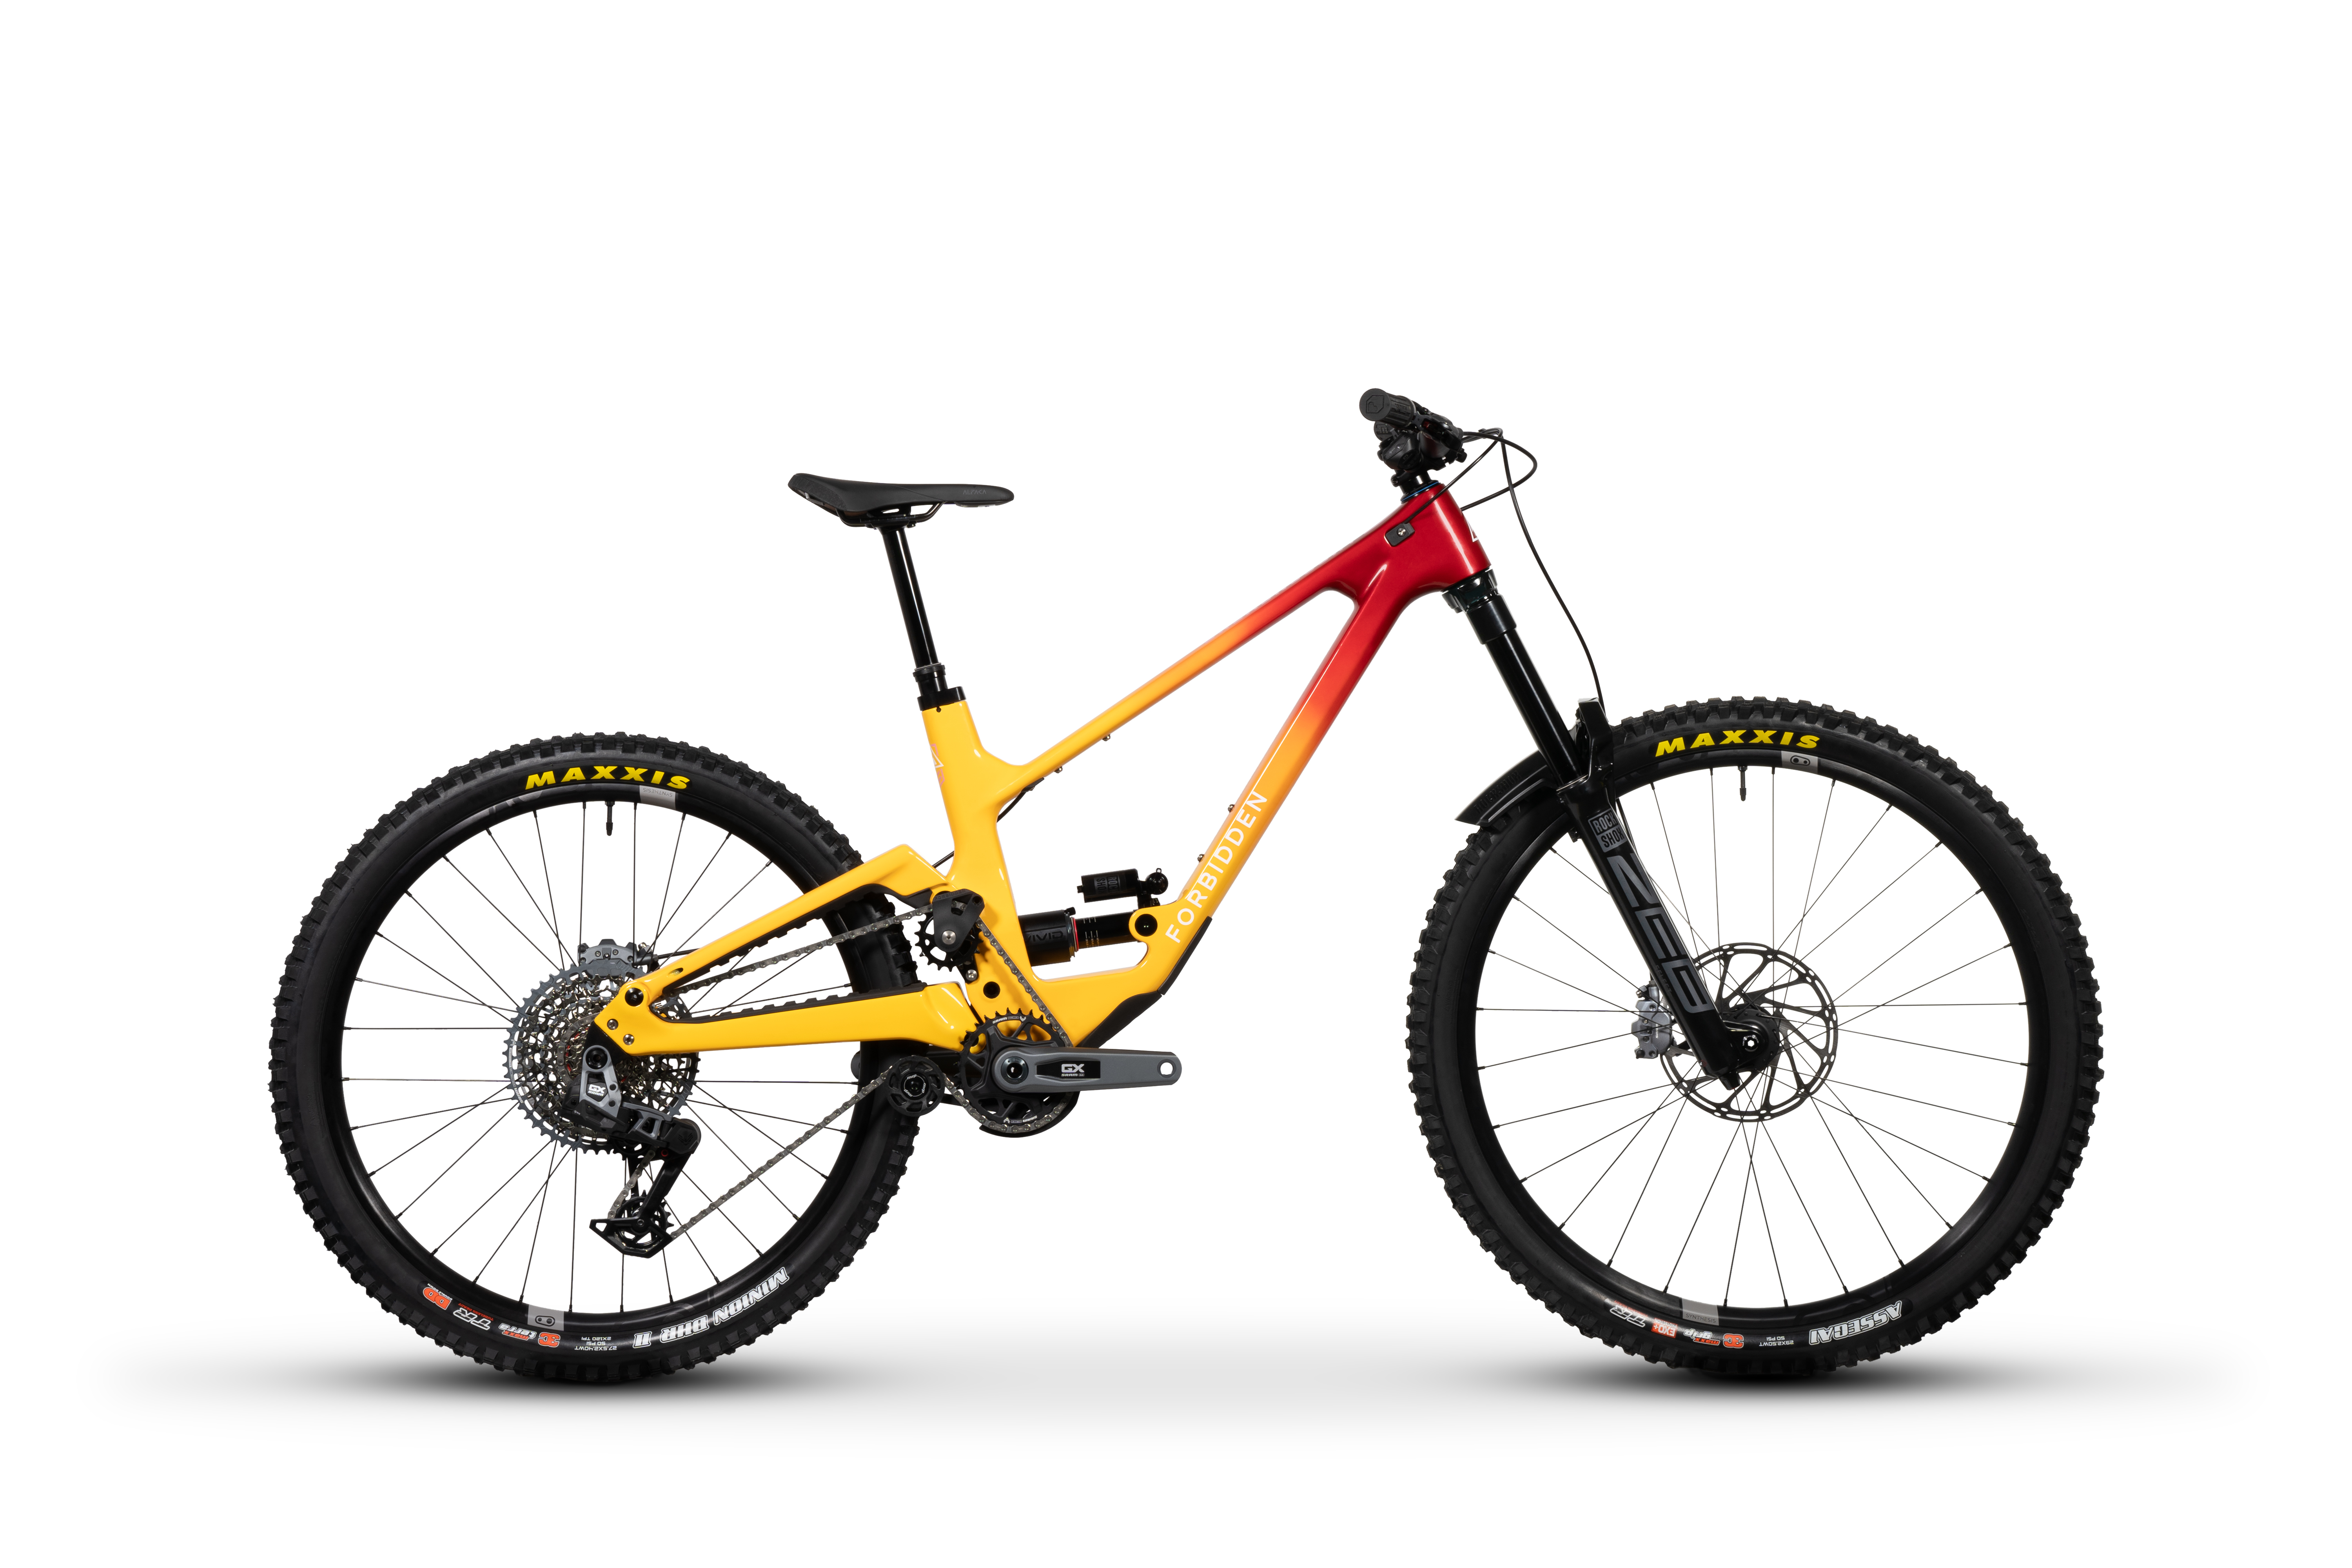
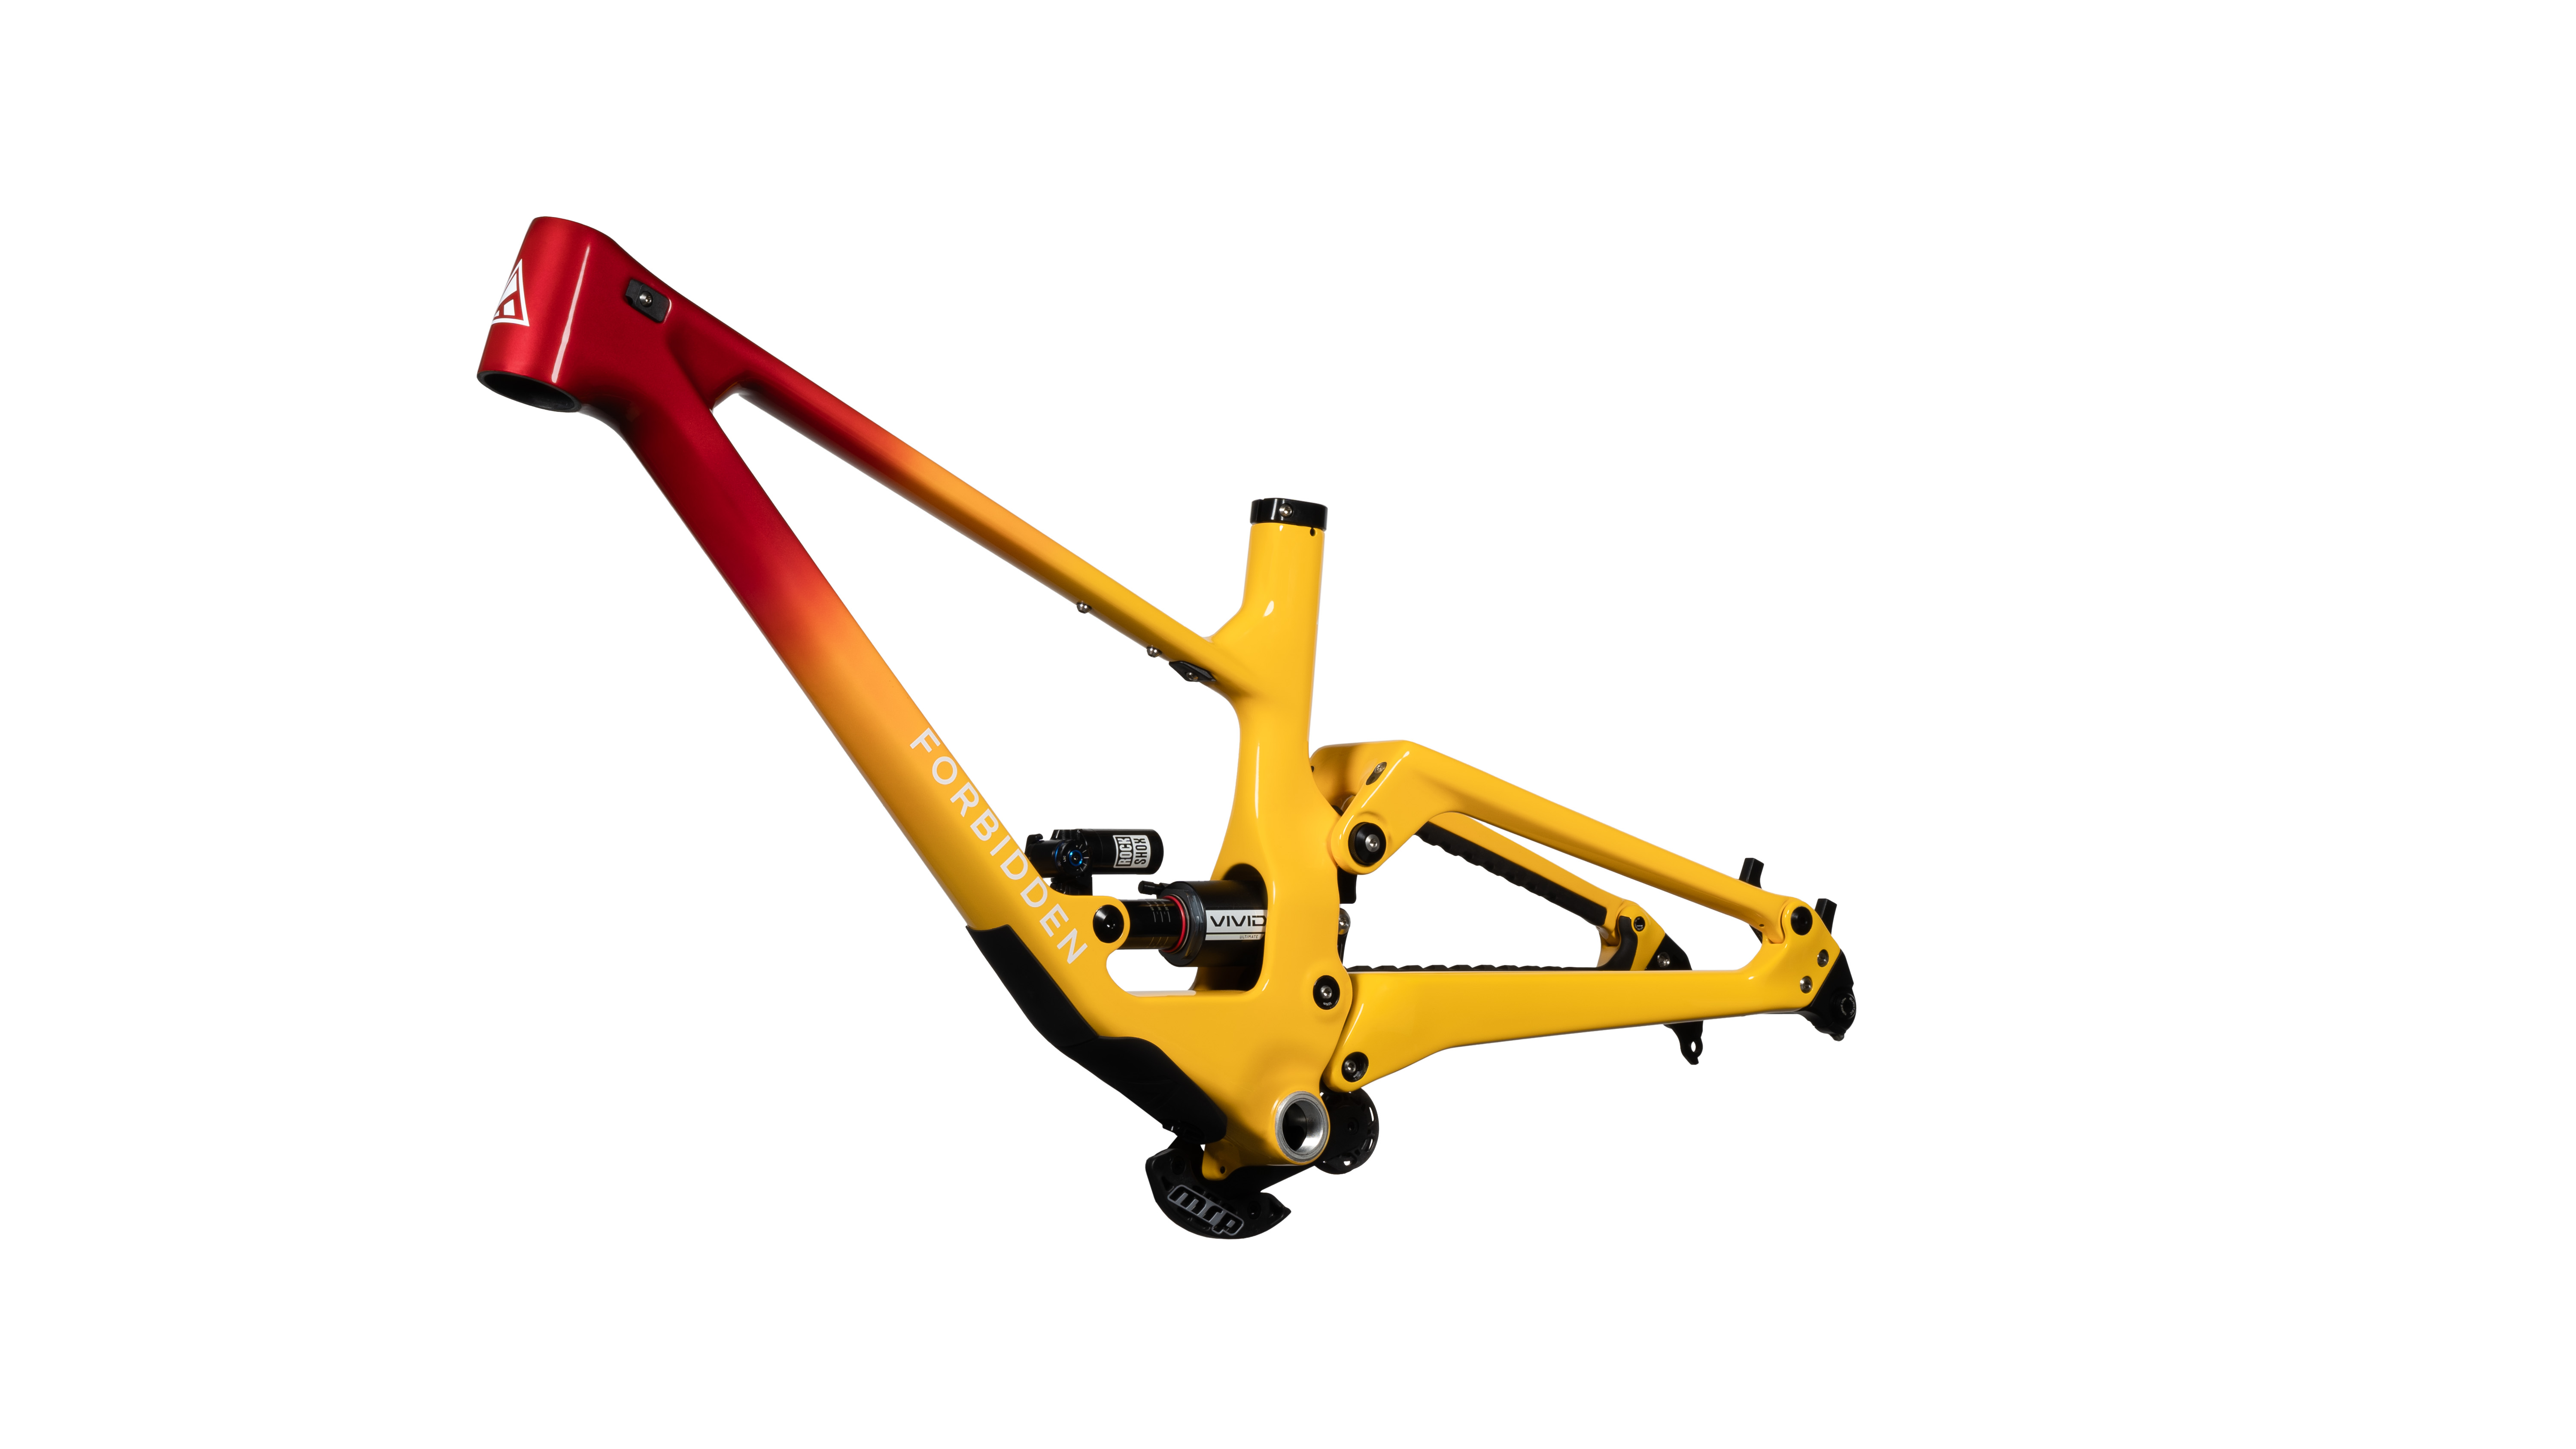
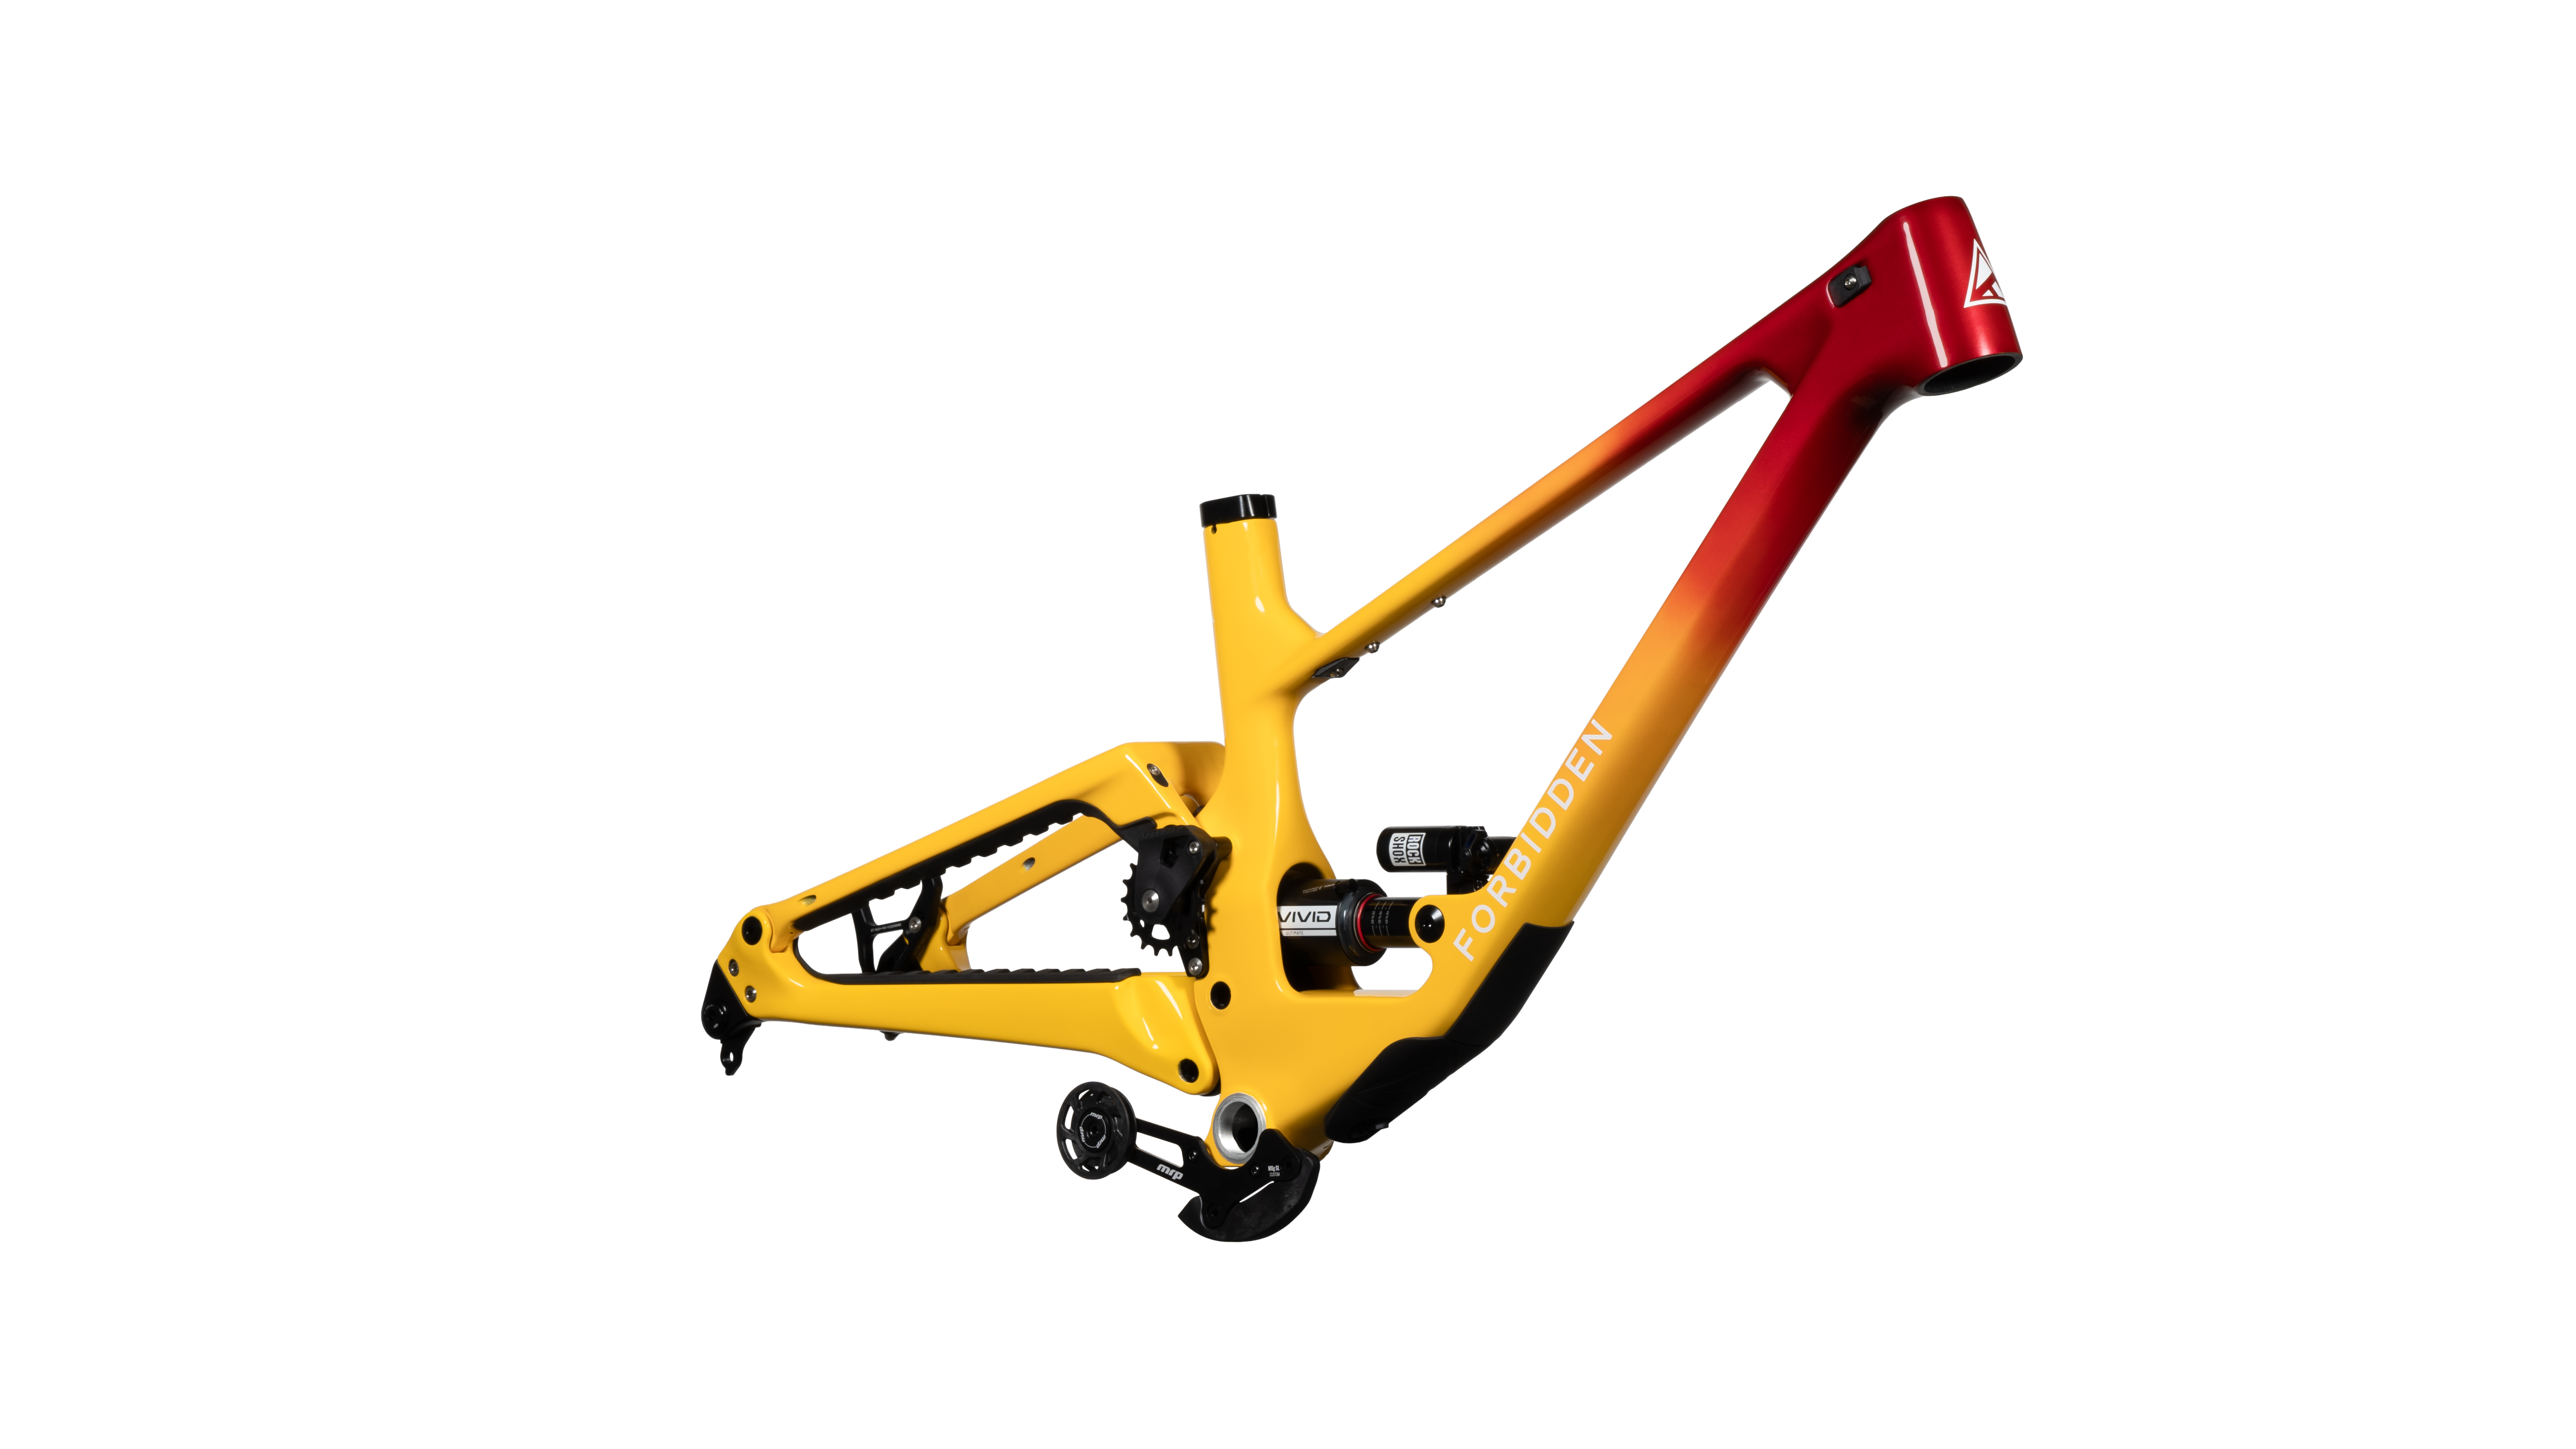
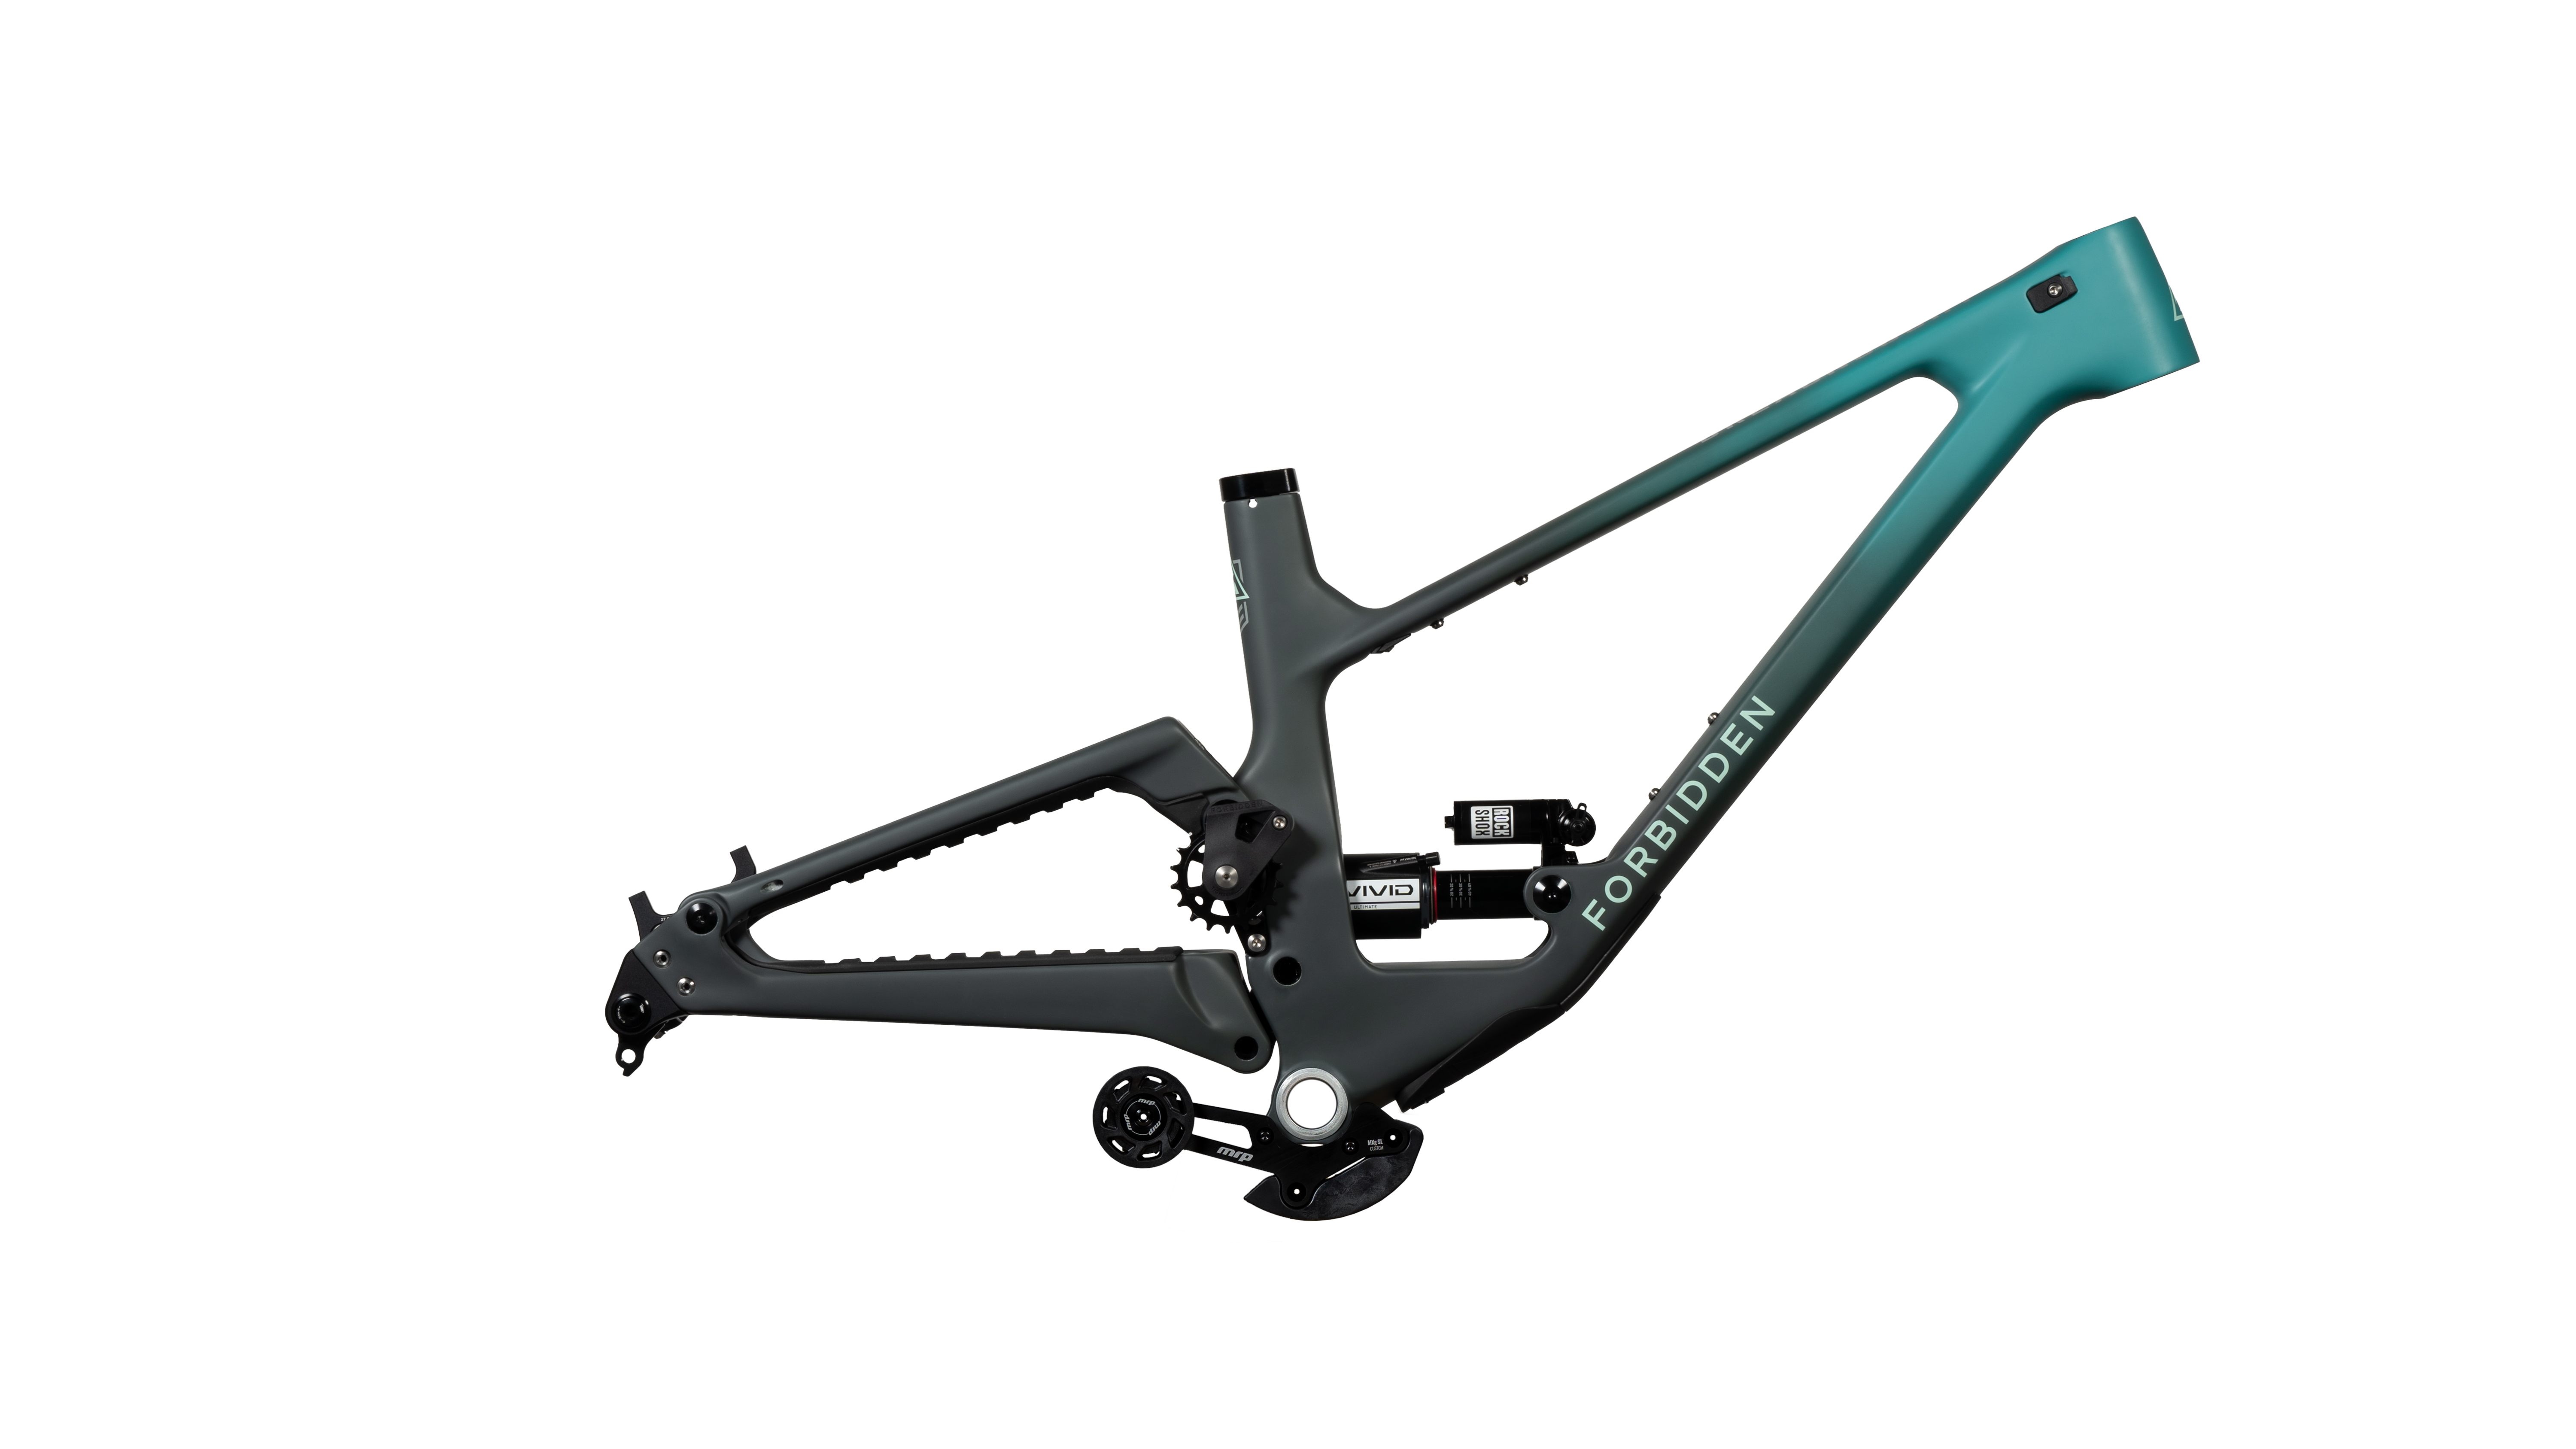
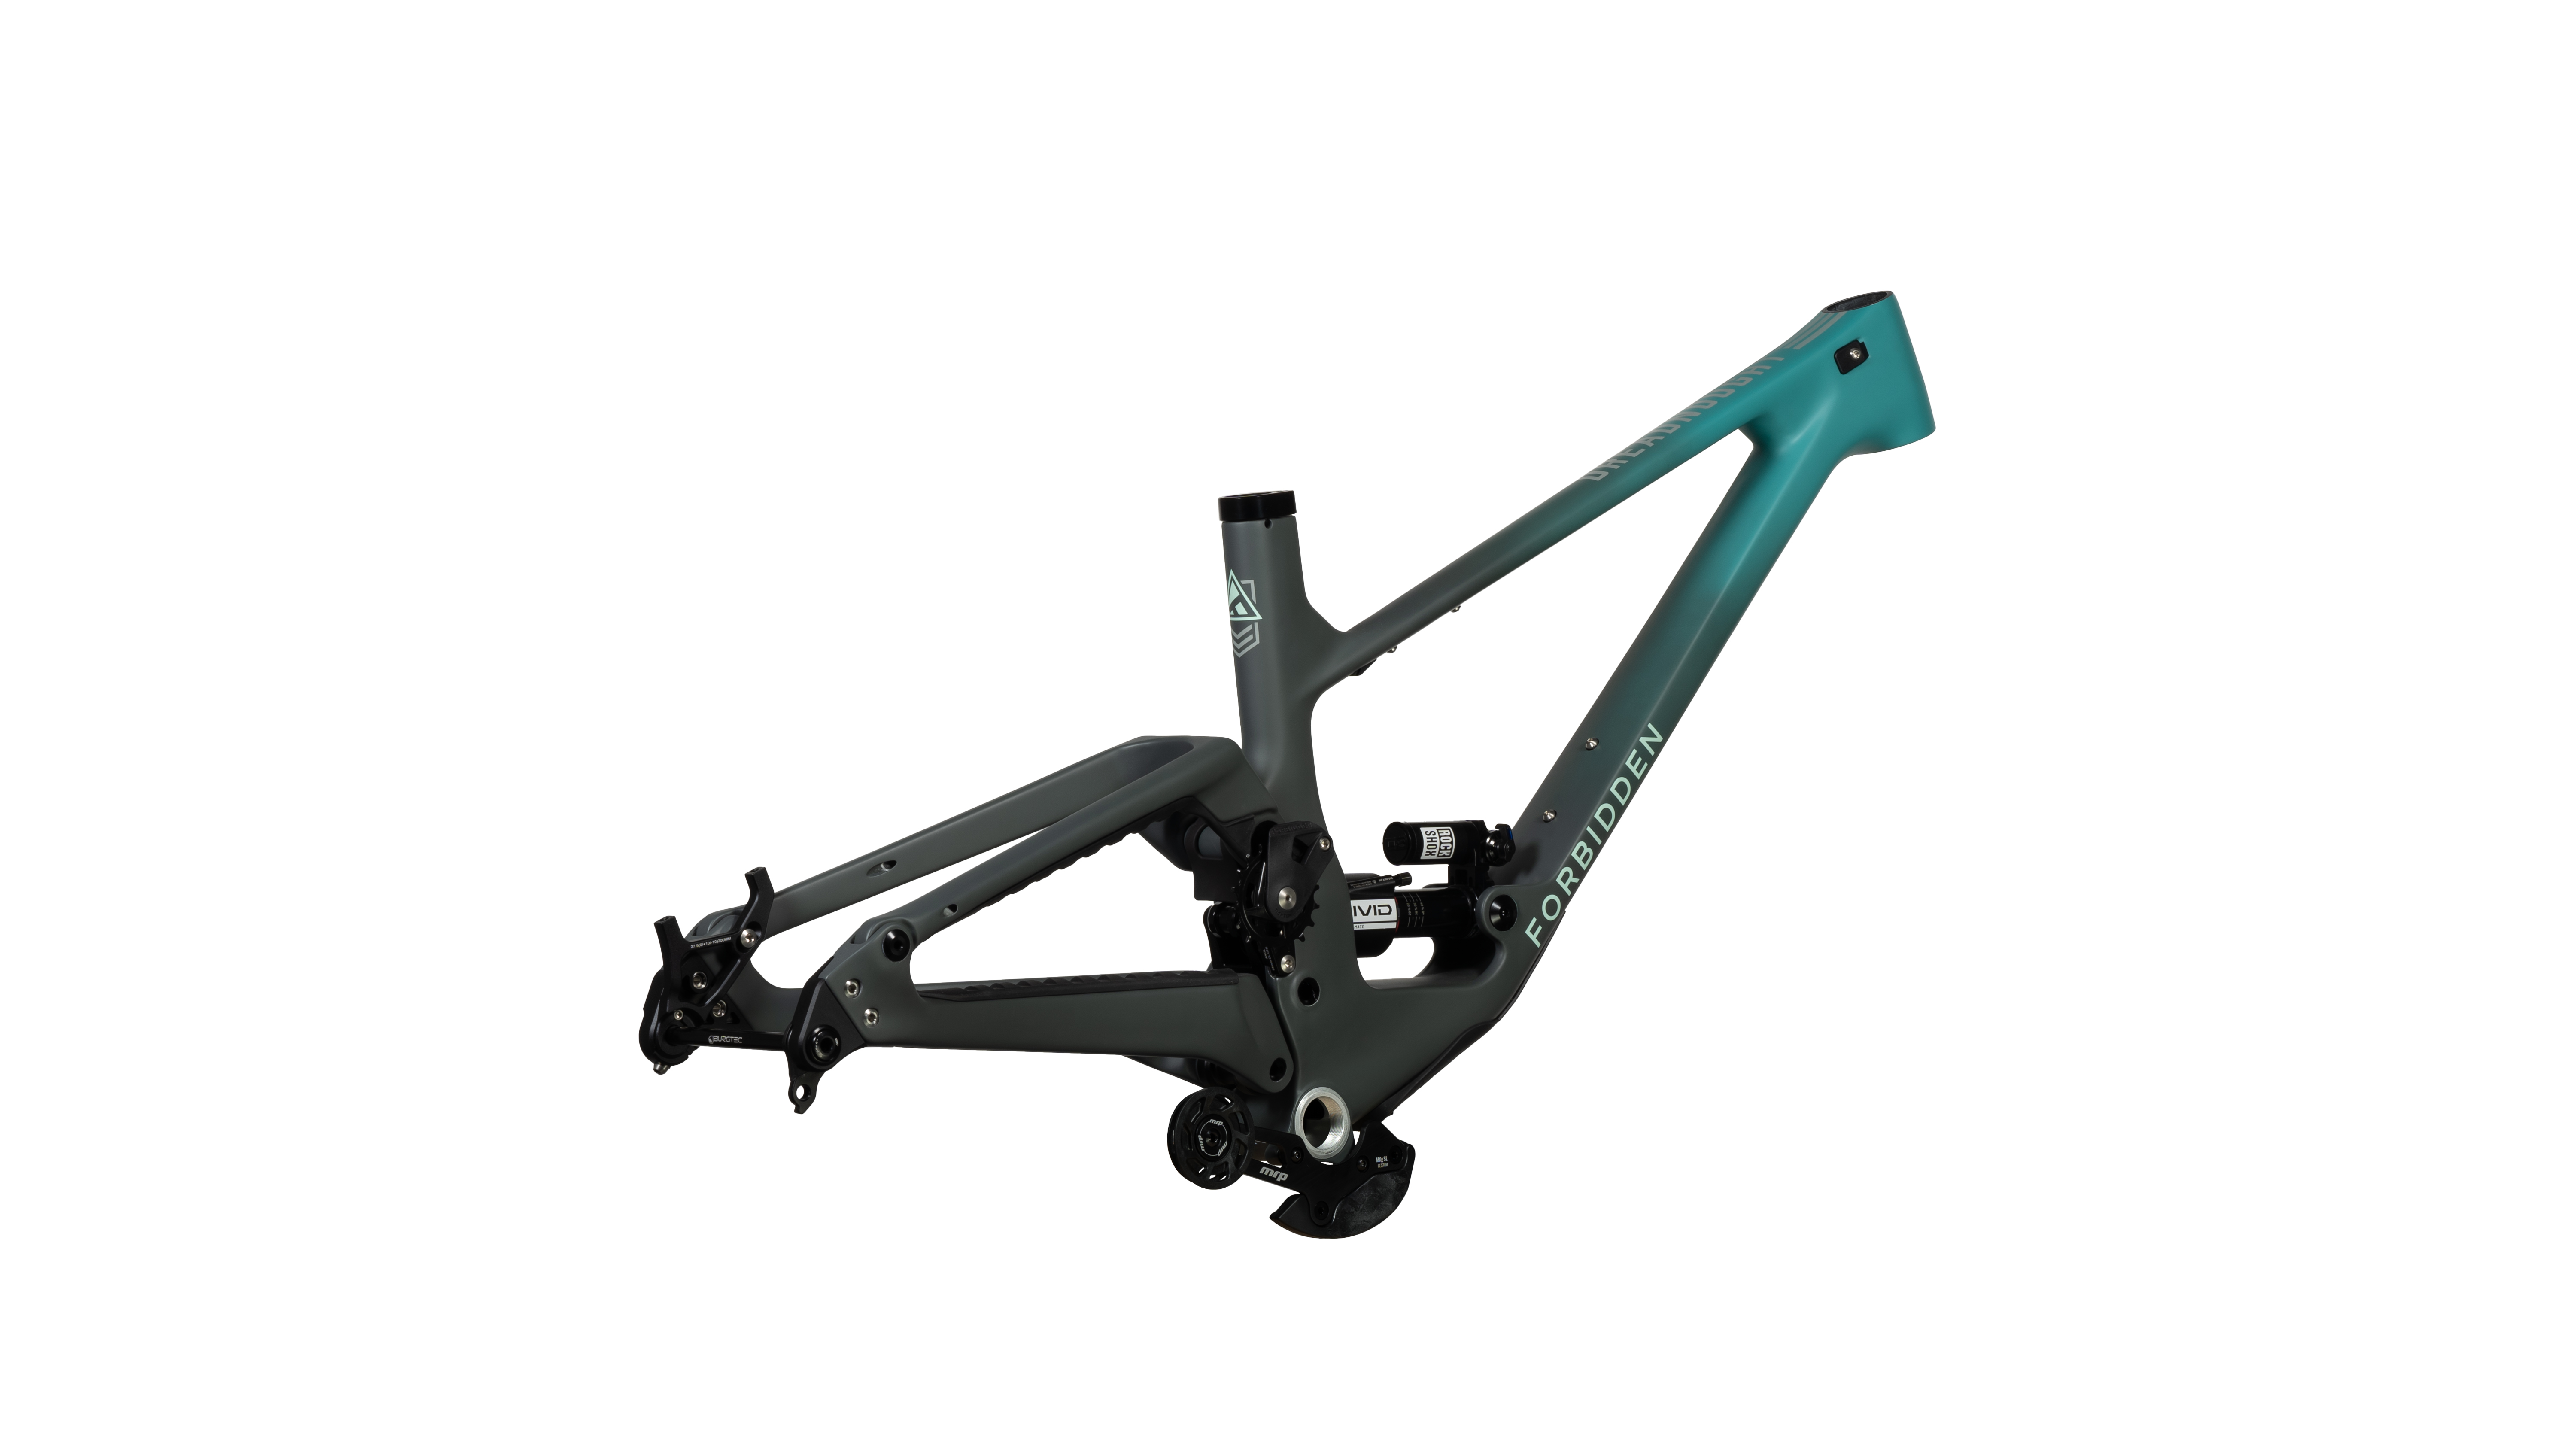
Dreadnought forged a new path for performance high pivot bikes and cemented the platform’s category-defying nature. It dealt handily with the demands of the World Cup Downhill circuit, revelled in the rigours of enduro racing, and endured lap after lap of abuse in the bike park, while still craving more. From the race track to the bike park and everything in between, Dreadnought has proven its unparalleled versatility.
Now it’s time for the big guns to get the V2 treatment. Dreadnought V2 carries the torch forward into a new realm of capability, giving riders even more firepower than ever before. We’ve taken our next-gen suspension system, seen on the class-leading Druid and Supernought, and applied it to our revered brawler of a bike. We didn’t just up the calibre, add more travel, and call it good. We overhauled every detail to refine and distill its purpose into something that exhilarates.
From the helm of the Dreadnought, you see no obstacles, only opportunities.
Fear Nothing.
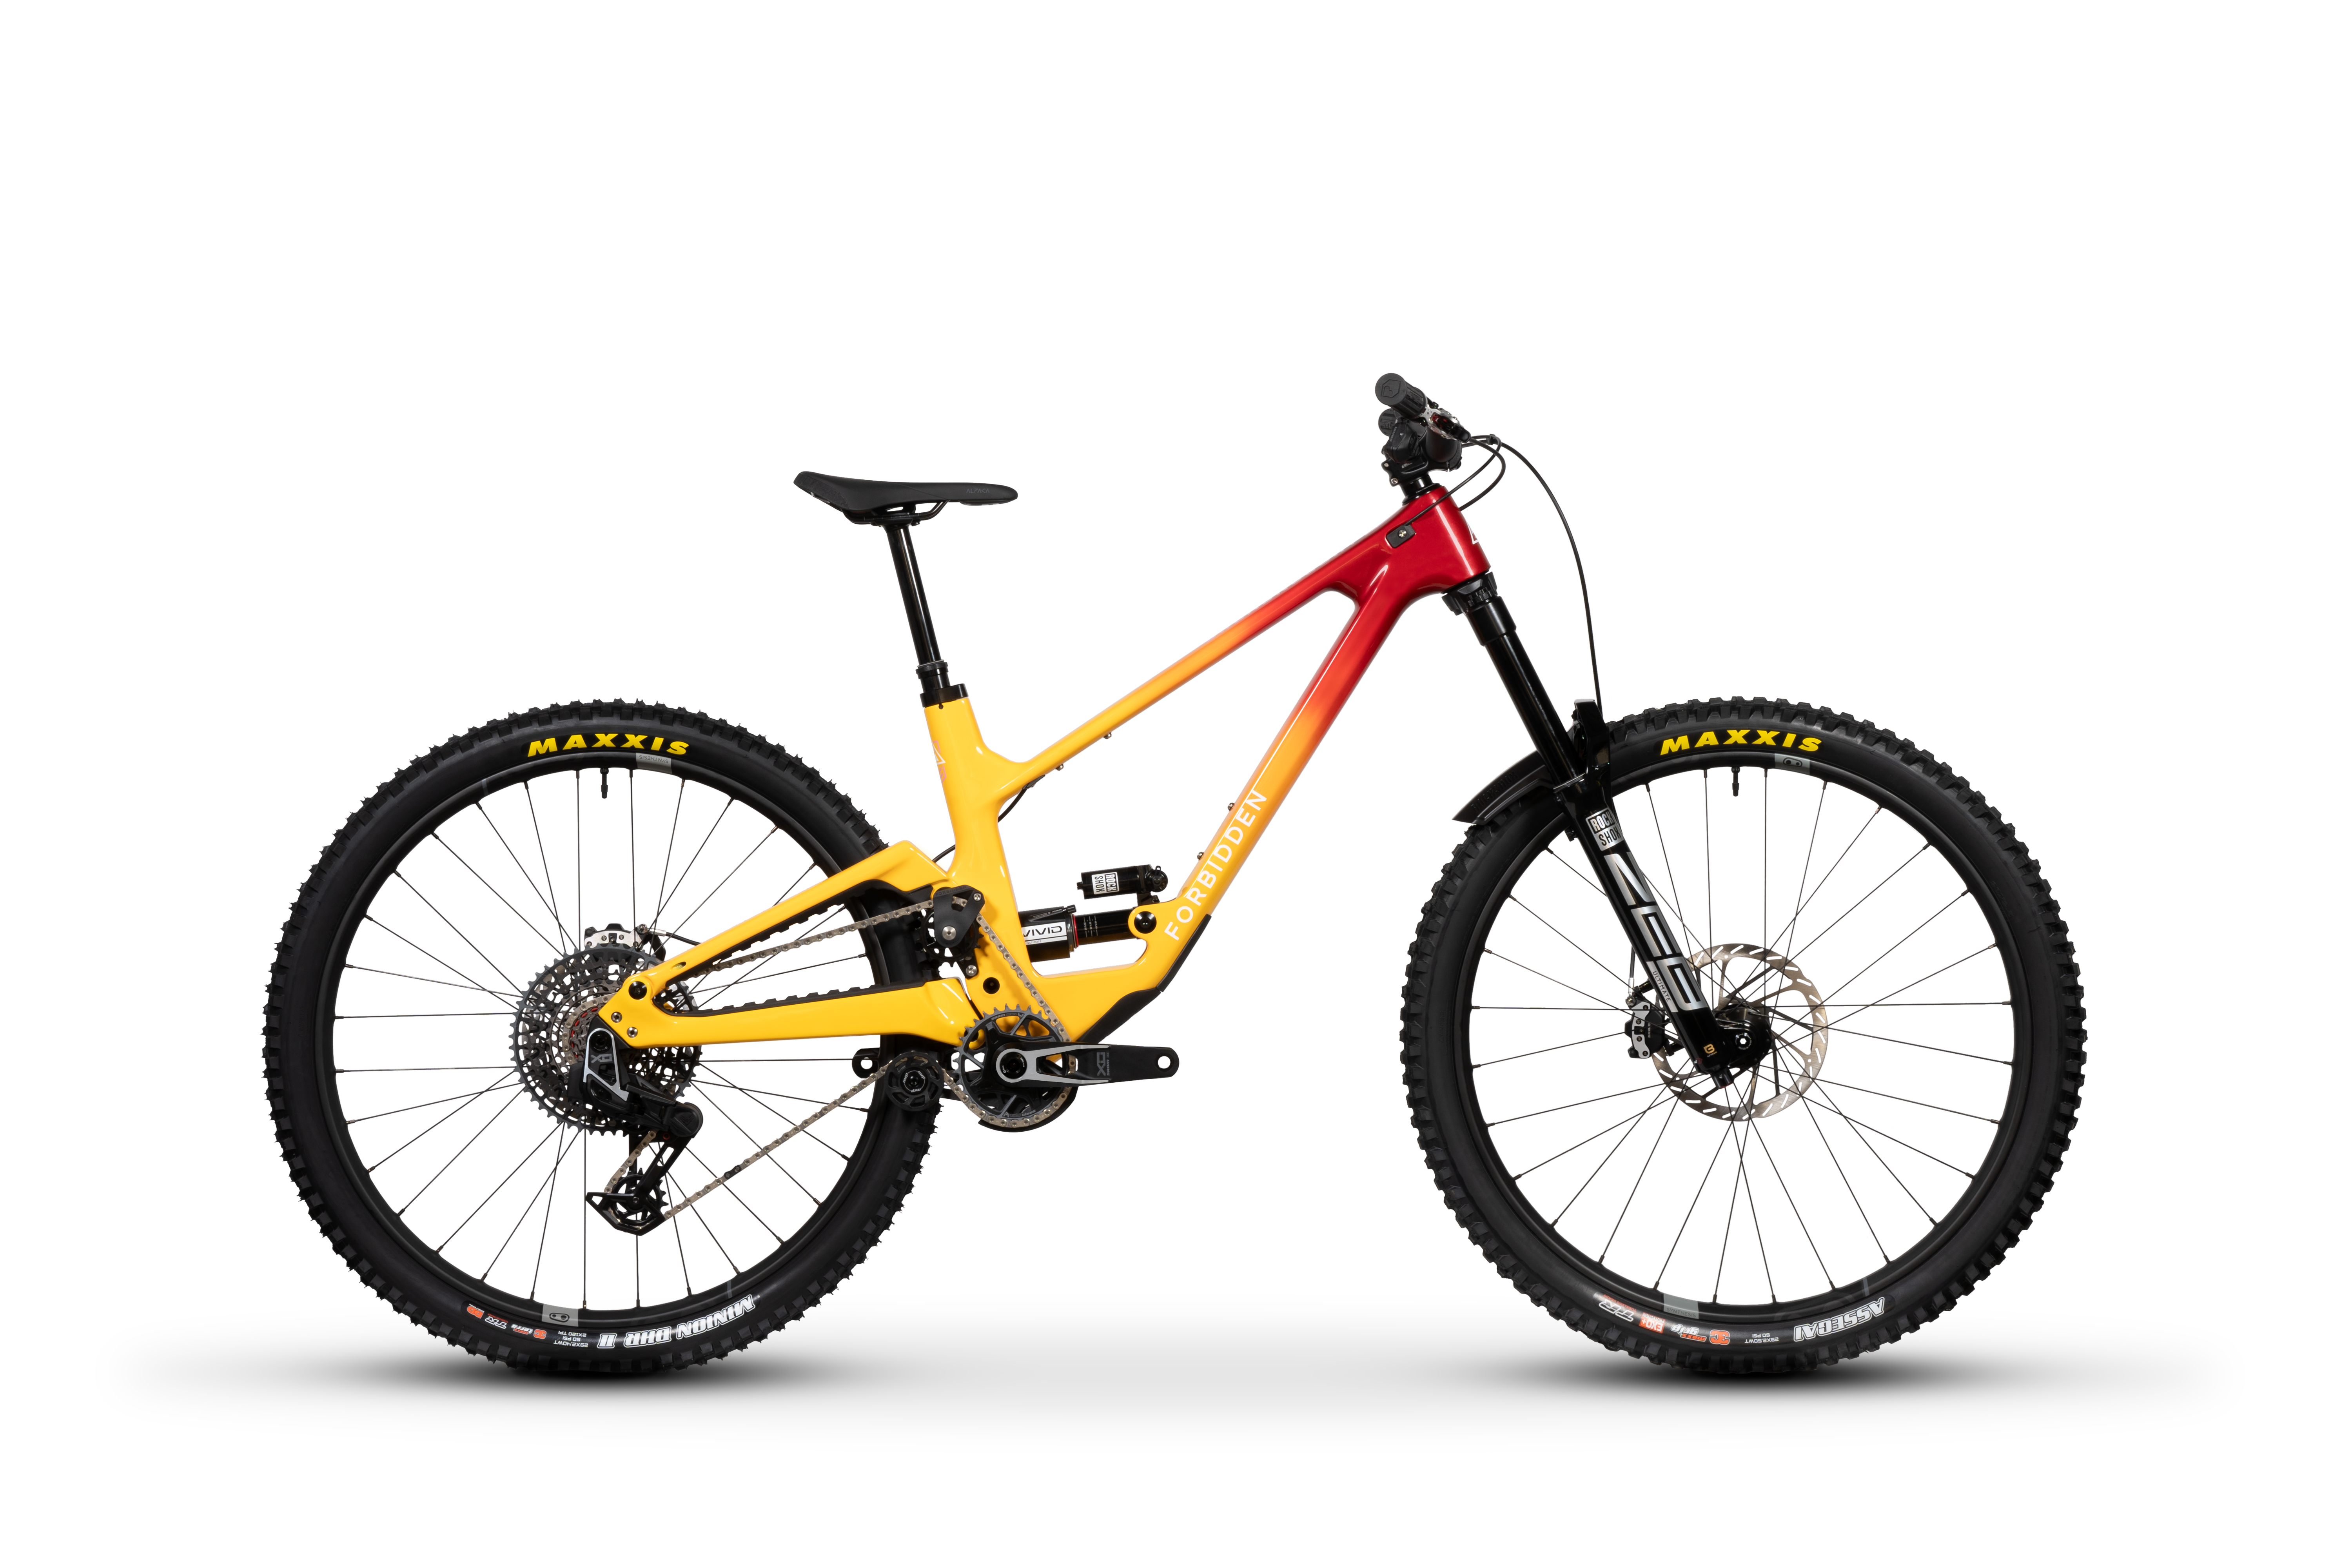
-
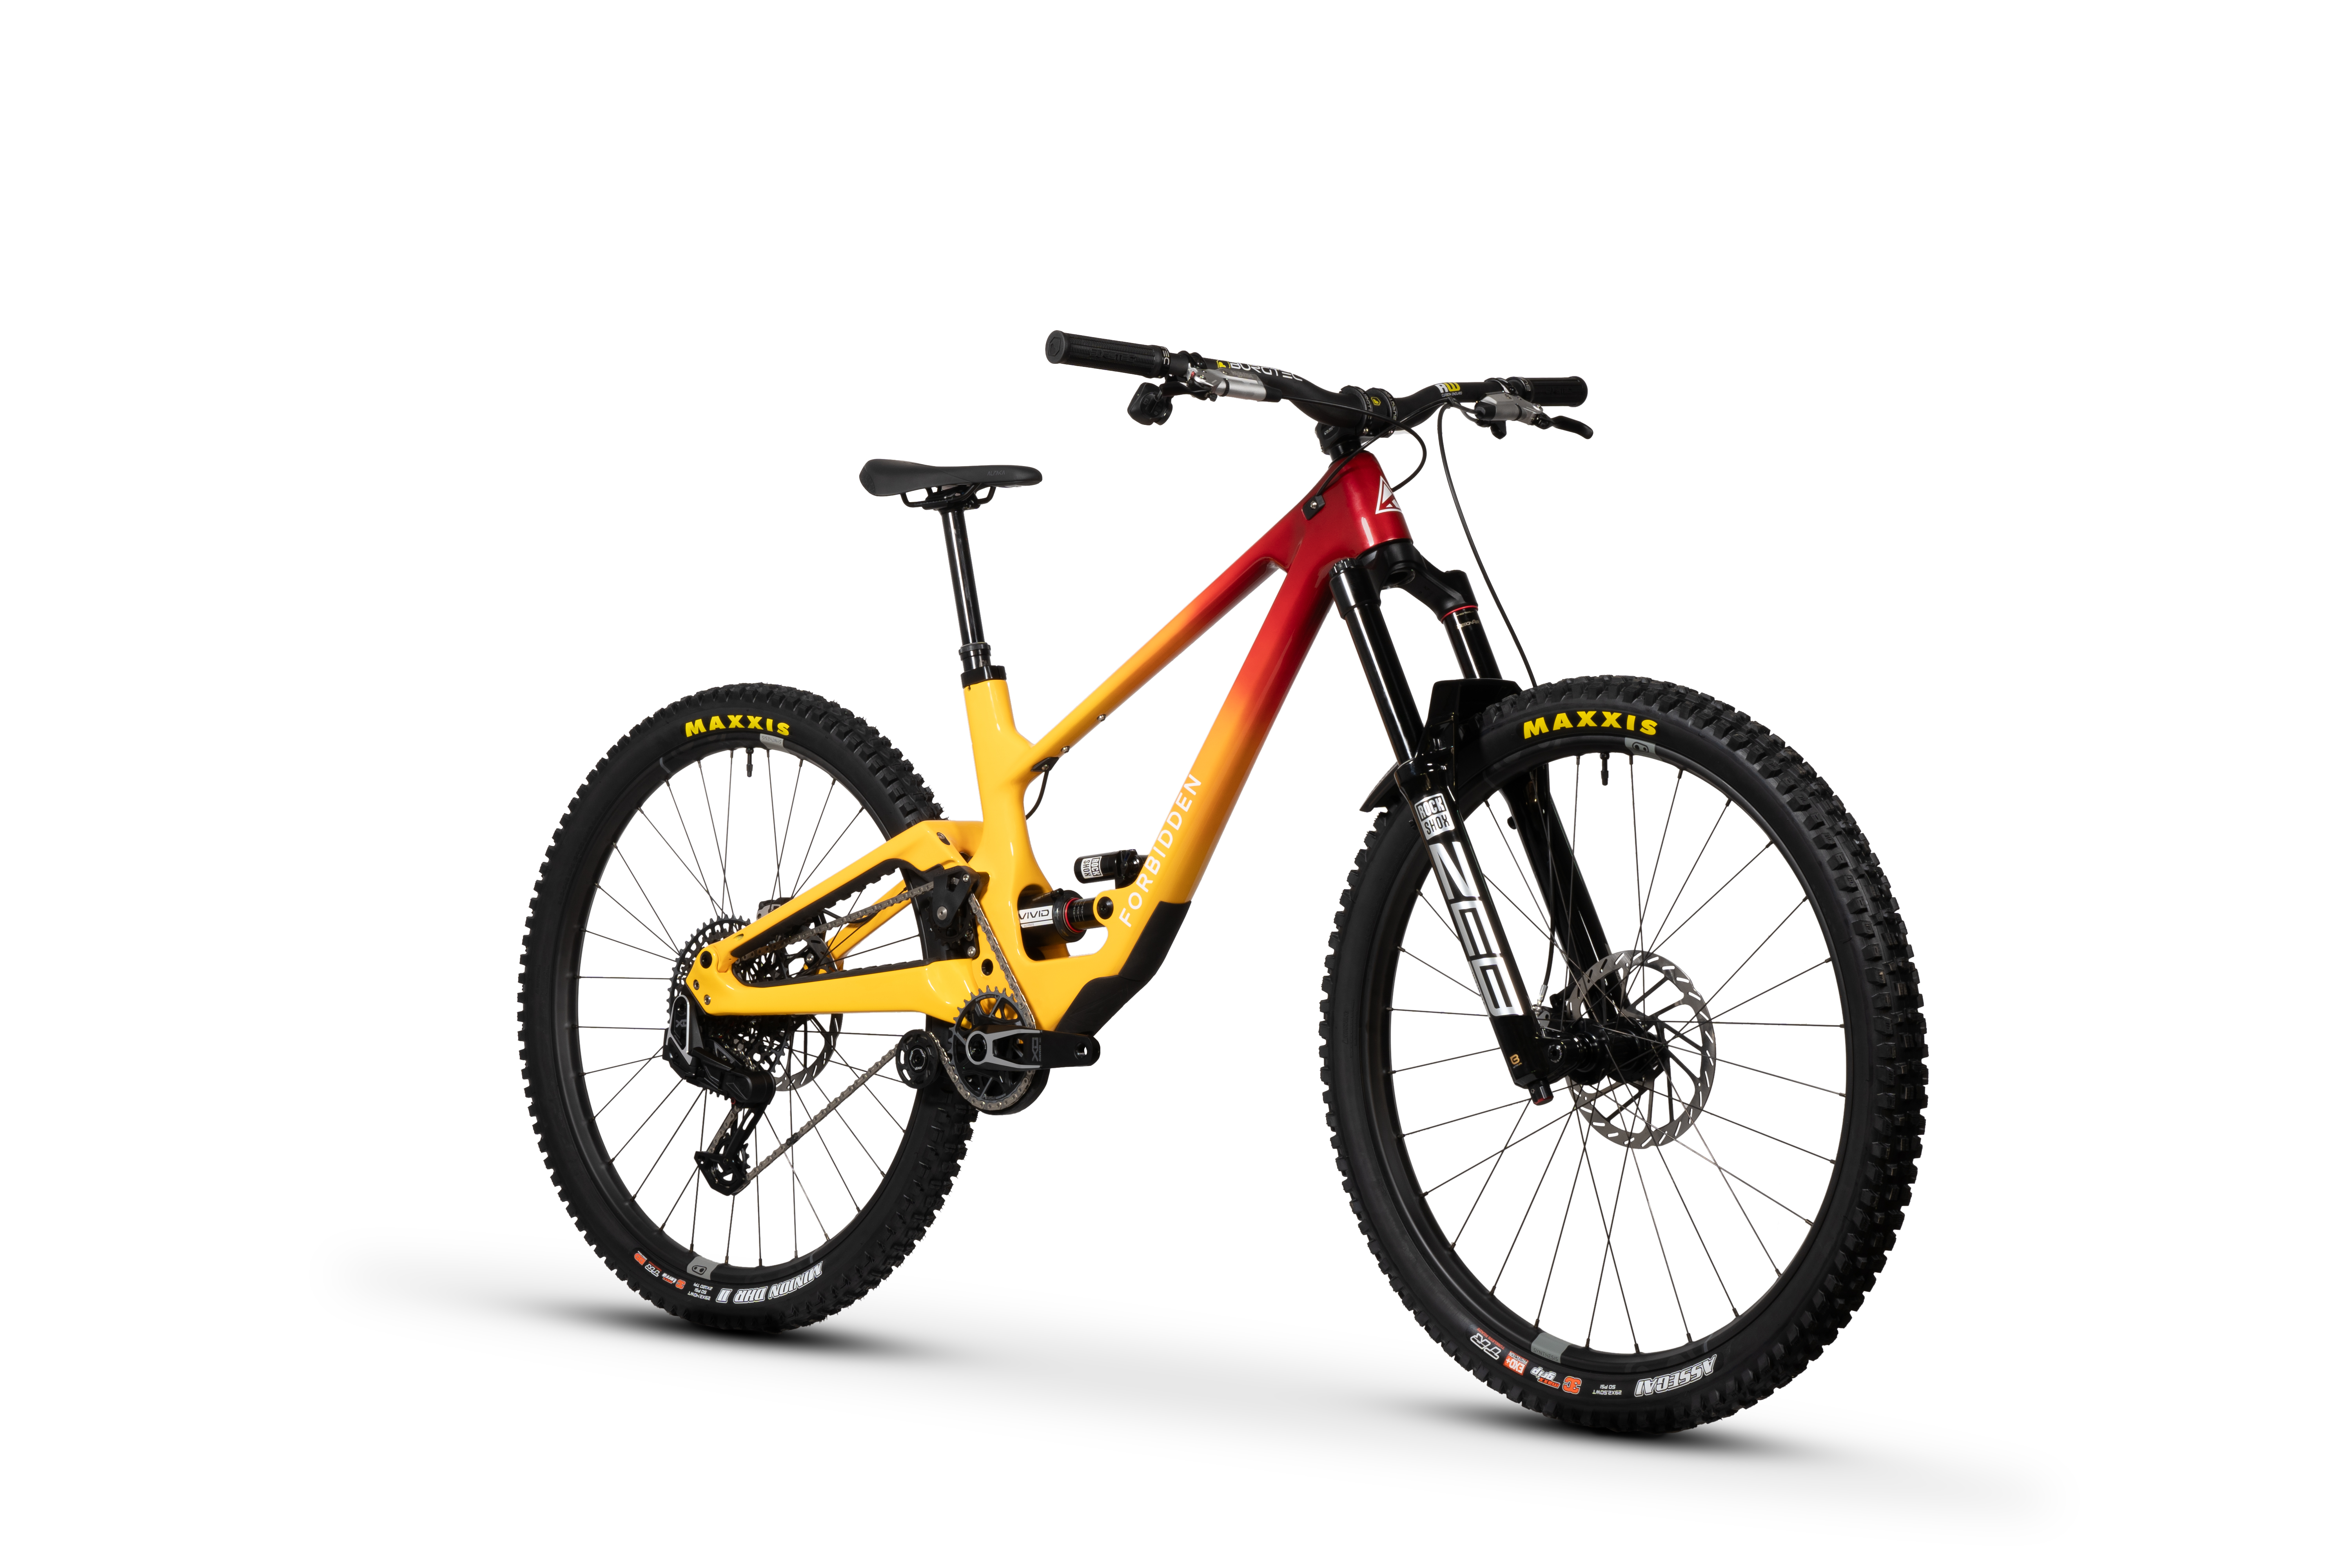
Intended Use
Enduro / Bikepark
-
Suspension
160mm Rear / 170mm Front
-
Wheel Size
Full 29er or Mixed (MX)
Choose Your Dream Ride
Choose Your Dream Ride


Scroll
Do you want to understand thescience behind the witchcraft?
Do you want to understand the science behind the witchcraft?
Dreadnought Specs
Dreadnought Specs
Dreadnought X0 RS U$11,999 CAD |
Dreadnought GX RS S Plus$9,499 CAD |
Dreadnought GX RS S$8,499 CAD |
Dreadnought V2 Framekit$5,499 CAD |
|
|---|---|---|---|---|
|
FRAME |
FRAME Dreadnought V2 Full Carbon - 160mm Travel High-Modulus Carbon Fiber | Trifecta V2 High Pivot 4-Bar Suspension | One Ride Geometry | Enduro Max Bearings | 73mm Threaded BSA Bottom Bracket |
FRAME Dreadnought V2 Full Carbon - 160mm Travel High-Modulus Carbon Fiber | Trifecta V2 High Pivot 4-Bar Suspension | One Ride Geometry | Enduro Max Bearings | 73mm Threaded BSA Bottom Bracket |
FRAME Dreadnought V2 Full Carbon - 160mm Travel High-Modulus Carbon Fiber | Trifecta V2 High Pivot 4-Bar Suspension | One Ride Geometry | Enduro Max Bearings | 73mm Threaded BSA Bottom Bracket |
FRAME Dreadnought V2 Full Carbon - 160mm Travel High-Modulus Carbon Fiber | Trifecta V2 High Pivot 4-Bar Suspension | One Ride Geometry | Enduro Max Bearings | 73mm Threaded BSA Bottom Bracket |
|
FORK |
FORK RockShox ZEB Ultimate 170mm Travel | Charger 3 RC2 W/ButterCup | Debonair + | Rebound, HSC/LSC Adjust | Pressure Relief Valves | 44mm Offset | Maxle Stealth Thru-Axle | Gloss Black |
FORK RockShox ZEB Select+ 170mm Travel | Charger 3 RC2 | Debonair + | Rebound, HSC/LSC Adjust | 44mm Offset | Maxle Stealth Thru-Axle | Gloss Black |
FORK RockShox ZEB Select 170mm Travel | Charger RC | Debonair + | LSR/LSC Adjust | 44mm Offset | Maxle Stealth Thru-Axle | Gloss Black |
FORK |
|
REAR SHOCK |
REAR SHOCK RockShox Vivid Ultimate Touchdown RC2T | Rebound, High And Low Speed Compression, And Hydraulic Bottom Out Adjust | Threshold Lever | Trunnion/Bearing Mount | R85C26 Tune | 205x60mm |
REAR SHOCK RockShox Vivid Select+ Touchdown RCT | Rebound, Compression, And Hydraulic Bottom Out Adjust | Threshold Lever | Trunnion/Bearing Mount | R85C26 Tune | 205x60mm |
REAR SHOCK RockShox Vivid Select Touchdown RT | Rebound And Hydraulic Bottom Out Adjust | Threshold Lever | Trunnion/Bearing Mount | R85C26 Tune | 205x60mm |
REAR SHOCK RockShox Vivid Ultimate Touchdown RC2T | Rebound, High And Low Speed Compression, And Hydraulic Bottom Out Adjust | Threshold Lever | Trunnion/Bearing Mount | R85C26 Tune | 205x60mm |
|
HEADSET |
HEADSET Cane Creek Hellbender 70 SHIS: ZS44/28.6|ZS56/40 | Sealed Cartridge Bearings | 6000 Series Alloy Cups And Materials | Sealed Steel Crown Race |
HEADSET Cane Creek 40 SHIS: ZS44/28.6|ZS56/40 | Sealed Cartridge Bearings | 6000 Series Alloy Cups And Materials | Sealed Steel Crown Race |
HEADSET Cane Creek 40 SHIS: ZS44/28.6|ZS56/40 | Sealed Cartridge Bearings | 6000 Series Alloy Cups And Materials | Sealed Steel Crown Race |
HEADSET |
|
GRIPS |
GRIPS Burgtec Bartender Pro 135mm length | Single Sided Lock-On | Black |
GRIPS Burgtec Bartender Pro 135mm length | Single Sided Lock-On | Black |
GRIPS Burgtec Bartender Pro 135mm length | Single Sided Lock-On | Black |
GRIPS |
|
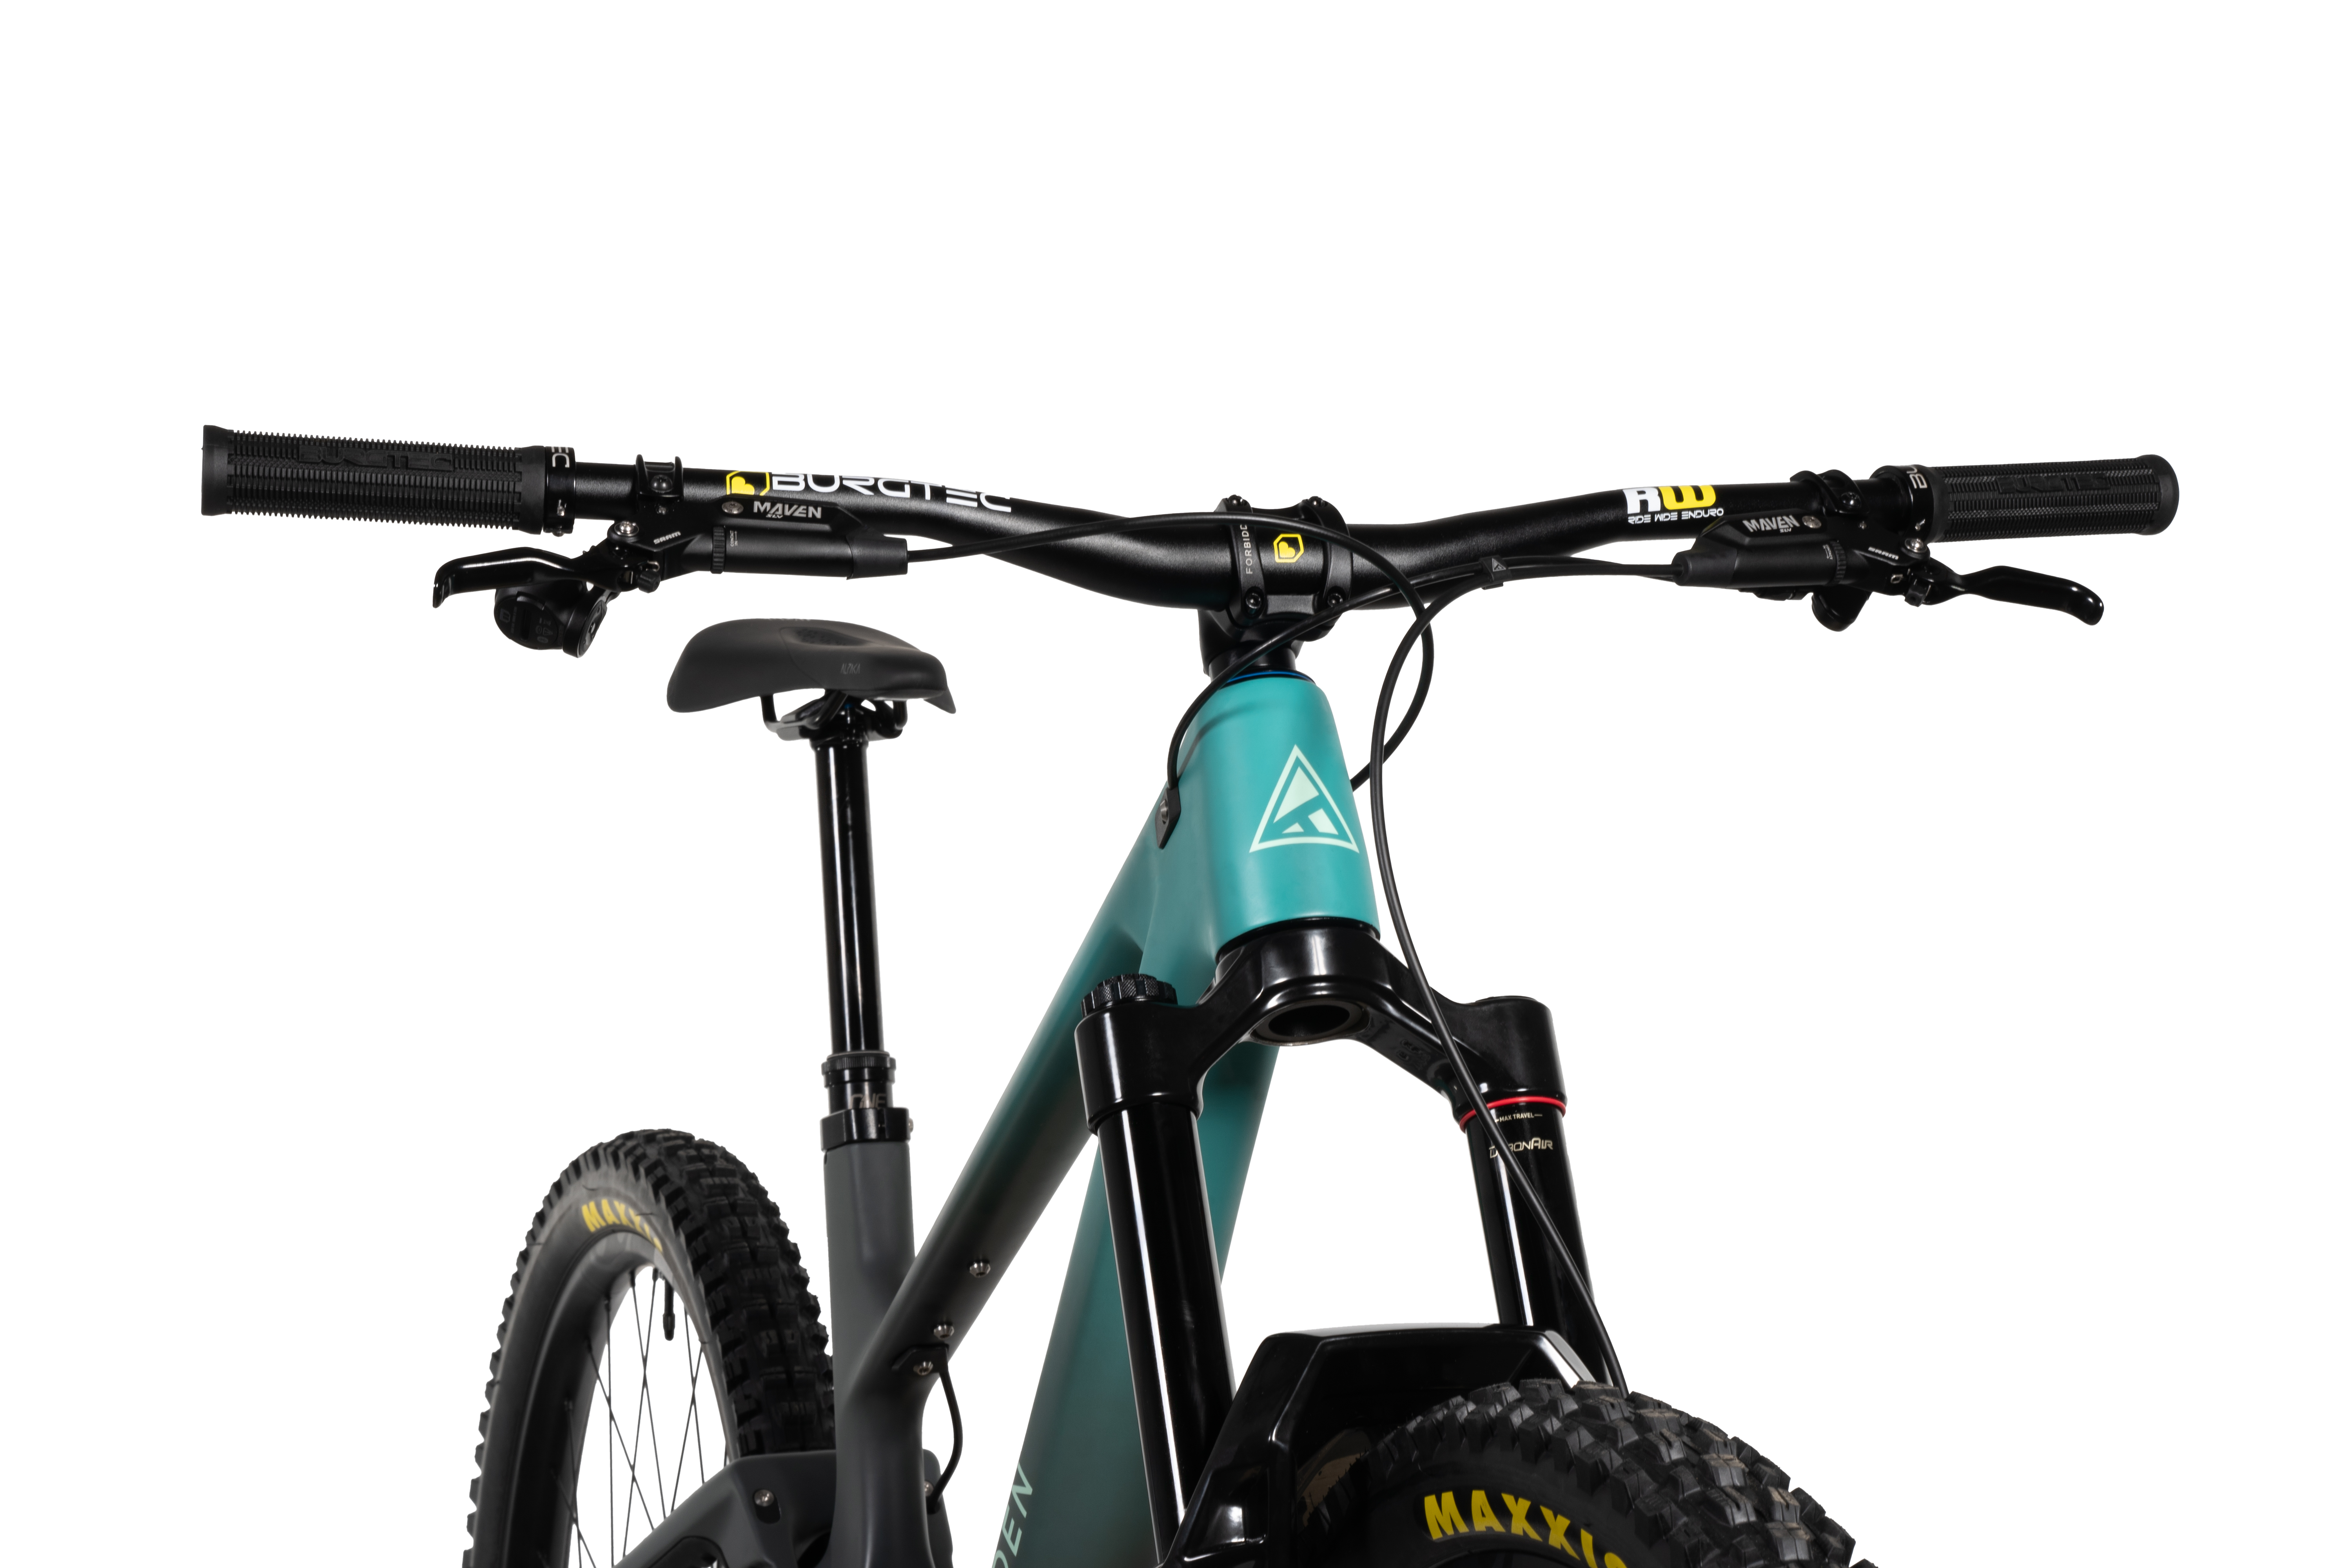
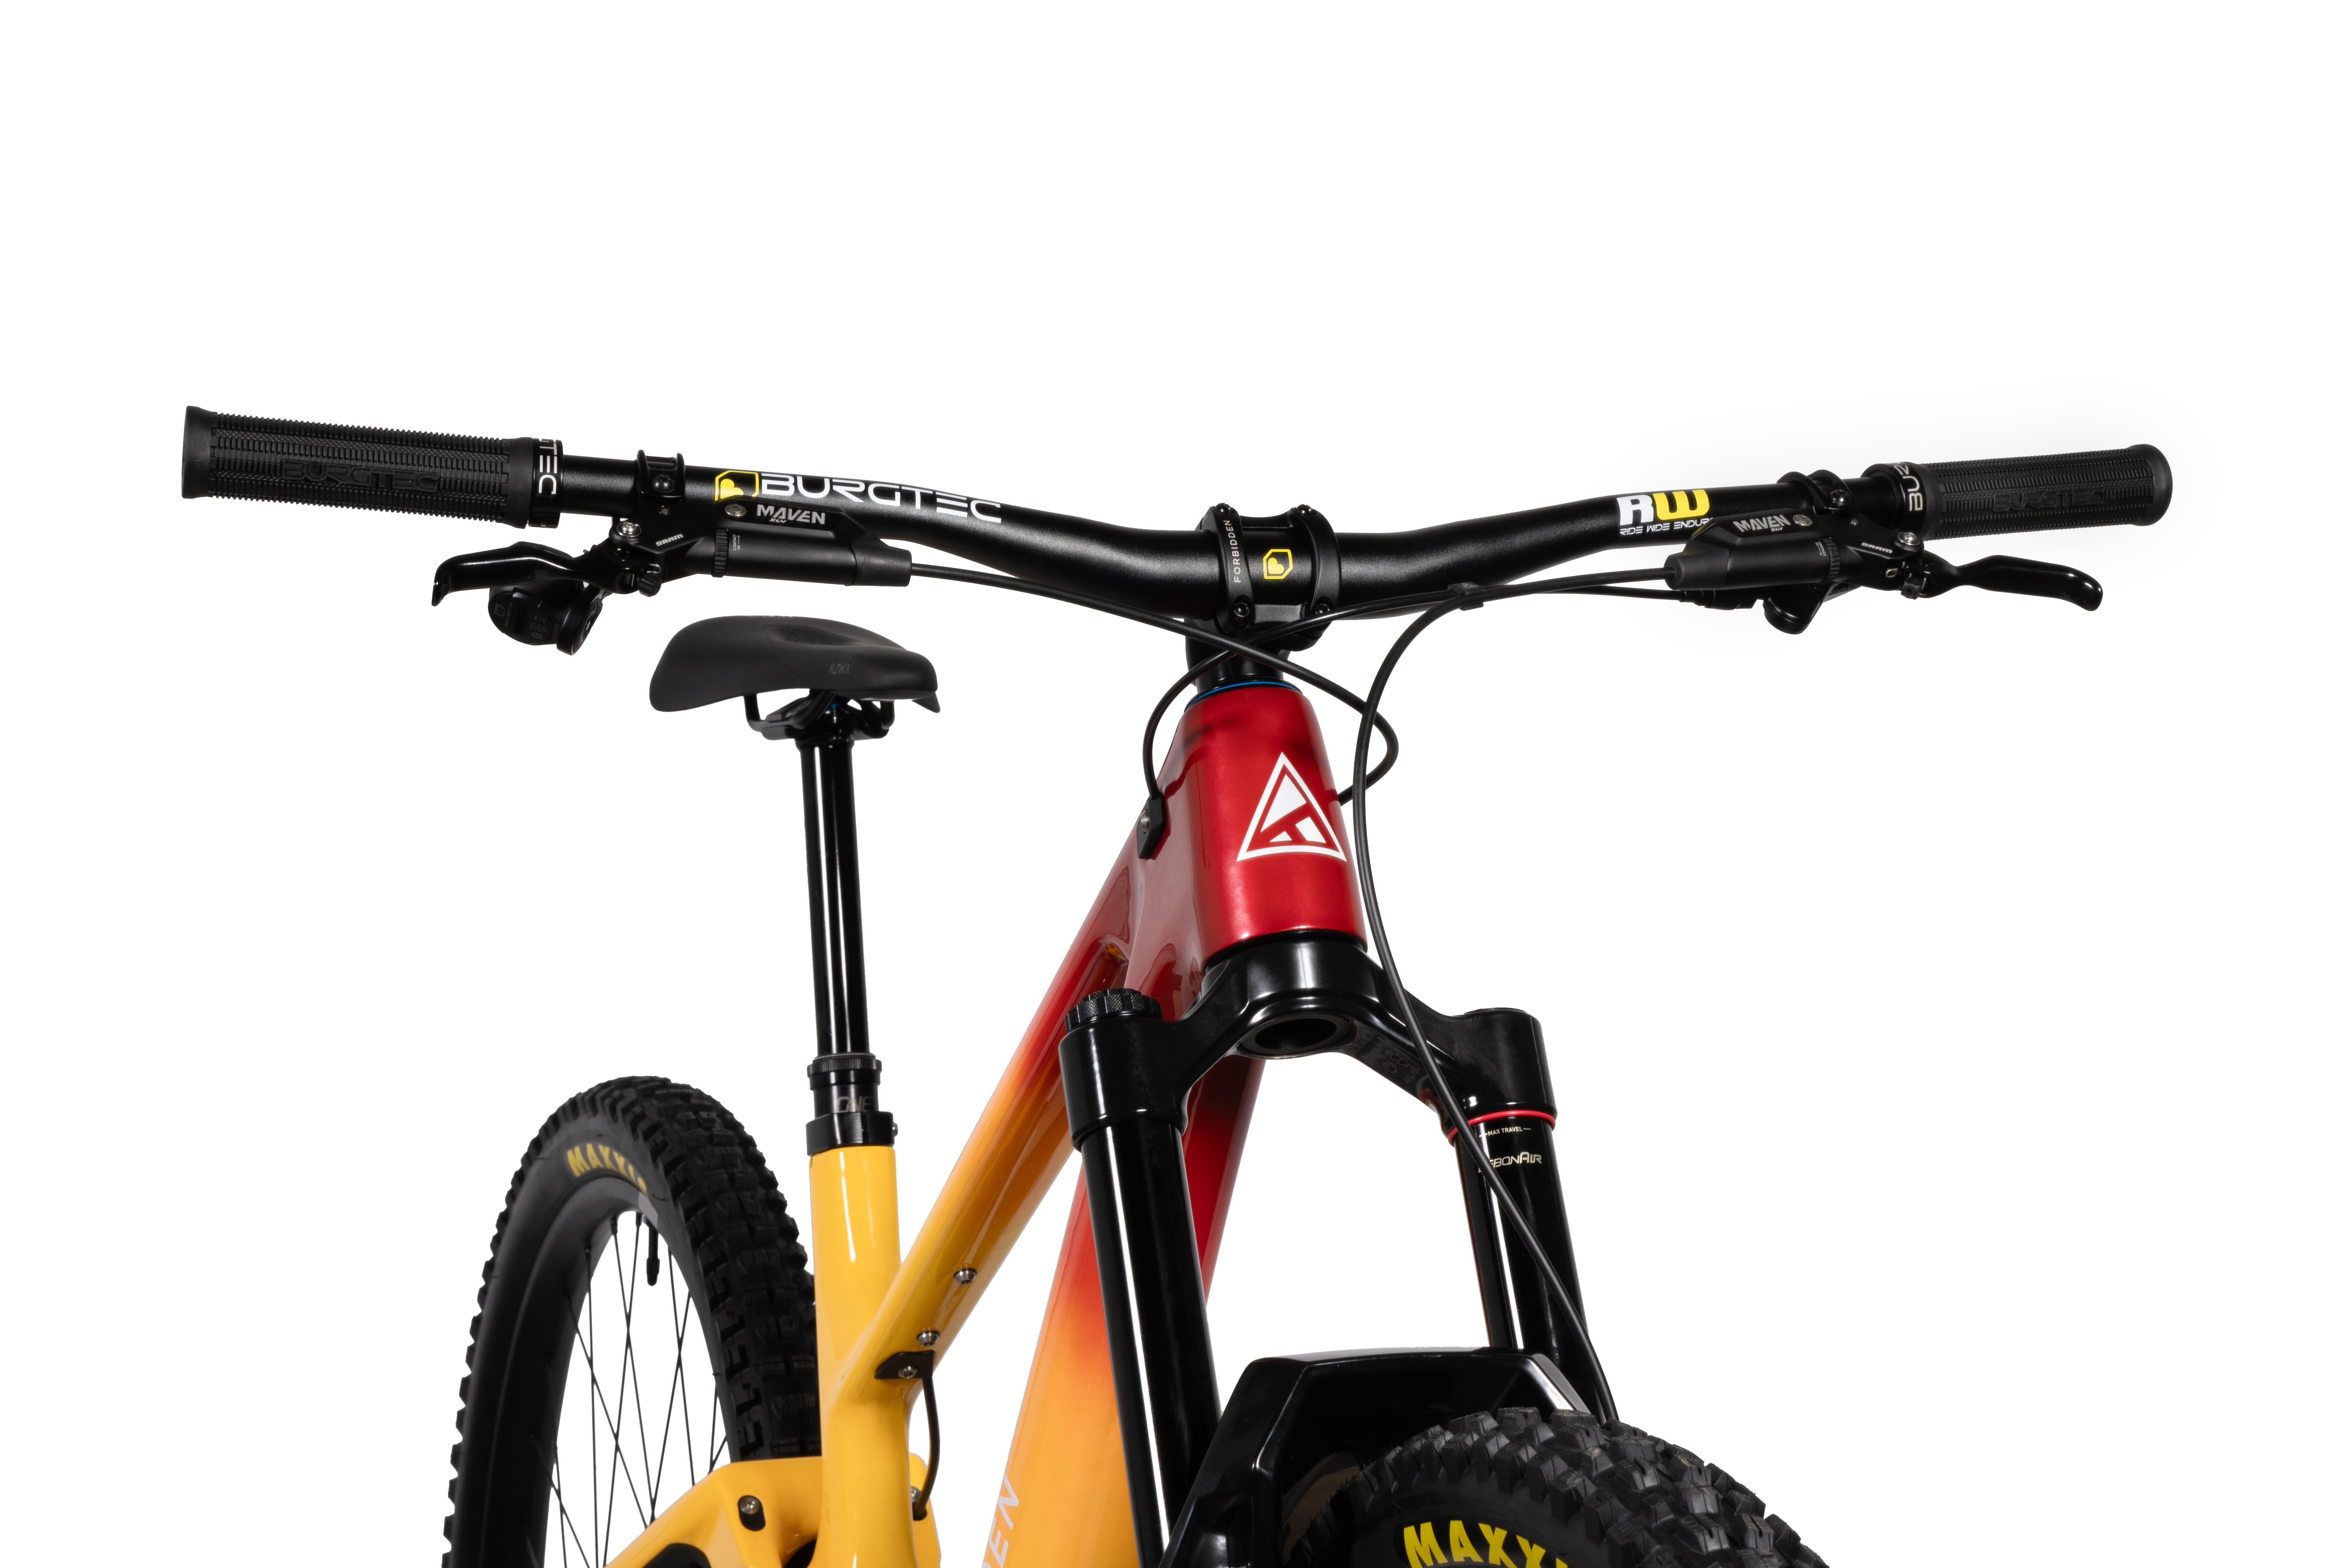
HANDLE BARS |
HANDLE BARS Burgtec Ride Wide Enduro Carbon 800mm Width | S1-S2:22.5 / S3-S4:30 Rise | 9° Backsweep 5° Upward | 35mm Bar Bore | Black |
HANDLE BARS Burgtec Ride Wide Enduro Alloy 800mm Width | S1-S2:22.5 / S3-S4:30 Rise | 9° Backsweep 5° Upward | 35mm Bar Bore | Black |
HANDLE BARS Forbidden 800mm Width | S1-S2:22.5 / S3-S4:30 Rise | 9° Backsweep 5° Upward | 35mm Bar Bore | Black |
HANDLE BARS |
|
STEM |
STEM Burgtec OE MK3 Enduro 42.5mm Length | 35mm Bar Clamp | Black |
STEM Forbidden 40mm Length | 35mm Bar Clamp | Black |
STEM Forbidden 40mm Length | 35mm Bar Clamp | Black |
STEM |
|
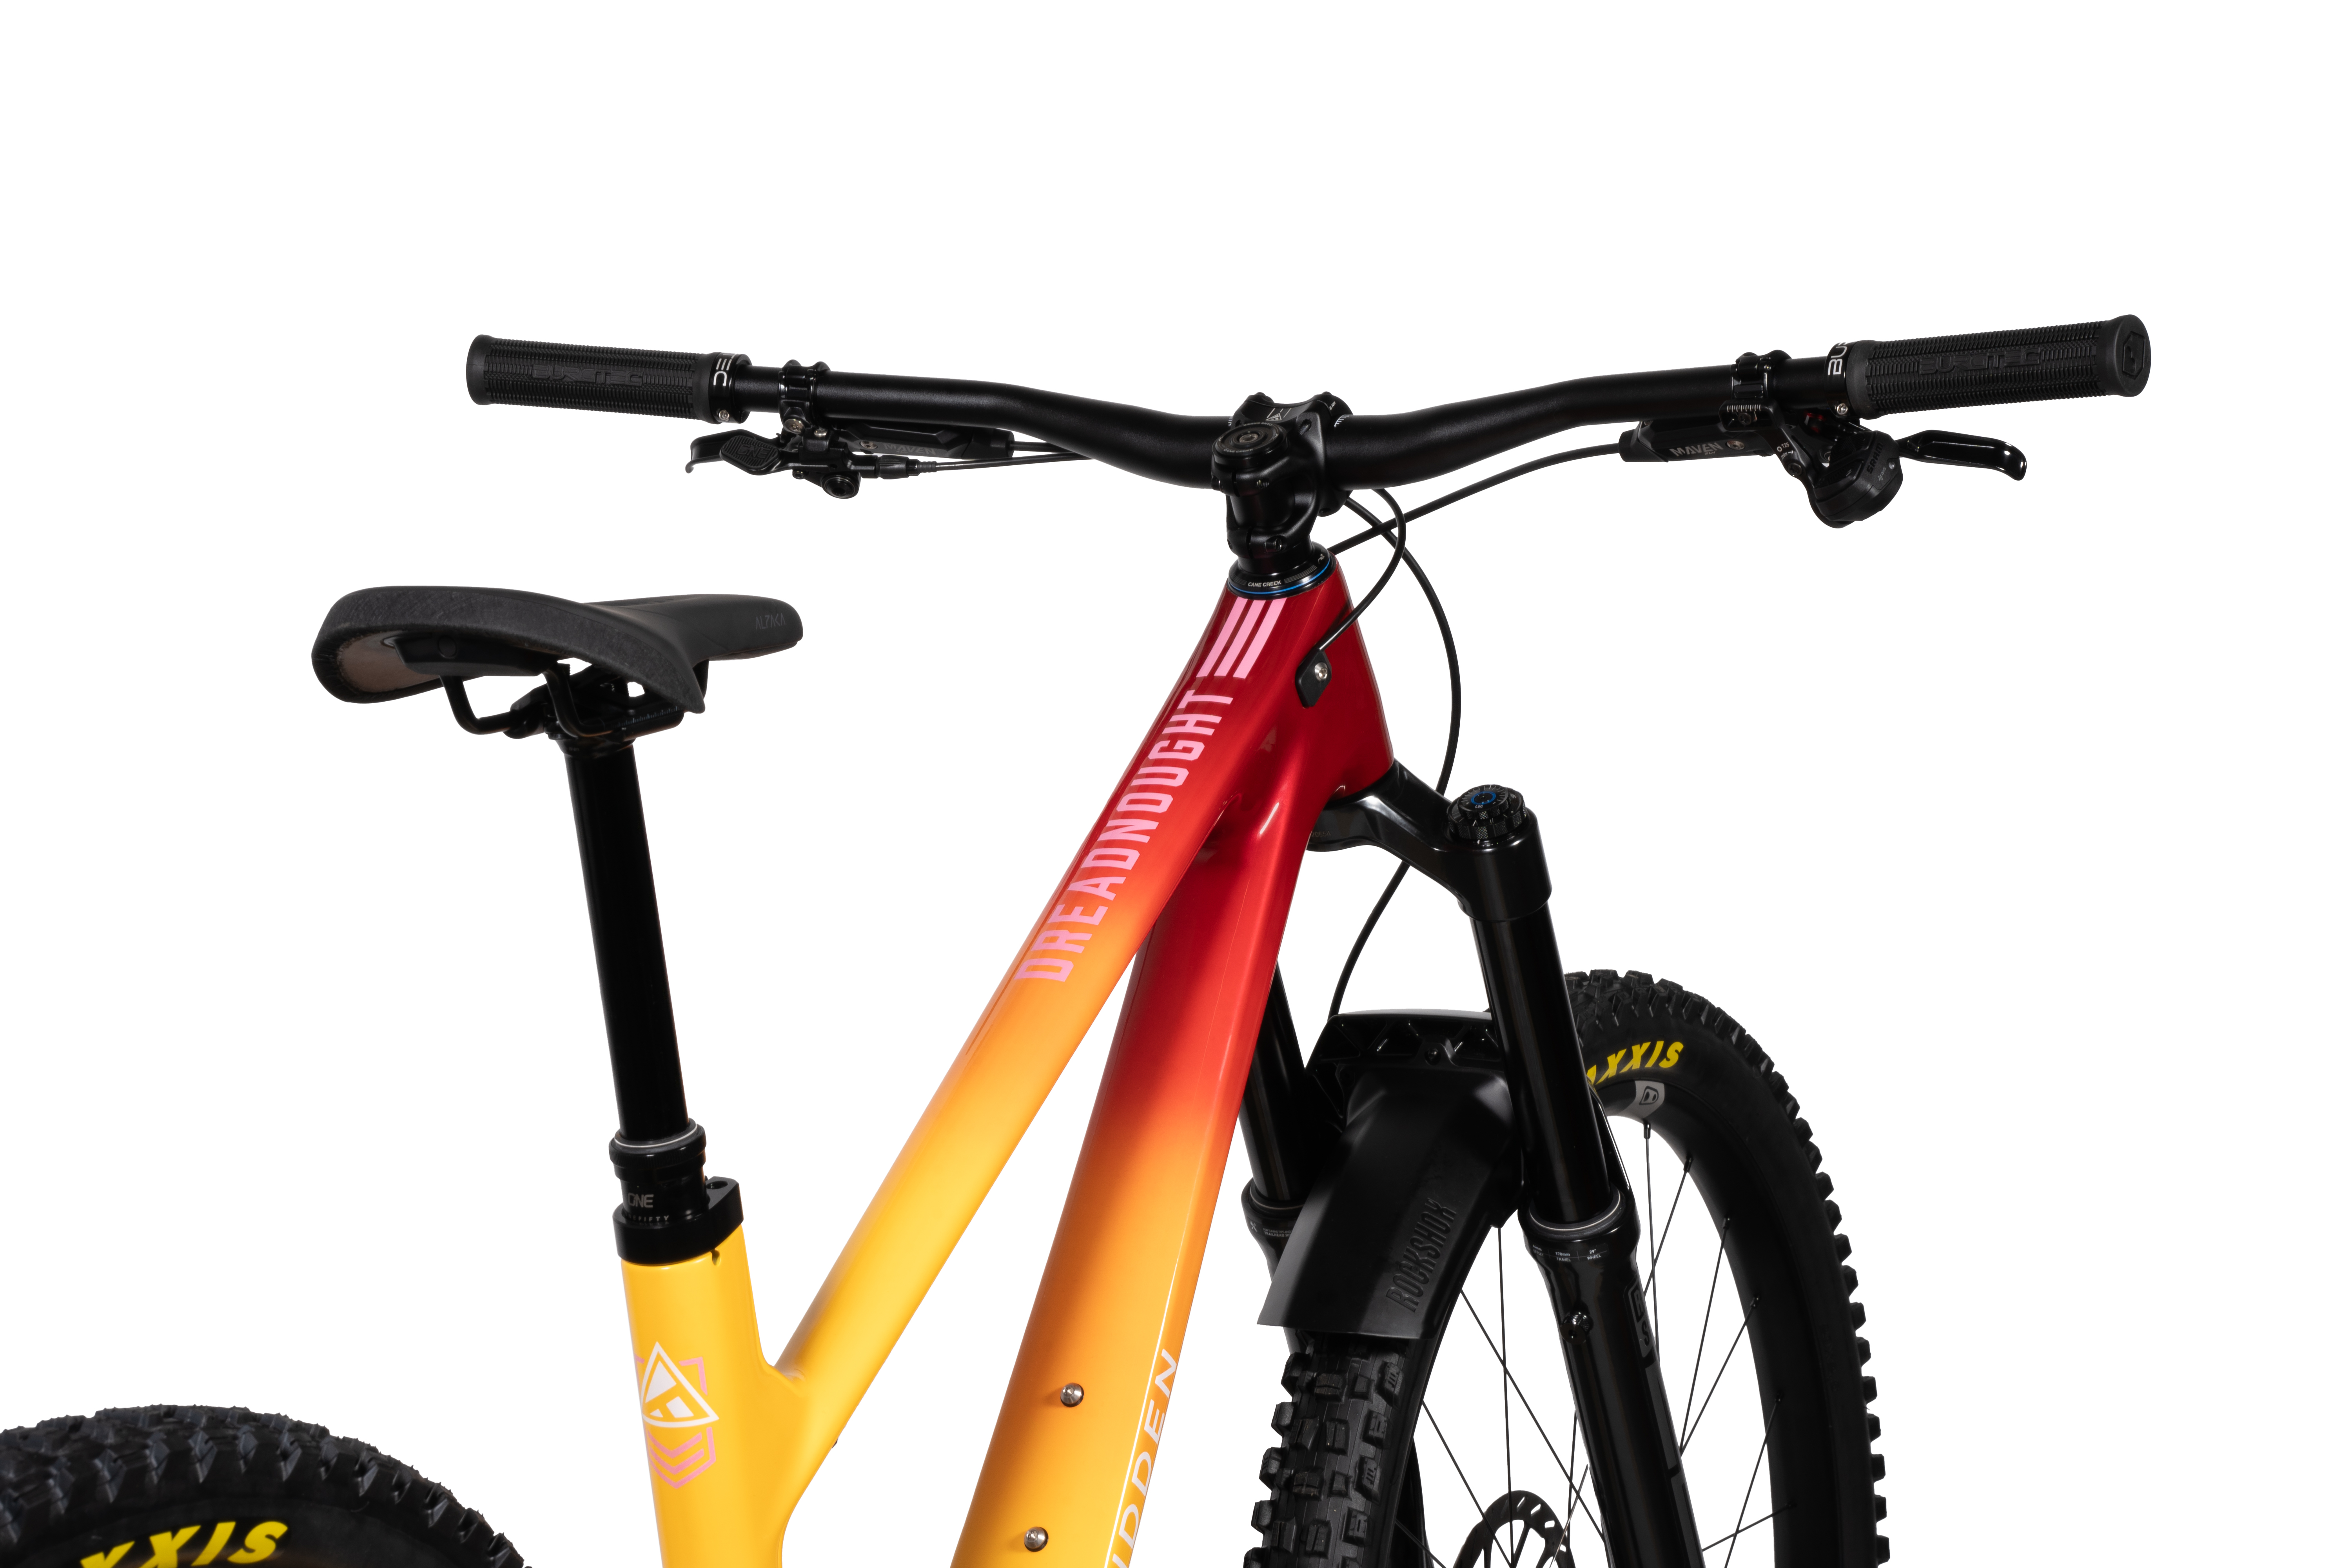
SEAT POST |
SEAT POST OneUp Dropper Post 31.6mm | Size Specific Travel S1:120mm / S2:150mm / S3:180mm / S4:210mm |
SEAT POST OneUp Dropper Post 31.6mm | Size Specific Travel S1:120mm / S2:150mm / S3:180mm / S4:210mm |
SEAT POST OneUp Dropper Post 31.6mm | Size Specific Travel S1:120mm / S2:150mm / S3:180mm / S4:210mm |
SEAT POST |
|
SEAT POST REMOTE |
SEAT POST REMOTE OneUp MMX UFT Lever Aluminum Remote | Oversized Bearing | MatchMaker X Integrated Dropper Remote |
SEAT POST REMOTE OneUp MMX UFT Lever Aluminum Remote | Oversized Bearing | MatchMaker X Integrated Dropper Remote |
SEAT POST REMOTE OneUp MMX UFT Lever Aluminum Remote | Oversized Bearing | MatchMaker X Integrated Dropper Remote |
SEAT POST REMOTE |
|
SEAT POST CLAMP |
SEAT POST CLAMP Forbidden 7075 CNC Aluminum | 34.9mm | Black Anodized |
SEAT POST CLAMP Forbidden 7075 CNC Aluminum | 34.9mm | Black Anodized |
SEAT POST CLAMP Forbidden 7075 CNC Aluminum | 34.9mm | Black Anodized |
SEAT POST CLAMP Forbidden 7075 CNC Aluminum | 34.9mm | Black Anodized |
|
SADDLE |
SADDLE Fizik Terra Alpaca X5 145mm Width | X5: Ride-Compliant Fiber Reinforced Nylon Shell And An S-Alloy Rail | Black |
SADDLE Fizik Terra Alpaca X5 145mm Width | X5: Ride-Compliant Fiber Reinforced Nylon Shell And An S-Alloy rail | Black |
SADDLE Fizik Terra Alpaca X5 145mm Width | X5: Ride-Compliant Fiber Reinforced Nylon Shell And An S-Alloy Rail | Black |
SADDLE |
|
FRONT BRAKE |
FRONT BRAKE SRAM Maven Ultimate 4-Piston Stealth Body | SwingLink | Reach & Contact Adjustment | Organic Pads |
FRONT BRAKE SRAM Maven Silver 4-Piston Stealth Body | SwingLink | Reach & Contact Adjustment | Organic Pads |
FRONT BRAKE SRAM Maven Bronze 4-Piston Stealth Body | SwingLink | Reach Adjustment | Organic Pads |
FRONT BRAKE |
|
FRONT BRAKE ROTOR |
FRONT BRAKE ROTOR SRAM HS2 - 200mm 6-Bolt |
FRONT BRAKE ROTOR SRAM HS2 - 200mm 6-Bolt |
FRONT BRAKE ROTOR SRAM Centerline - 200mm 6-Bolt |
FRONT BRAKE ROTOR |
|
REAR BRAKE |
REAR BRAKE SRAM Maven Ultimate 4-Piston Stealth Body | SwingLink | Reach & Contact Adjustment | Organic Pads |
REAR BRAKE SRAM Maven Silver 4-Piston Stealth Body | SwingLink | Reach & Contact Adjustment | Organic Pads |
REAR BRAKE SRAM Maven Bronze 4-Piston Stealth Body | SwingLink | Reach Adjustment | Organic Pads |
REAR BRAKE |
|
REAR BRAKE ROTOR |
REAR BRAKE ROTOR SRAM HS2 - 200mm 6-Bolt |
REAR BRAKE ROTOR SRAM HS2 - 200mm 6-Bolt |
REAR BRAKE ROTOR SRAM Centerline - 200mm 6-Bolt |
REAR BRAKE ROTOR |
|
REAR SHIFTER |
REAR SHIFTER SRAM Pod Ultimate With MMX Clamp | AXS Controller | Two Button Design |
REAR SHIFTER SRAM Pod With MMX Clamp | AXS Controller | Two Button Design |
REAR SHIFTER SRAM Pod With MMX Clamp | AXS Controller | Two Button Design |
REAR SHIFTER |
|
REAR DERAILLEUR |
REAR DERAILLEUR SRAM X0 AXS T-Type 12speed Hangerless Interface | Magic Wheel | Overload Clutch | Replaceable Skid Plates |
REAR DERAILLEUR SRAM GX AXS T-Type 12speed Hangerless Interface | Overload Clutch | Replaceable Skid Plates |
REAR DERAILLEUR SRAM GX AXS T-Type 12speed Hangerless Interface | Overload Clutch | Replaceable Skid Plates |
REAR DERAILLEUR |
|
CASSETTE |
CASSETTE SRAM X0 T-Type 10-52T 12speed 12speed | XD Fit | 10-12-14-16-18-21-24-28-32-38-44-52T |
CASSETTE SRAM GX T-Type 10-52T 12speed 12speed | XD Fit | 10-12-14-16-18-21-24-28-32-38-44-52T |
CASSETTE SRAM GX T-Type 10-52T 12speed 12speed | XD Fit | 10-12-14-16-18-21-24-28-32-38-44-52T |
CASSETTE |
|
CHAIN |
CHAIN SRAM GX Transmission Flattop 12speed 12speed | Links = S1:124 / S2:126 / S3:128 / S4:130 |
CHAIN SRAM GX Transmission Flattop 12speed 12speed | Links = S1:124 / S2:126 / S3:128 / S4:130 |
CHAIN SRAM GX Transmission Flattop 12speed 12speed | Links = S1:124 / S2:126 / S3:128 / S4:130 |
CHAIN |
|
CRANKSET |
CRANKSET SRAM X0 Eagle 32T - 165mm 165mm All Sizes | 55mm Chainline | Black |
CRANKSET SRAM GX Eagle 32T - 165mm 165mm All Sizes | 55mm Chainline | Black |
CRANKSET SRAM GX Eagle 32T - 165mm 165mm All Sizes | 55mm Chainline | Black |
CRANKSET |
|
PEDALS |
PEDALS Not included |
PEDALS Not included |
PEDALS Not included |
PEDALS |
|
UPPER CHAIN GUIDE |
UPPER CHAIN GUIDE Forbidden HD Guide |
UPPER CHAIN GUIDE Forbidden HD Guide |
UPPER CHAIN GUIDE Forbidden HD Guide |
UPPER CHAIN GUIDE Forbidden HD Guide |
|
LOWER CHAIN GUIDE |
LOWER CHAIN GUIDE MRP MXg Custom 2-Bolt Fixed Backplate | ISCG 05 Standard |
LOWER CHAIN GUIDE MRP MXg Custom 2-Bolt Fixed Backplate | ISCG 05 Standard |
LOWER CHAIN GUIDE MRP MXg Custom 2-Bolt Fixed Backplate | ISCG 05 Standard |
LOWER CHAIN GUIDE MRP MXg Custom 2-Bolt Fixed Backplate | ISCG 05 Standard |
|
BOTTOM BRACKET |
BOTTOM BRACKET SRAM DUB Threaded BSA Wide 28.99mm Spindle | DUB | Threaded BSA |
BOTTOM BRACKET SRAM DUB Threaded BSA Wide 28.99mm Spindle | DUB | Threaded BSA |
BOTTOM BRACKET SRAM DUB Threaded BSA Wide 28.99mm Spindle | DUB | Threaded BSA |
BOTTOM BRACKET |
|
FRONT HUB |
FRONT HUB Crank Brothers 110 x 15mm | 28-Hole | 6-Bolt | Black Anodized |
FRONT HUB Crank Brothers 110 x 15mm | 28-Hole | 6-Bolt | Black Anodized |
FRONT HUB Crankbrothers Synthesis Enduro Std 110 x 15mm | 28-Hole | 6-Bolt | Black Anodized |
FRONT HUB |
|
FRONT AXLE |
FRONT AXLE Maxle Stealth Included With Fork |
FRONT AXLE Maxle Stealth Included With Fork |
FRONT AXLE Maxle Stealth Included With Fork |
FRONT AXLE |
|
REAR HUB |
REAR HUB Crank Brothers Ratchet Internals | XD Driver | 148x12mm | 32hole | 6-Bolt | Black Anodized Decal |
REAR HUB Crank Brothers Ratchet Internals | XD Driver | 148 x 12mm | 32-Hole | 6-Bolt | Black Anodized Decal |
REAR HUB Crankbrothers Synthesis Enduro Std XD Driver | 148 x 12mm | 32-Hole | 6-Bolt | Black Anodized Decal |
REAR HUB |
|
REAR AXLE |
REAR AXLE Burgtec 180 x 1.0mm Axle UDH |
REAR AXLE Burgtec 180 x 1.0mm Axle UDH |
REAR AXLE Burgtec 180 x 1.0mm Axle UDH |
REAR AXLE Burgtec 180 x 1.0mm Axle UDH |
|
SPOKES |
SPOKES Sapim CX Ray (fr) / CX Sprint (rr) Front: CX Ray 2.0/0.9/2.2/2.0mm / Rear: Race 2.0/1.25/2.25/2.0mm | Aero | Black ED Coated Stainless | Black Brass 14mm Nipples |
SPOKES Sapim Race Race 2.0/1.8/2.0mm | Double Butted | Black ED Coated Stainless | Black Brass 14mm Nipples |
SPOKES Sapim Race Race 2.0/1.8/2.0mm | Double Butted | Black ED Coated Stainless | Black Brass 14mm Nipples |
SPOKES |
|
RIMS |
RIMS Crankbrothers Synthesis 11 - Carbon Front 31.5mm / Rear 29.5mm Internal Width | Tubeless Ready | Black with Grey Graphics |
RIMS Crankbrothers Synthesis Enduro - Alloy Front 31.5mm / Rear 29.5mm Internal Width | Tubeless Ready | Black with Grey Graphics |
RIMS Crankbrothers Synthesis Enduro - Alloy Front 31.5mm / Rear 29.5mm Internal Width | Tubeless Ready | Black with Grey Graphics |
RIMS |
|
FRONT TIRE |
FRONT TIRE Maxxis Assegai - 3C Maxx Grip - EXO+ 29 x 2.5 | 3C MaxxGrip Rubber Compound | 60tpi | Folding | Tubeless Ready | EXO+ Casing |
FRONT TIRE Maxxis Assegai - 3C Maxx Grip - EXO+ 29 x 2.5 | 3C MaxxGrip Rubber Compound | 60tpi | Folding | Tubeless Ready | EXO+ Casing |
FRONT TIRE Maxxis Assegai - 3C Maxx Grip - EXO+ 29 x 2.5 | 3C MaxxGrip Rubber Compound | 60tpi | Folding | Tubeless Ready | EXO+ Casing |
FRONT TIRE |
|
REAR TIRE |
REAR TIRE Maxxis DHRII - 3C MaxxTerra - Double Down 29/27.5 x 2.4 | 3C MaxxTerra Rubber Compound | 120tpi | Folding | Tubeless Ready | Double Down Casing |
REAR TIRE Maxxis DHRII - 3C MaxxTerra - Double Down 29/27.5 x 2.4 | 3C MaxxTerra Rubber Compound | 120tpi | Folding | Tubeless Ready | Double Down Casing |
REAR TIRE Maxxis DHRII - 3C MaxxTerra - Double Down 29/27.5 x 2.4 | 3C MaxxTerra Rubber Compound | 120tpi | Folding | Tubeless Ready | Double Down Casing |
REAR TIRE |
|
Included |
Included Stans Sealant - 200ml |
Included Stans Sealant - 200ml |
Included Stans Sealant - 200ml |
Included 29" (0mm Offset) and 27.5" (0mm Offset) Dropouts |
|
Included |
Included SRAM AXS EP Powerpack 1 Battery |
Included SRAM AXS EP Powerpack 1 Battery |
Included SRAM AXS EP Powerpack 1 Battery |
Included SRAM Universal Derailleur Hanger |
*Please note: we make every effort to ensure accuracy of the Spec Information, but they are subject to change.
*Please note: we make every effort to ensure accuracy of the Spec Information, but they are subject to change.
Size Guide
Size Guide
S1
S1
S2
S2
S3
S3
S4
S4
5'2
158cm
5'6
168cm
5'6
168cm
5'10
178cm
5'10
178cm
6'2
188cm
6'2
188cm
6'6
198cm
29" Geometry
29" Geometry
| Fork Size 170mm | S1 | S2 | S3 | S4 | |
|---|---|---|---|---|---|
| A | Reach | 435 | 455 | 475 | 495 |
| B | Stack | 615 | 628 | 642 | 655 |
| C | Hori. Top Tube Length | 571 | 594 | 617 | 640 |
| D | Seat Tube Length | 400 | 420 | 440 | 470 |
| E | Seat Tube Angle (Effective) | 77.5 | 77.5 | 77.5 | 77.5 |
| F | Seat Tube Angle (Actual) | 74.5 | 76.3 | 77.5 | 77.5 |
| G | Head Tube Length | 90 | 105 | 120 | 135 |
| H | Head Tube Angle | 63.5 | 63.5 | 63.5 | 63.5 |
| I | Front Center | 776 | 802 | 829 | 856 |
| J | Rear Center | 431 | 446 | 460 | 475 |
| K | Wheel base | 1206.5 | 1247.7 | 1288.9 | 1330.1 |
| L | BB Drop | -26 | -26 | -26 | -26 |
| M | BB Height | 347 | 347 | 347 | 347 |
| N | Stand Over | 771 | 775 | 777 | 780 |
| O | Fork Length | 586 | 586 | 586 | 586 |
| P | Fork Offset | 44 | 44 | 44 | 44 |
MX Geometry
MX Geometry
| Fork Size 170mm | S1 | S2 | S3 | S4 | |
|---|---|---|---|---|---|
| A | Reach | 430 | 450 | 471 | 491 |
| B | Stack | 618 | 632 | 645 | 659 |
| C | Hori. Top Tube Length | 572 | 595 | 618 | 641 |
| D | Seat Tube Length | 400 | 420 | 440 | 470 |
| E | Seat Tube Angle (Effective) | 77.1 | 77.1 | 77.1 | 77.1 |
| F | Seat Tube Angle (Actual) | 74.1 | 75.8 | 77.1 | 77.1 |
| G | Head Tube Length | 90 | 105 | 120 | 135 |
| H | Head Tube Angle | 63.1 | 63.1 | 63.1 | 63.1 |
| I | Front Center | 775 | 802 | 829 | 855 |
| J | Rear Center | 431 | 446 | 460 | 475 |
| K | Wheel base | 1206.5 | 1247.6 | 1288.8 | 1330.0 |
| L | BB Drop | -19.6 | -19.6 | -19.6 | -19.6 |
| M | BB Height | 341 | 341 | 341 | 341 |
| N | Stand Over | 771 | 775 | 777 | 780 |
| O | Fork Length | 586 | 586 | 586 | 586 |
| P | Fork Offset | 44 | 44 | 44 | 44 |
Size Guide
29" Geometry
MX Geometry
The industry’s only TRULYPROPORTIONAL geometry.
The industry’s only TRULY PROPORTIONAL geometry.
Things You Should Know
Things You Should Know
Things YouShould Know
Things You Should Know
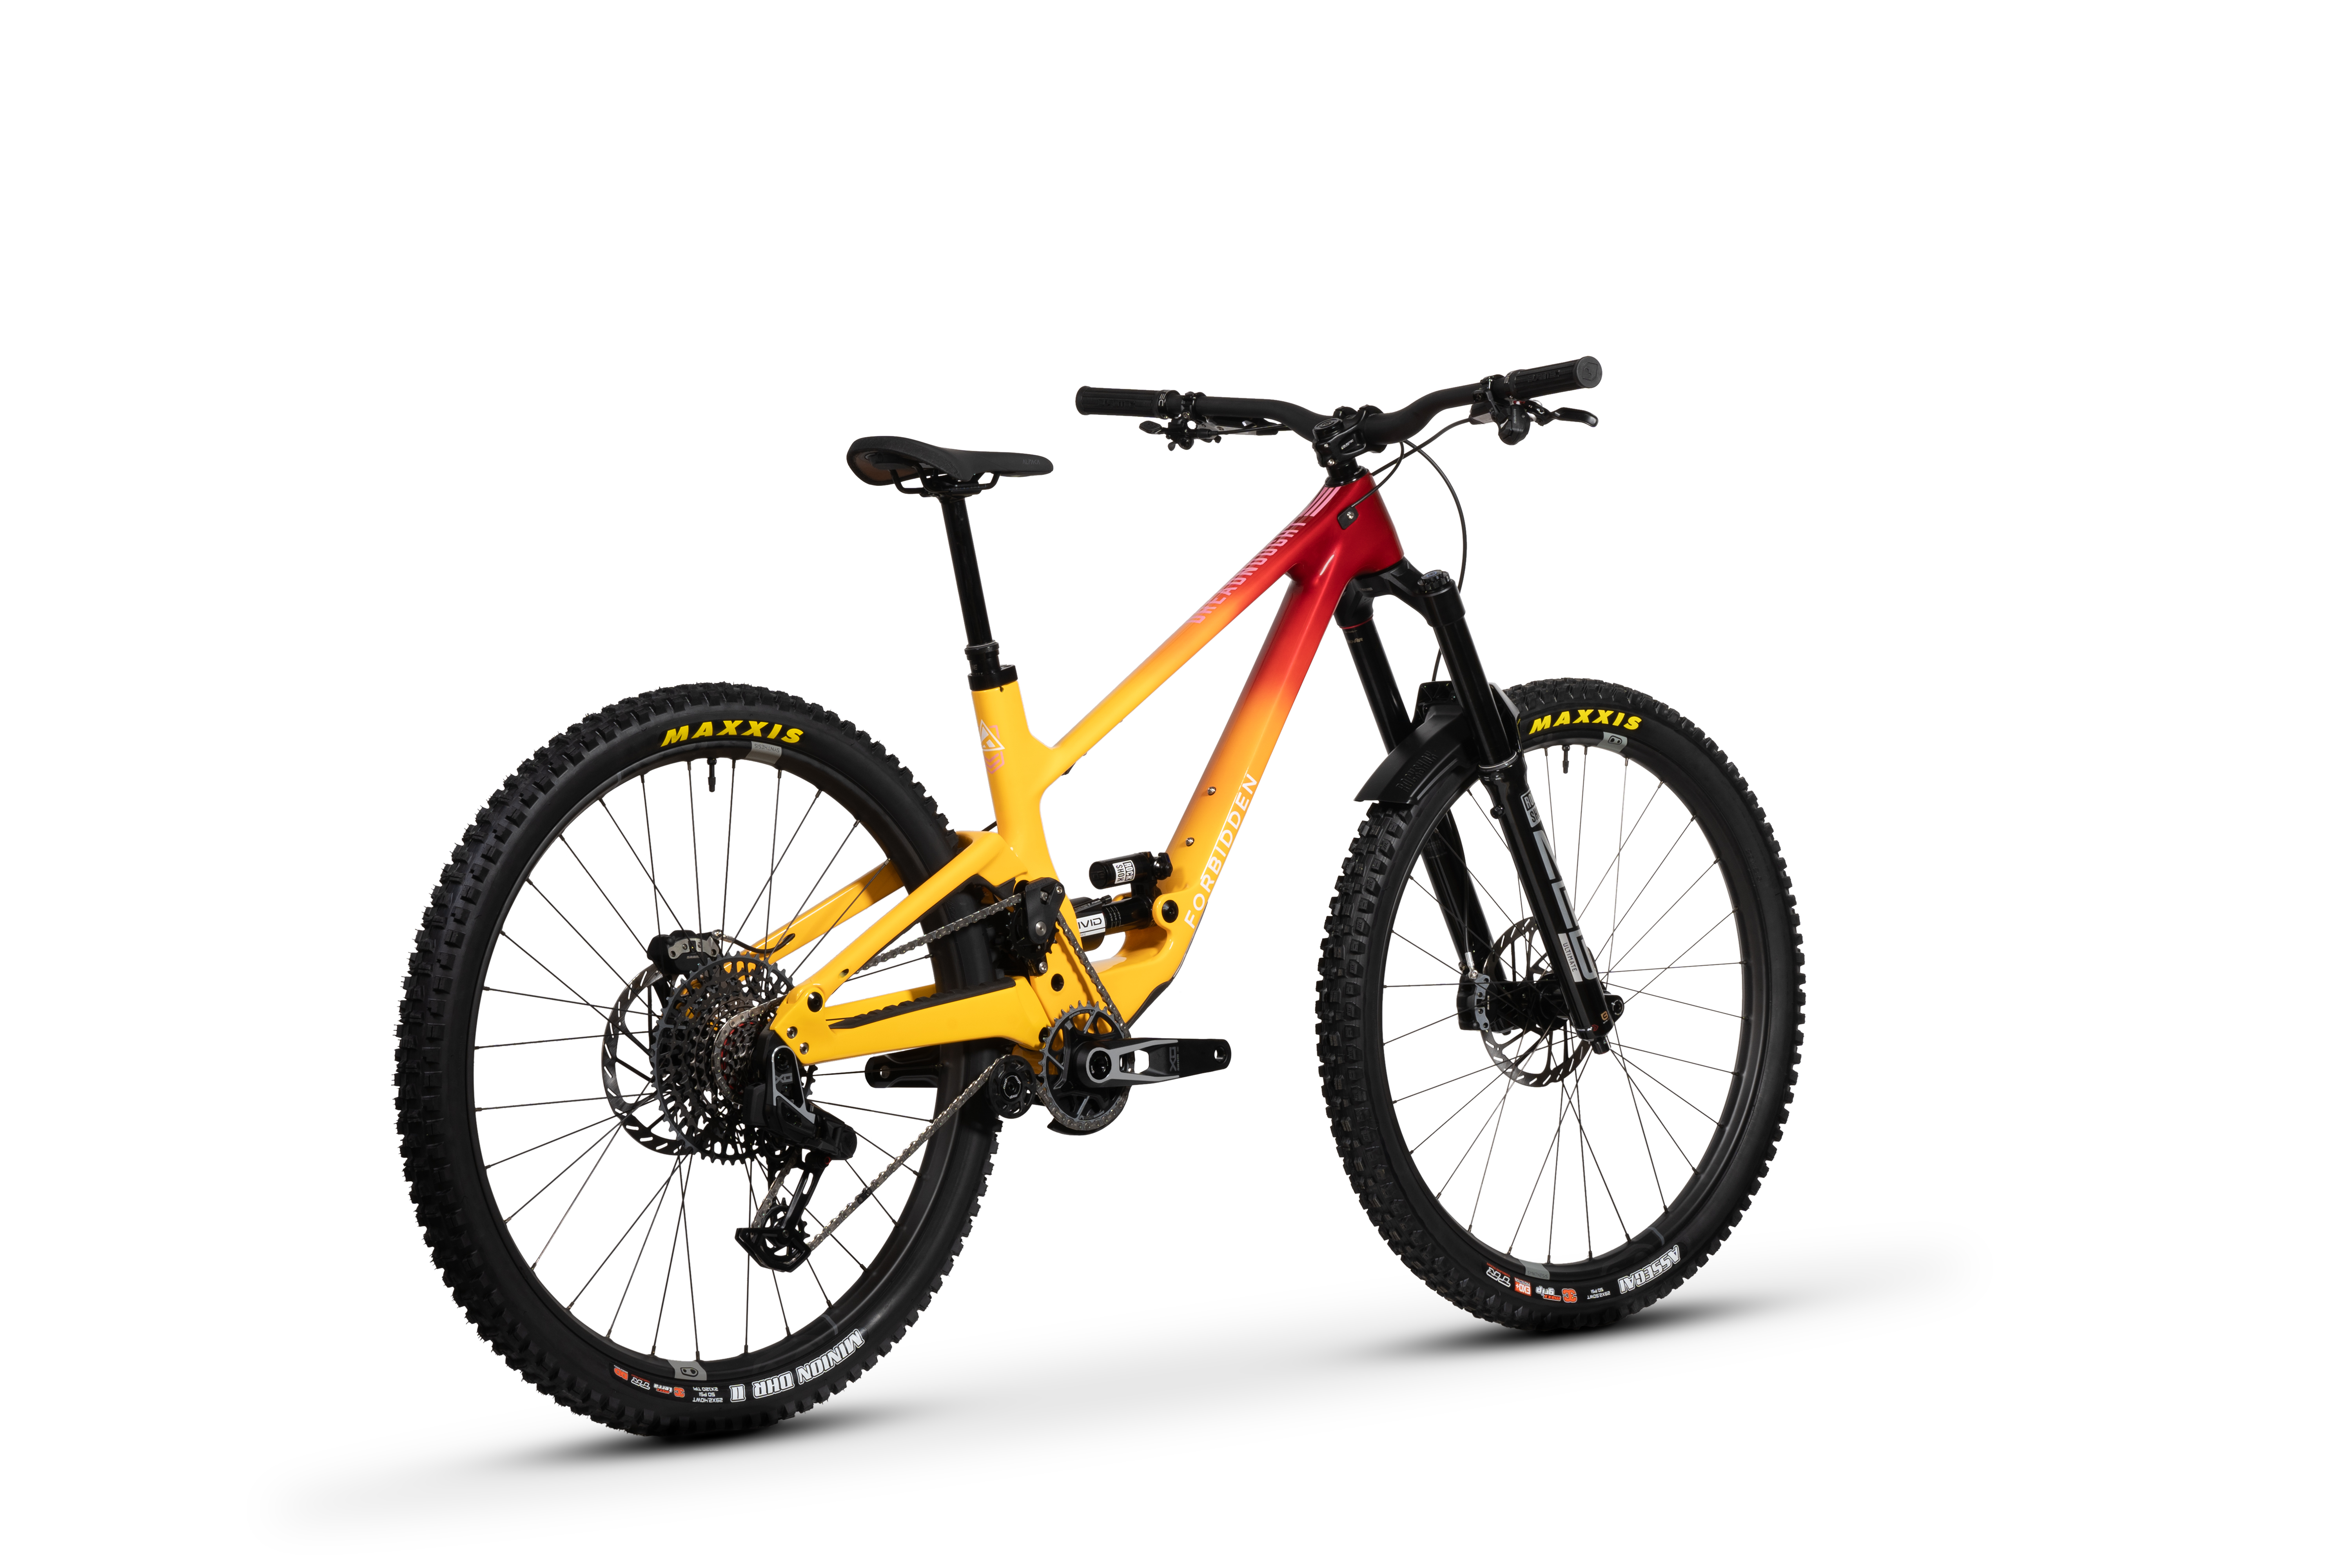
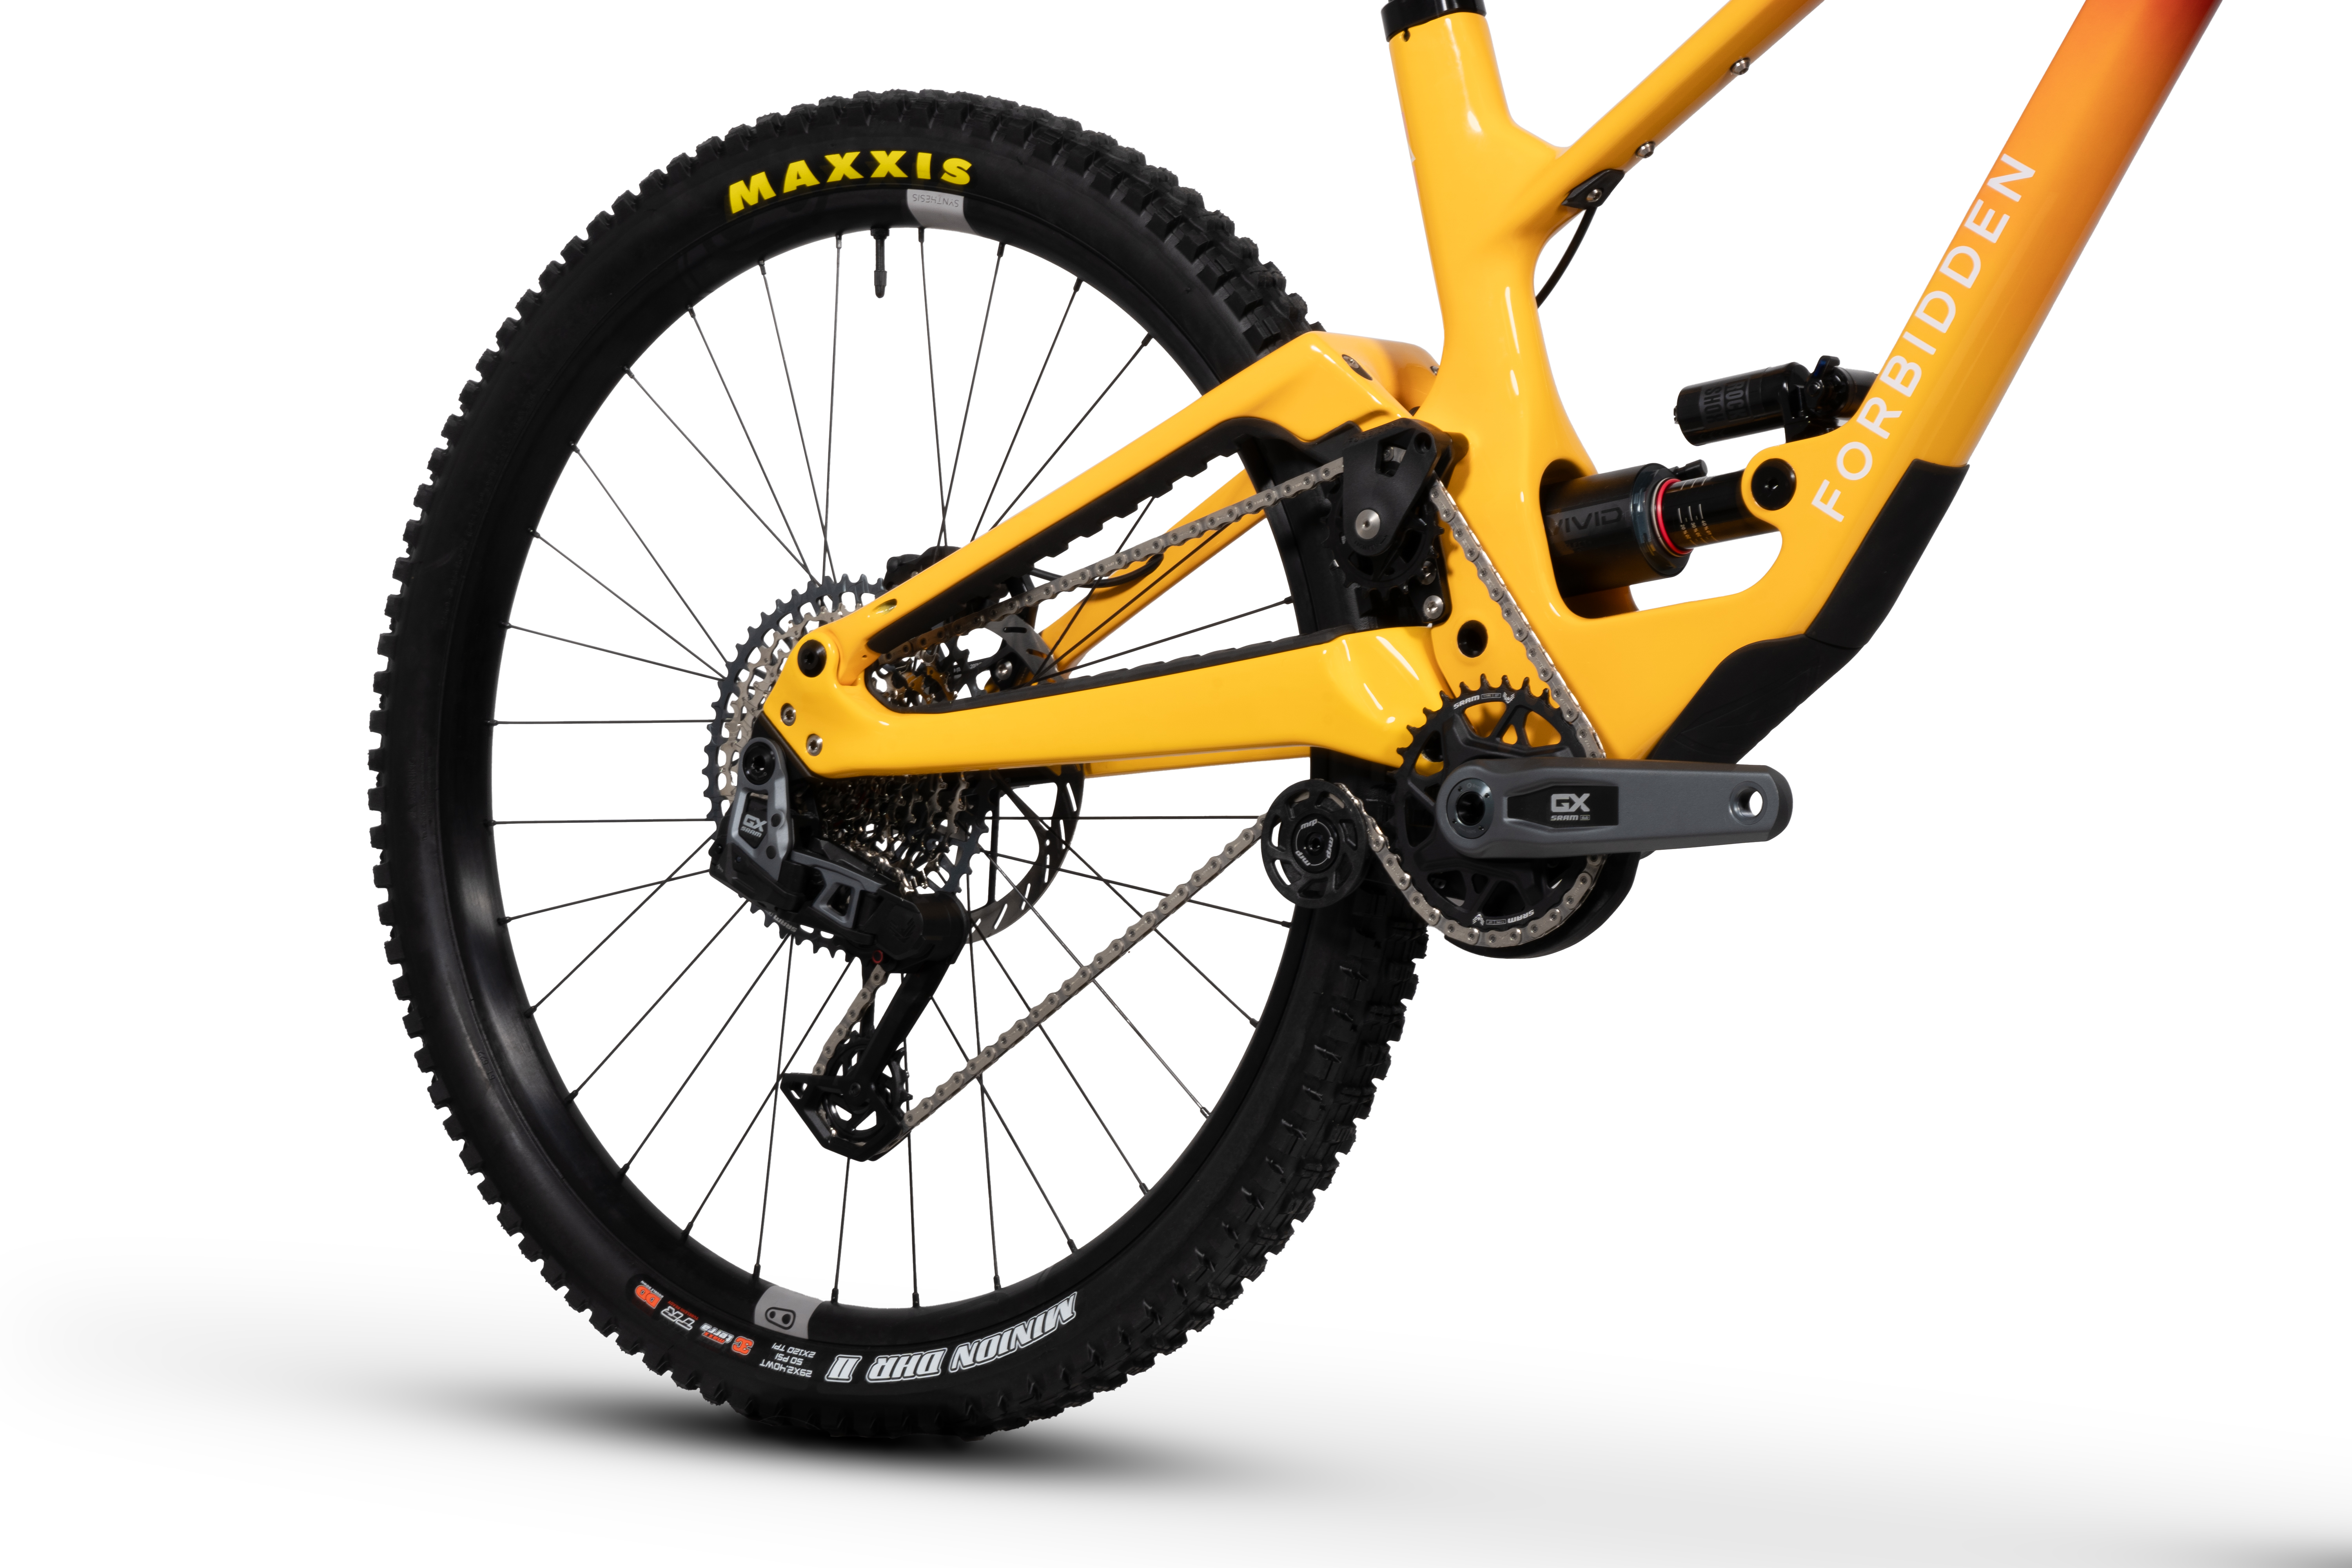
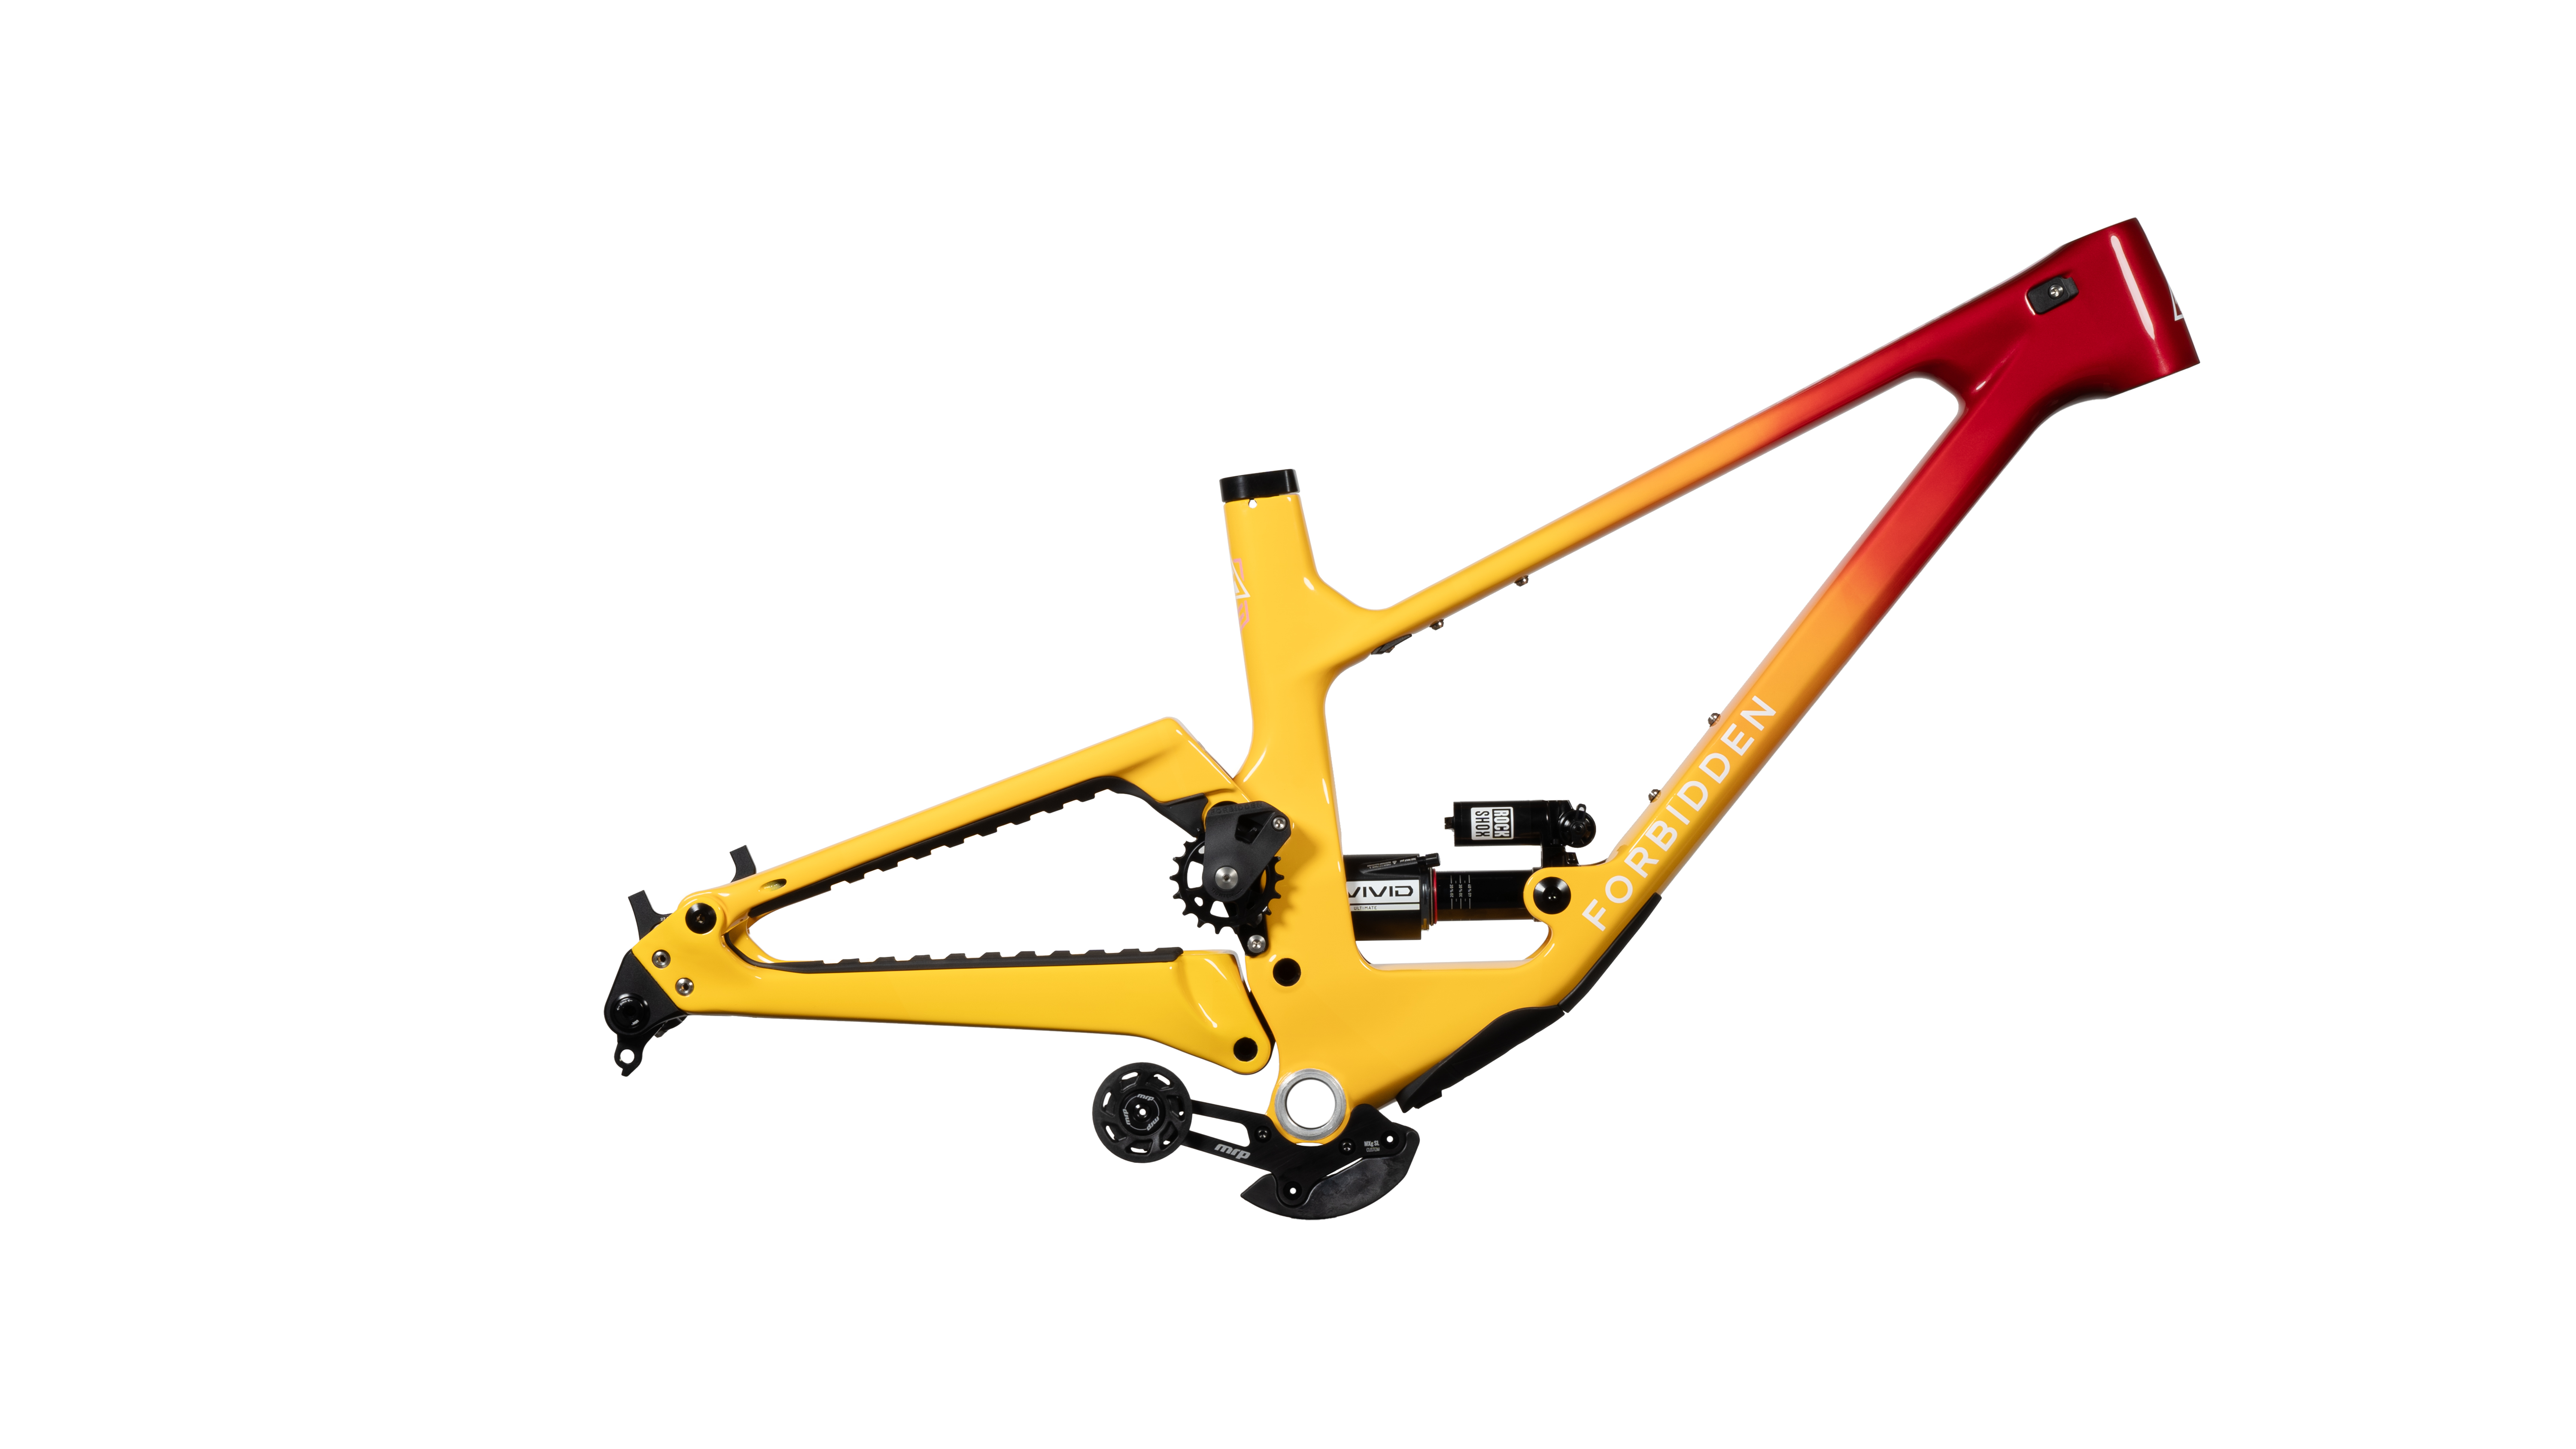
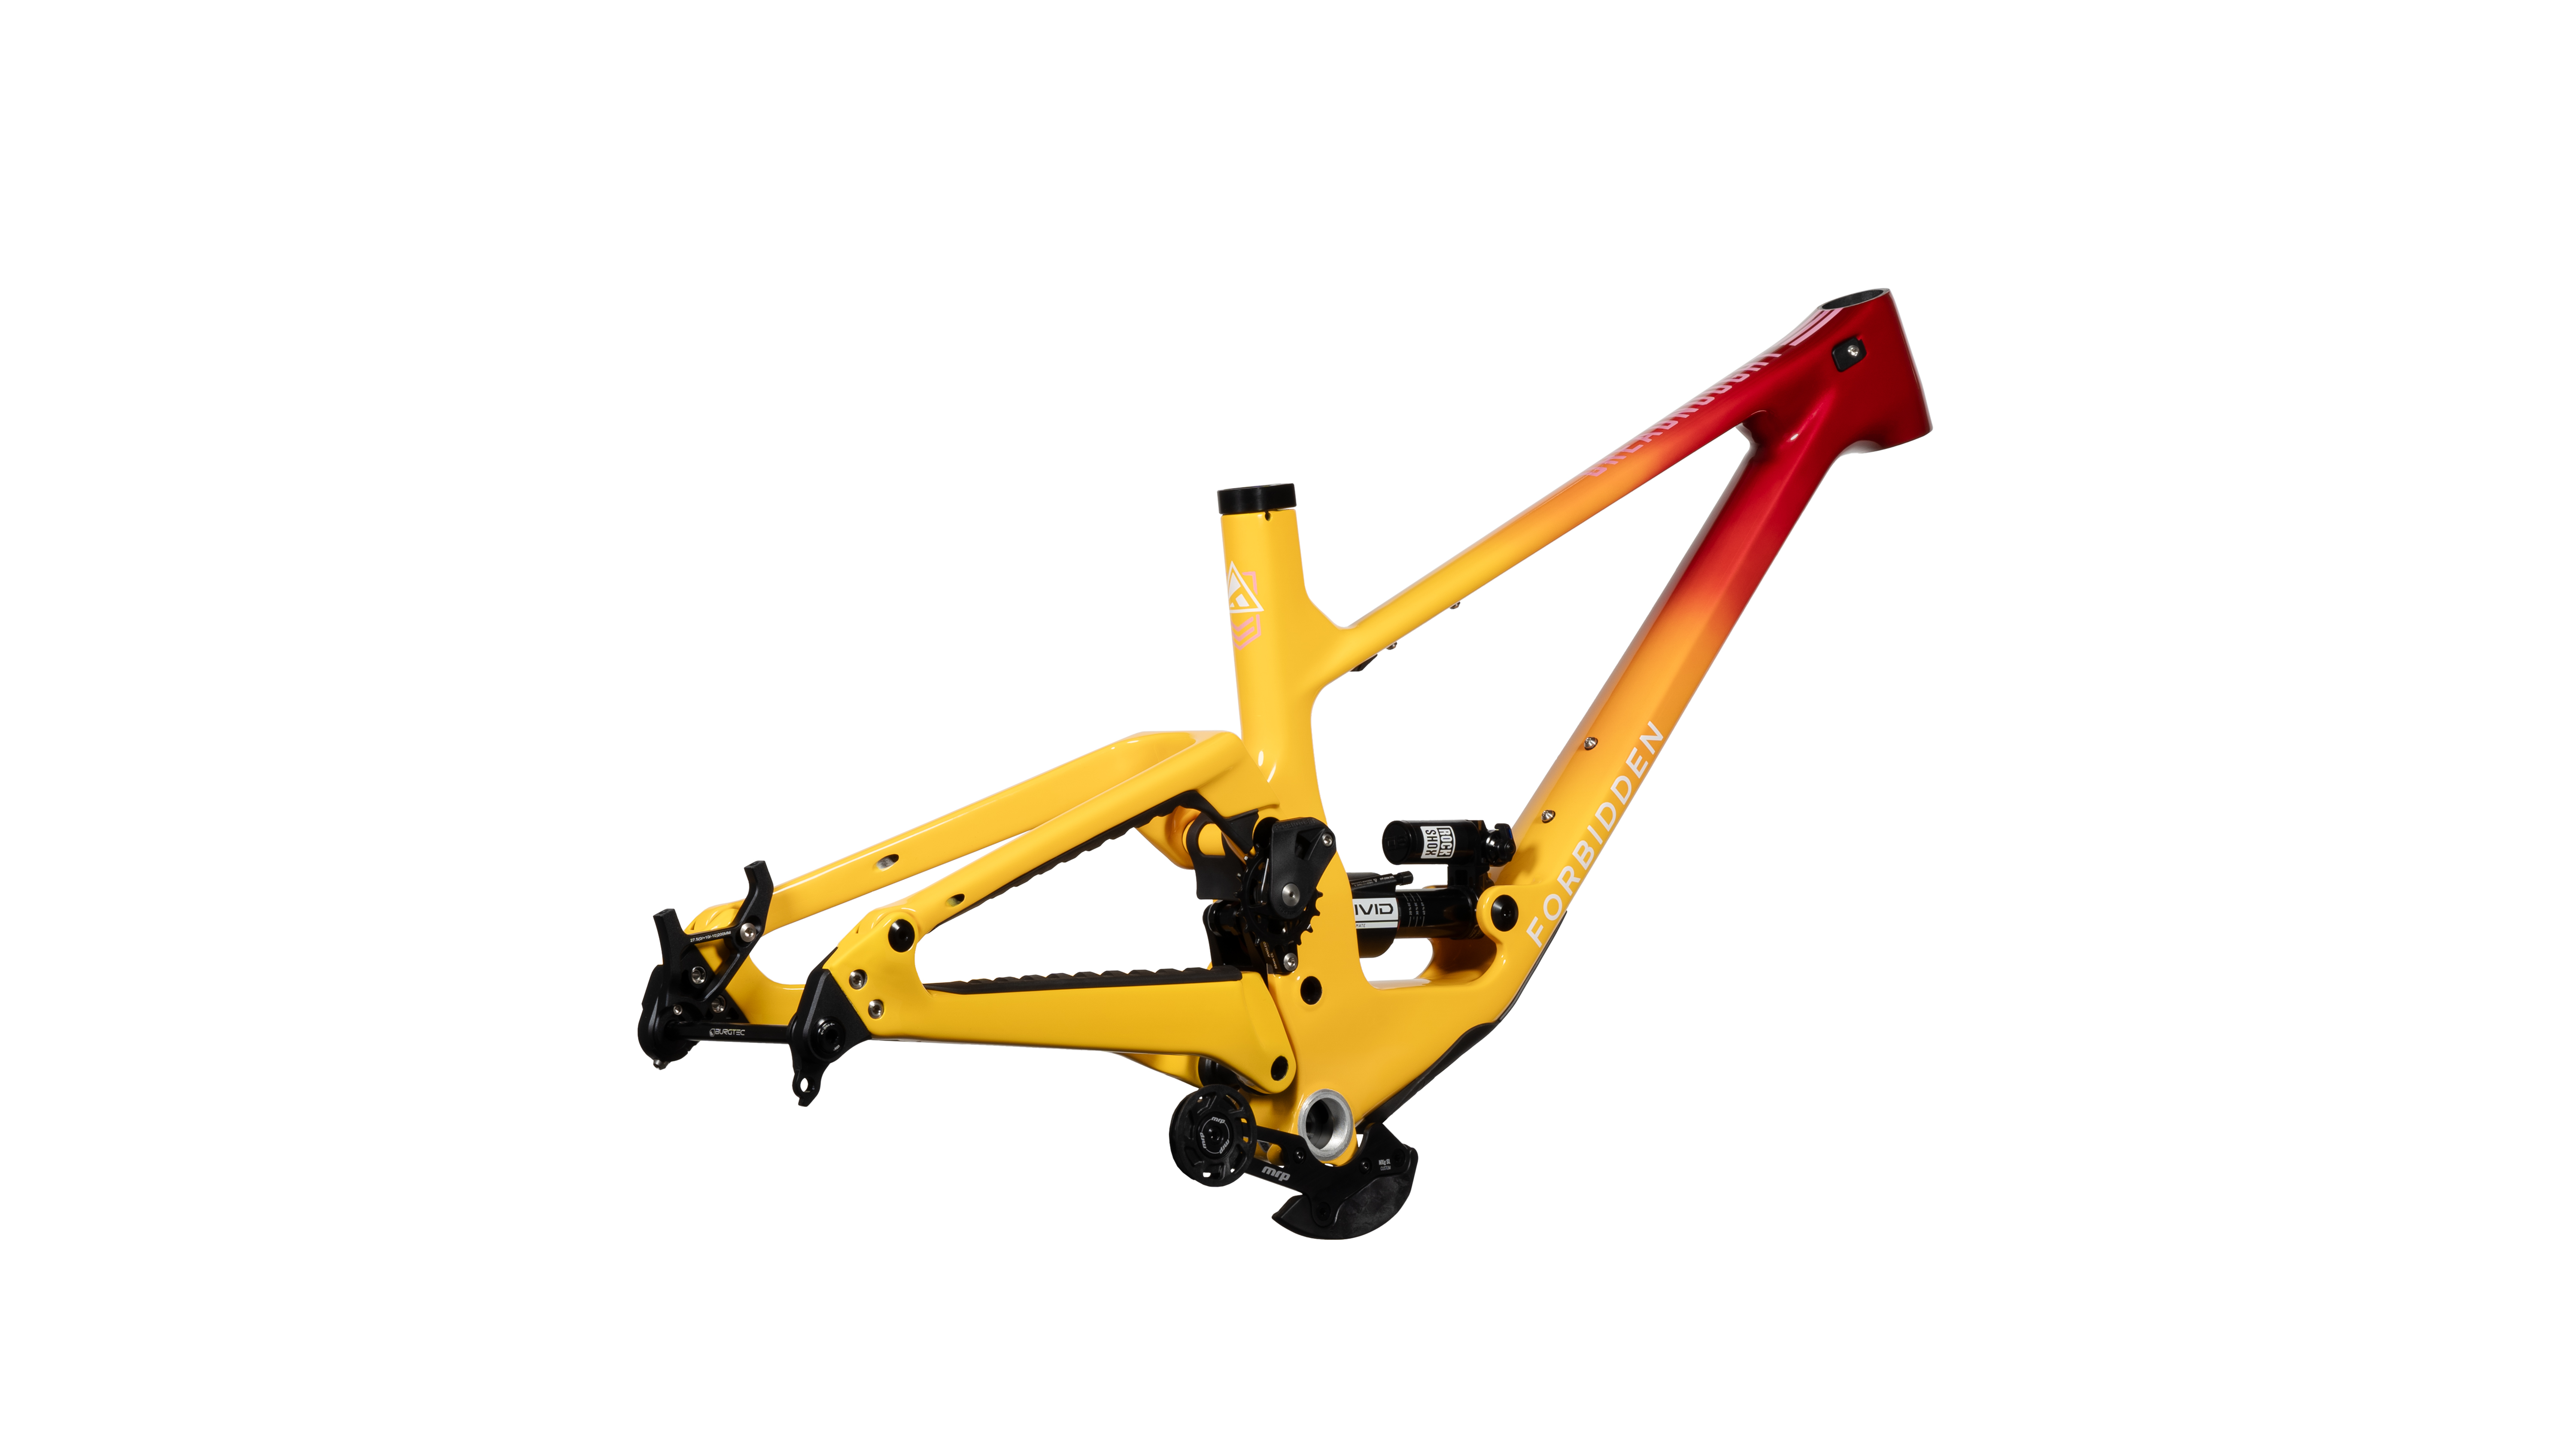
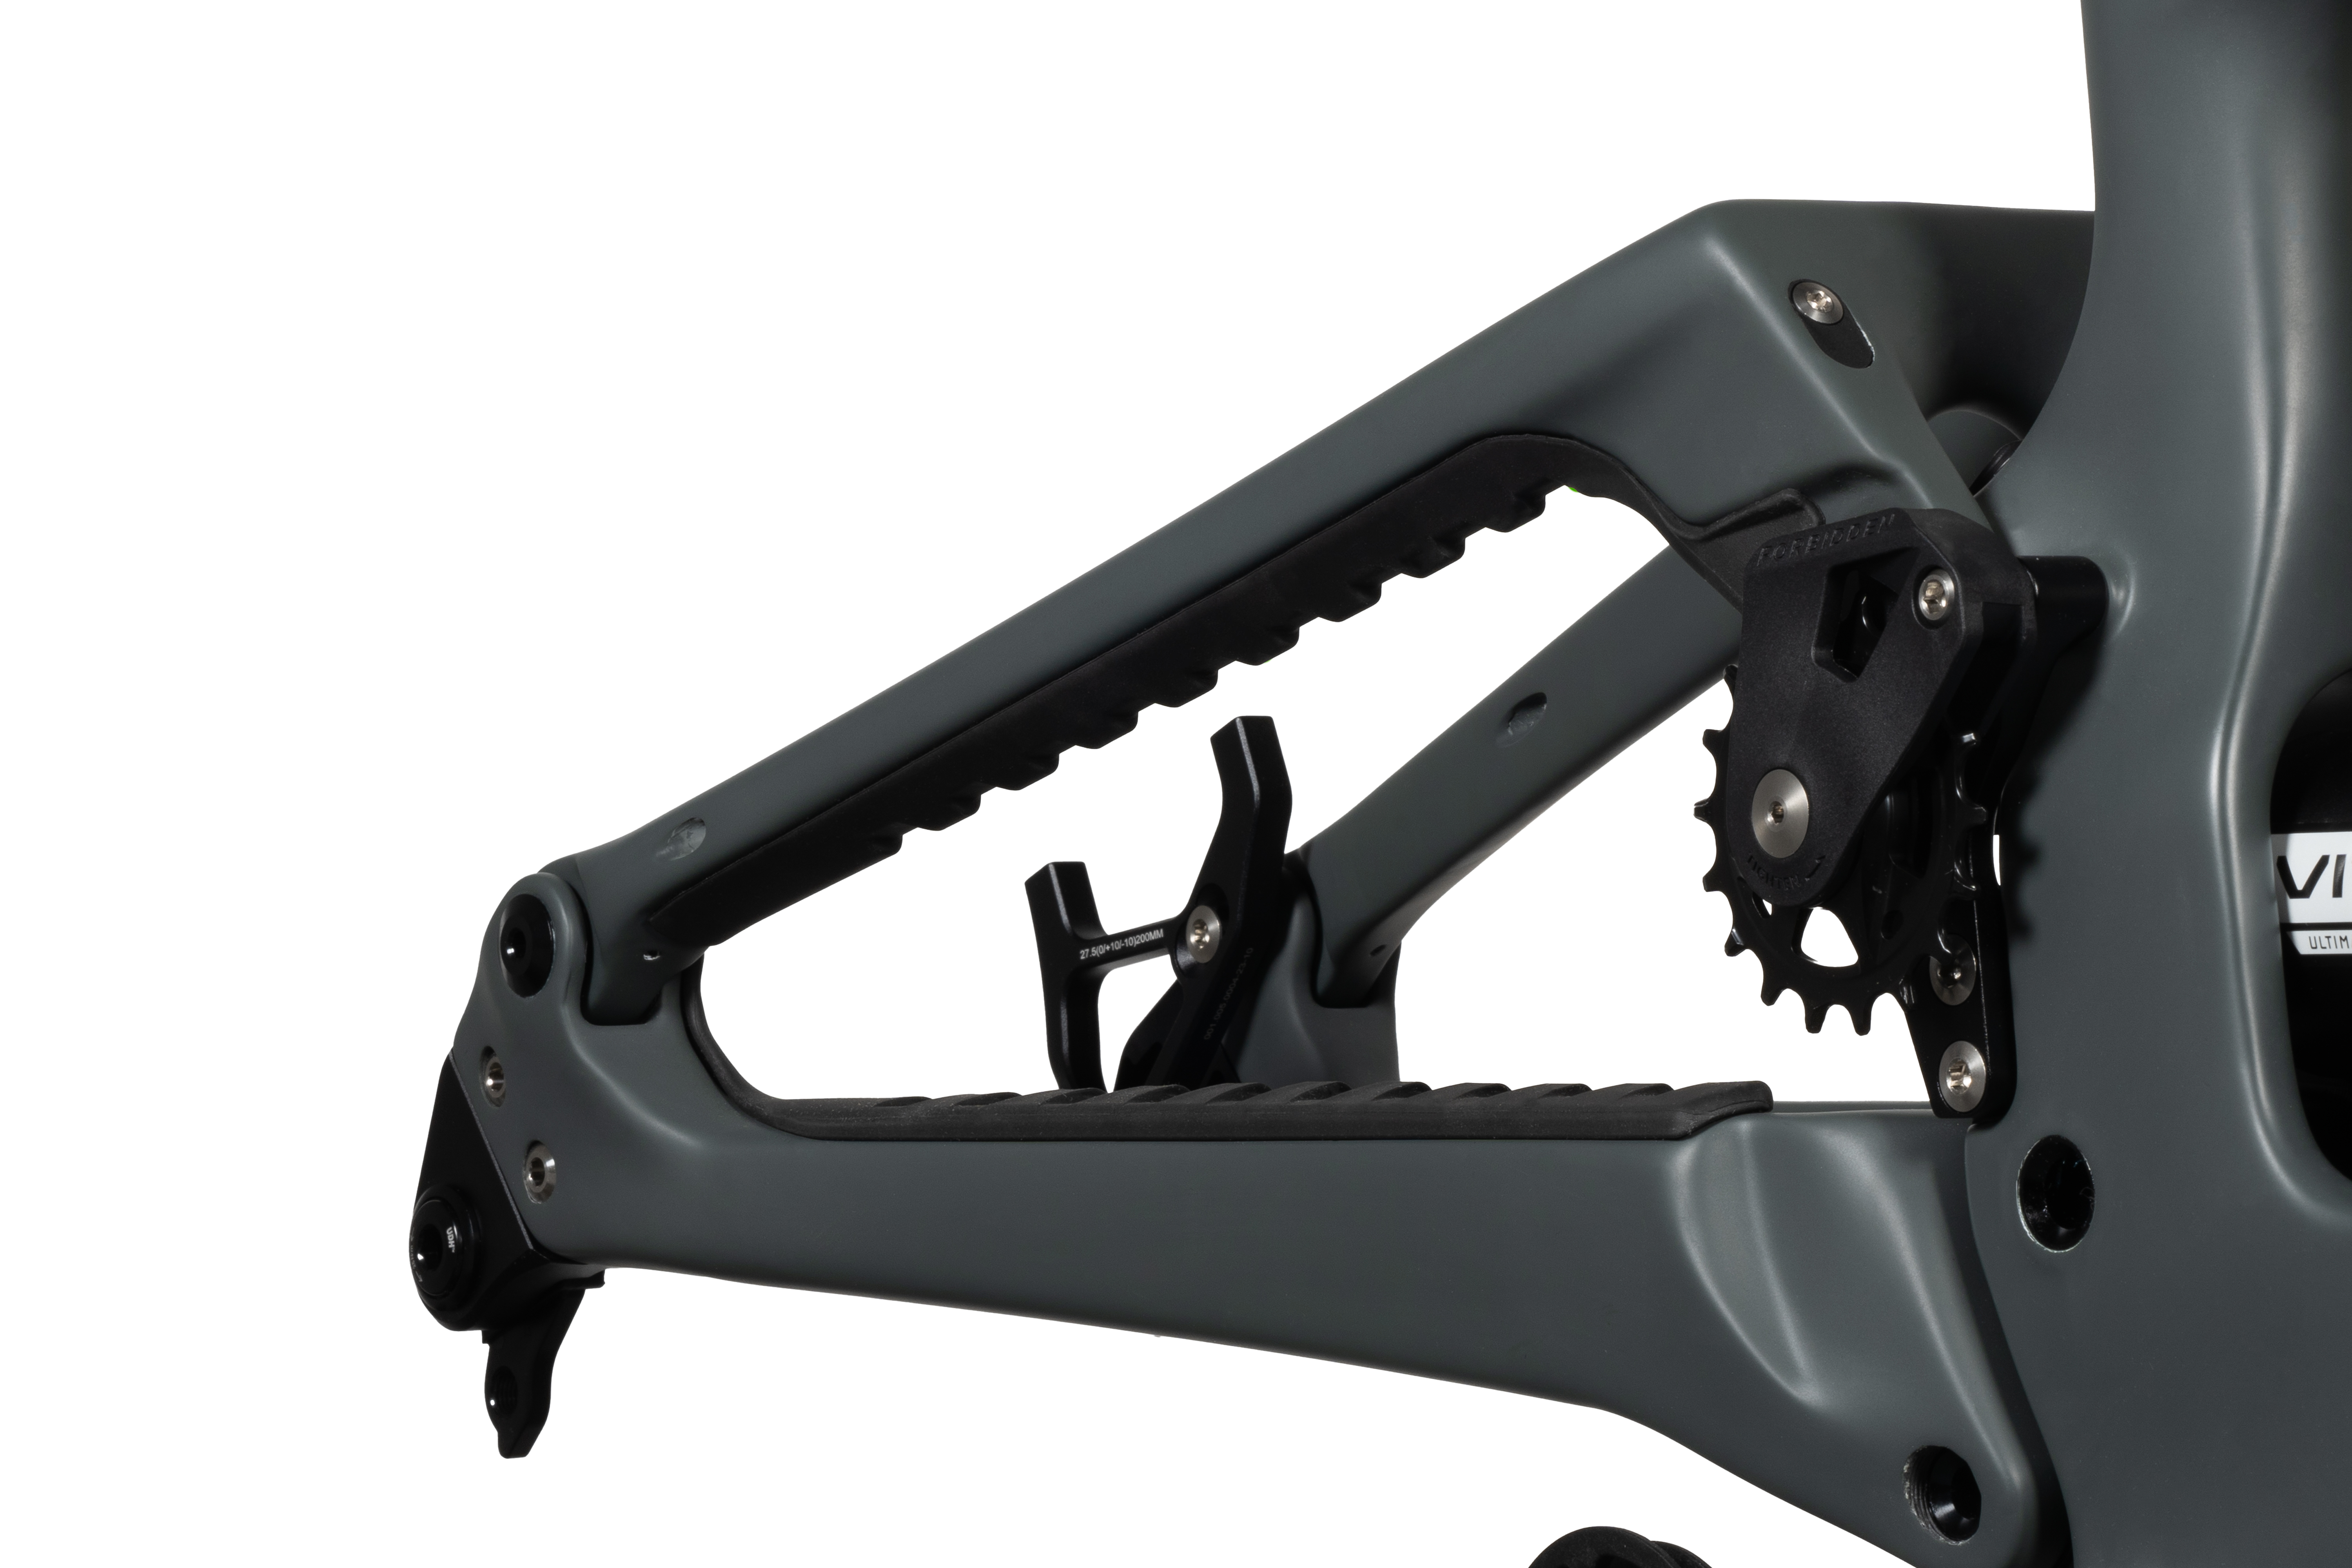
01 V2 Trifecta Layout
02 Hardware
03 Modular Dropouts
04 Cable Routing
05 Water Bottle Fitment
06 Frame Protection
07 Accessory Mount
08 Sensible Standards
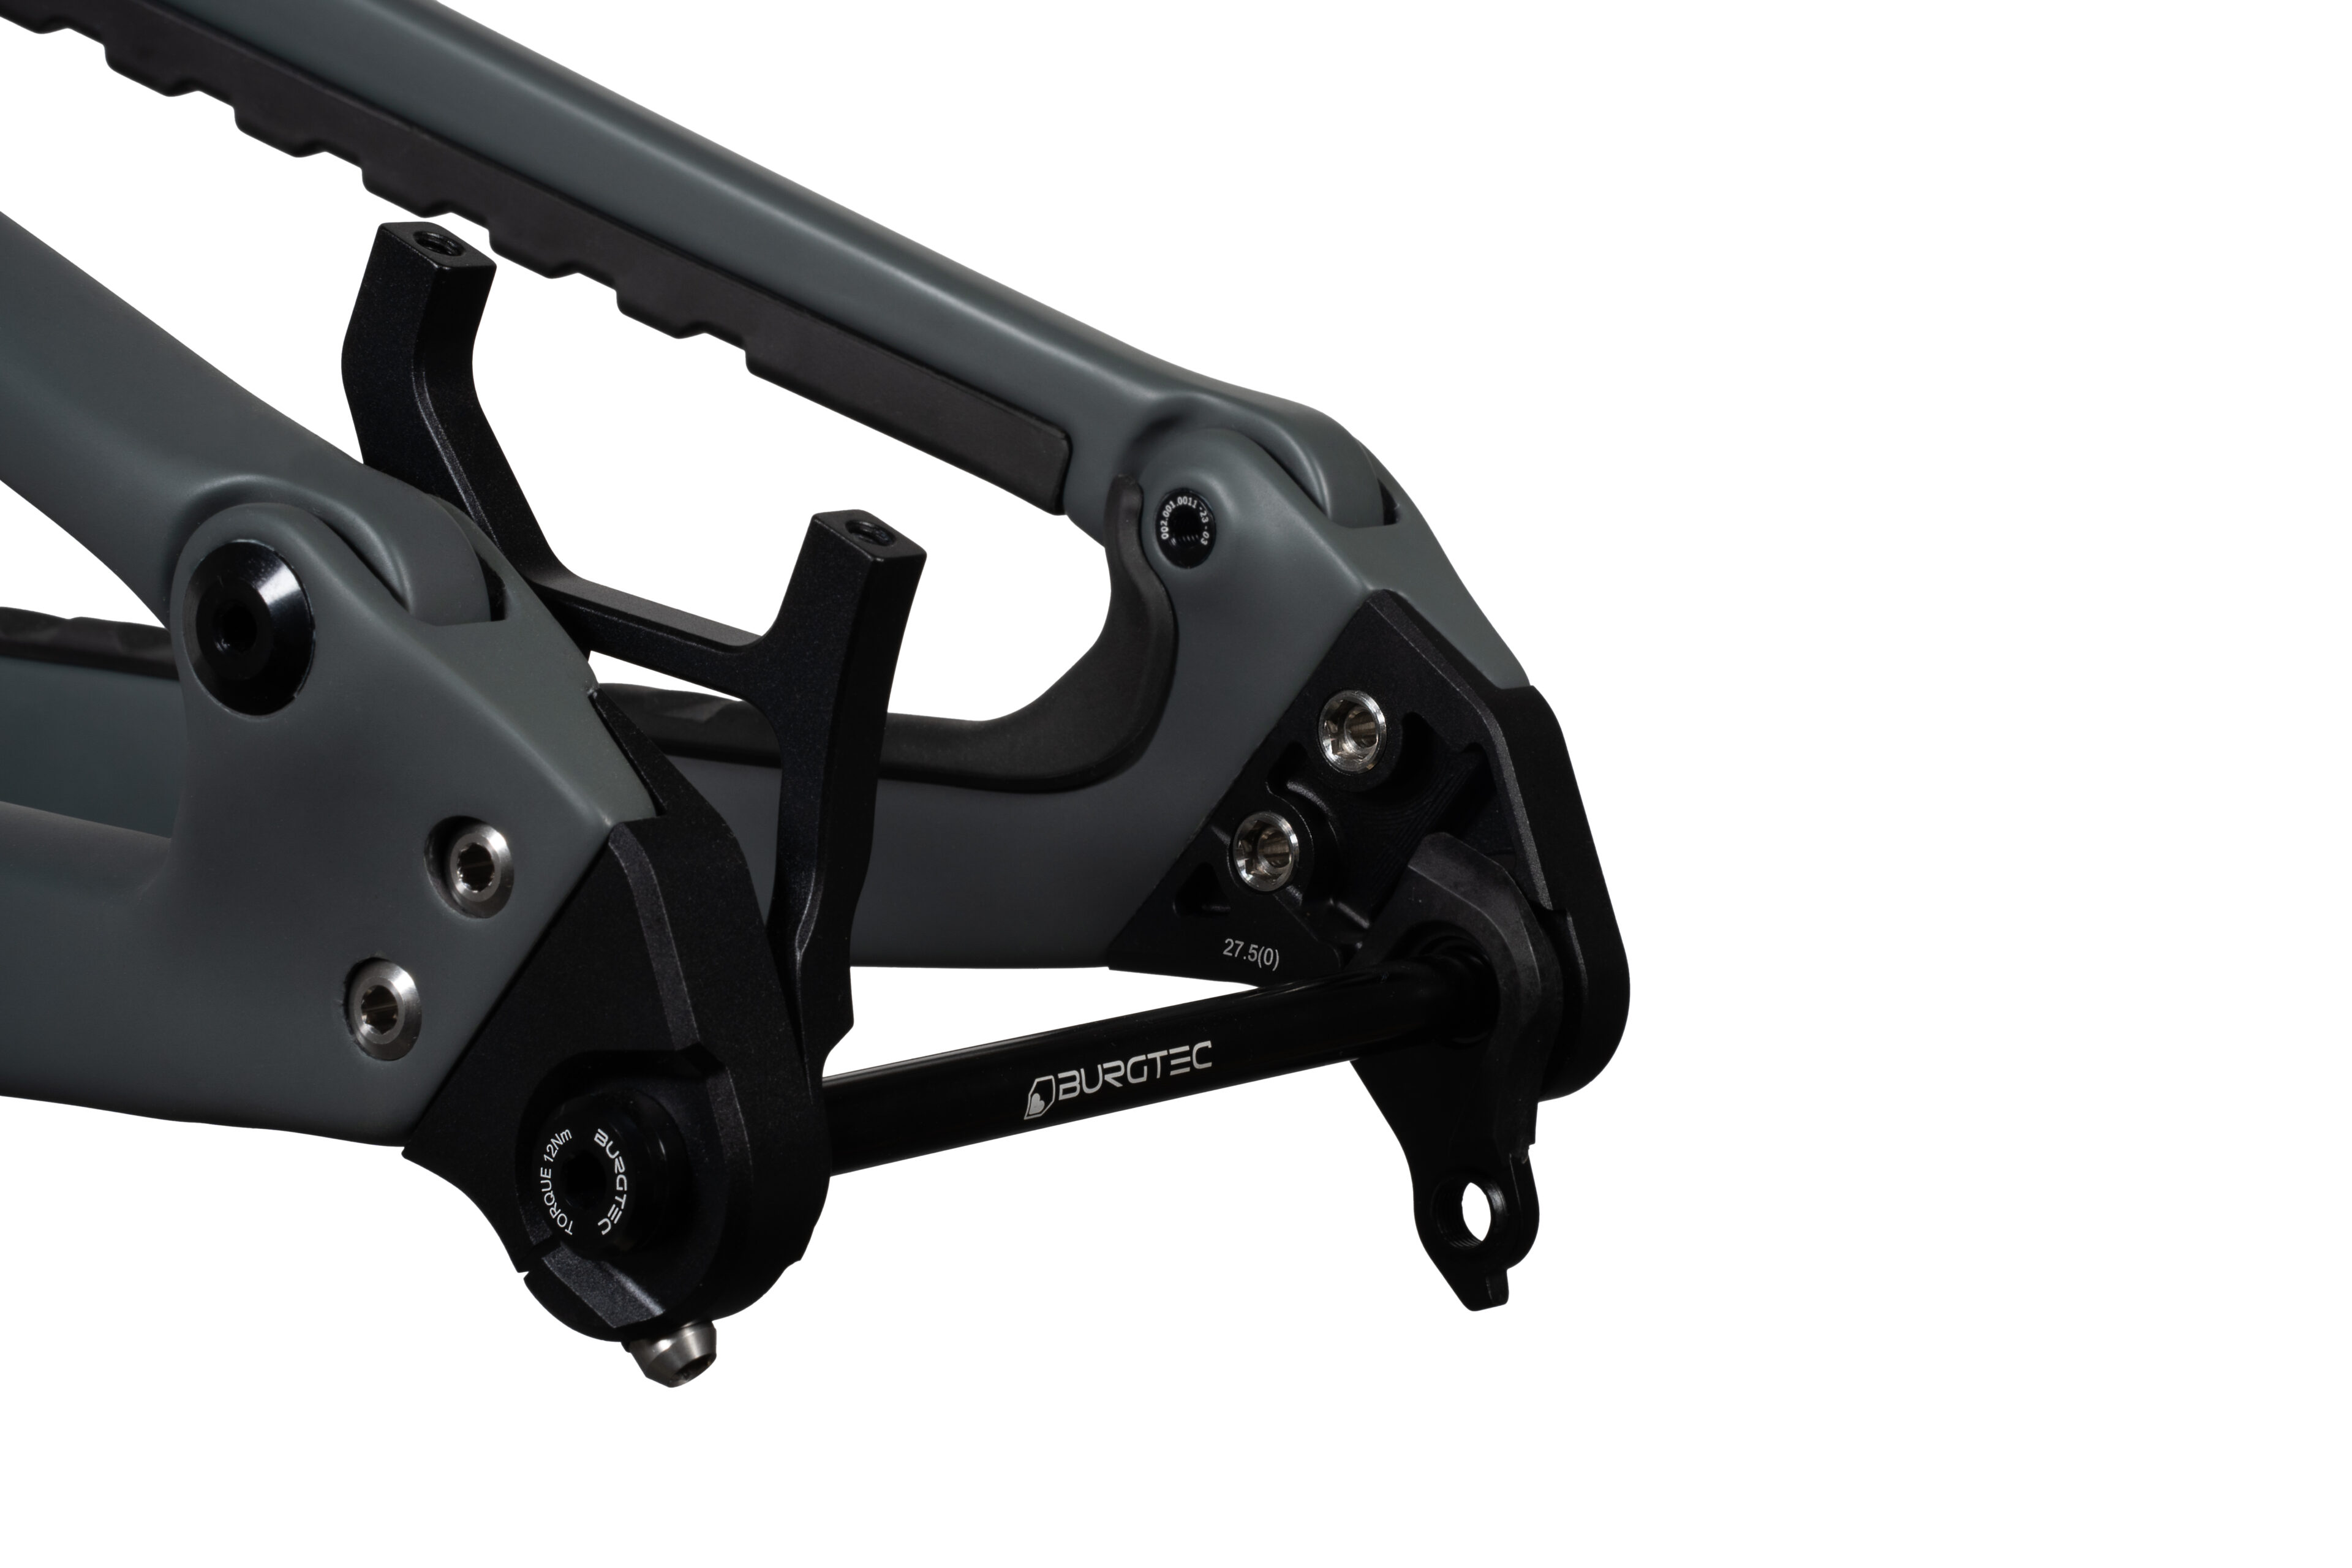
01
V2 Trifecta Layout
V2 Trifecta Layout
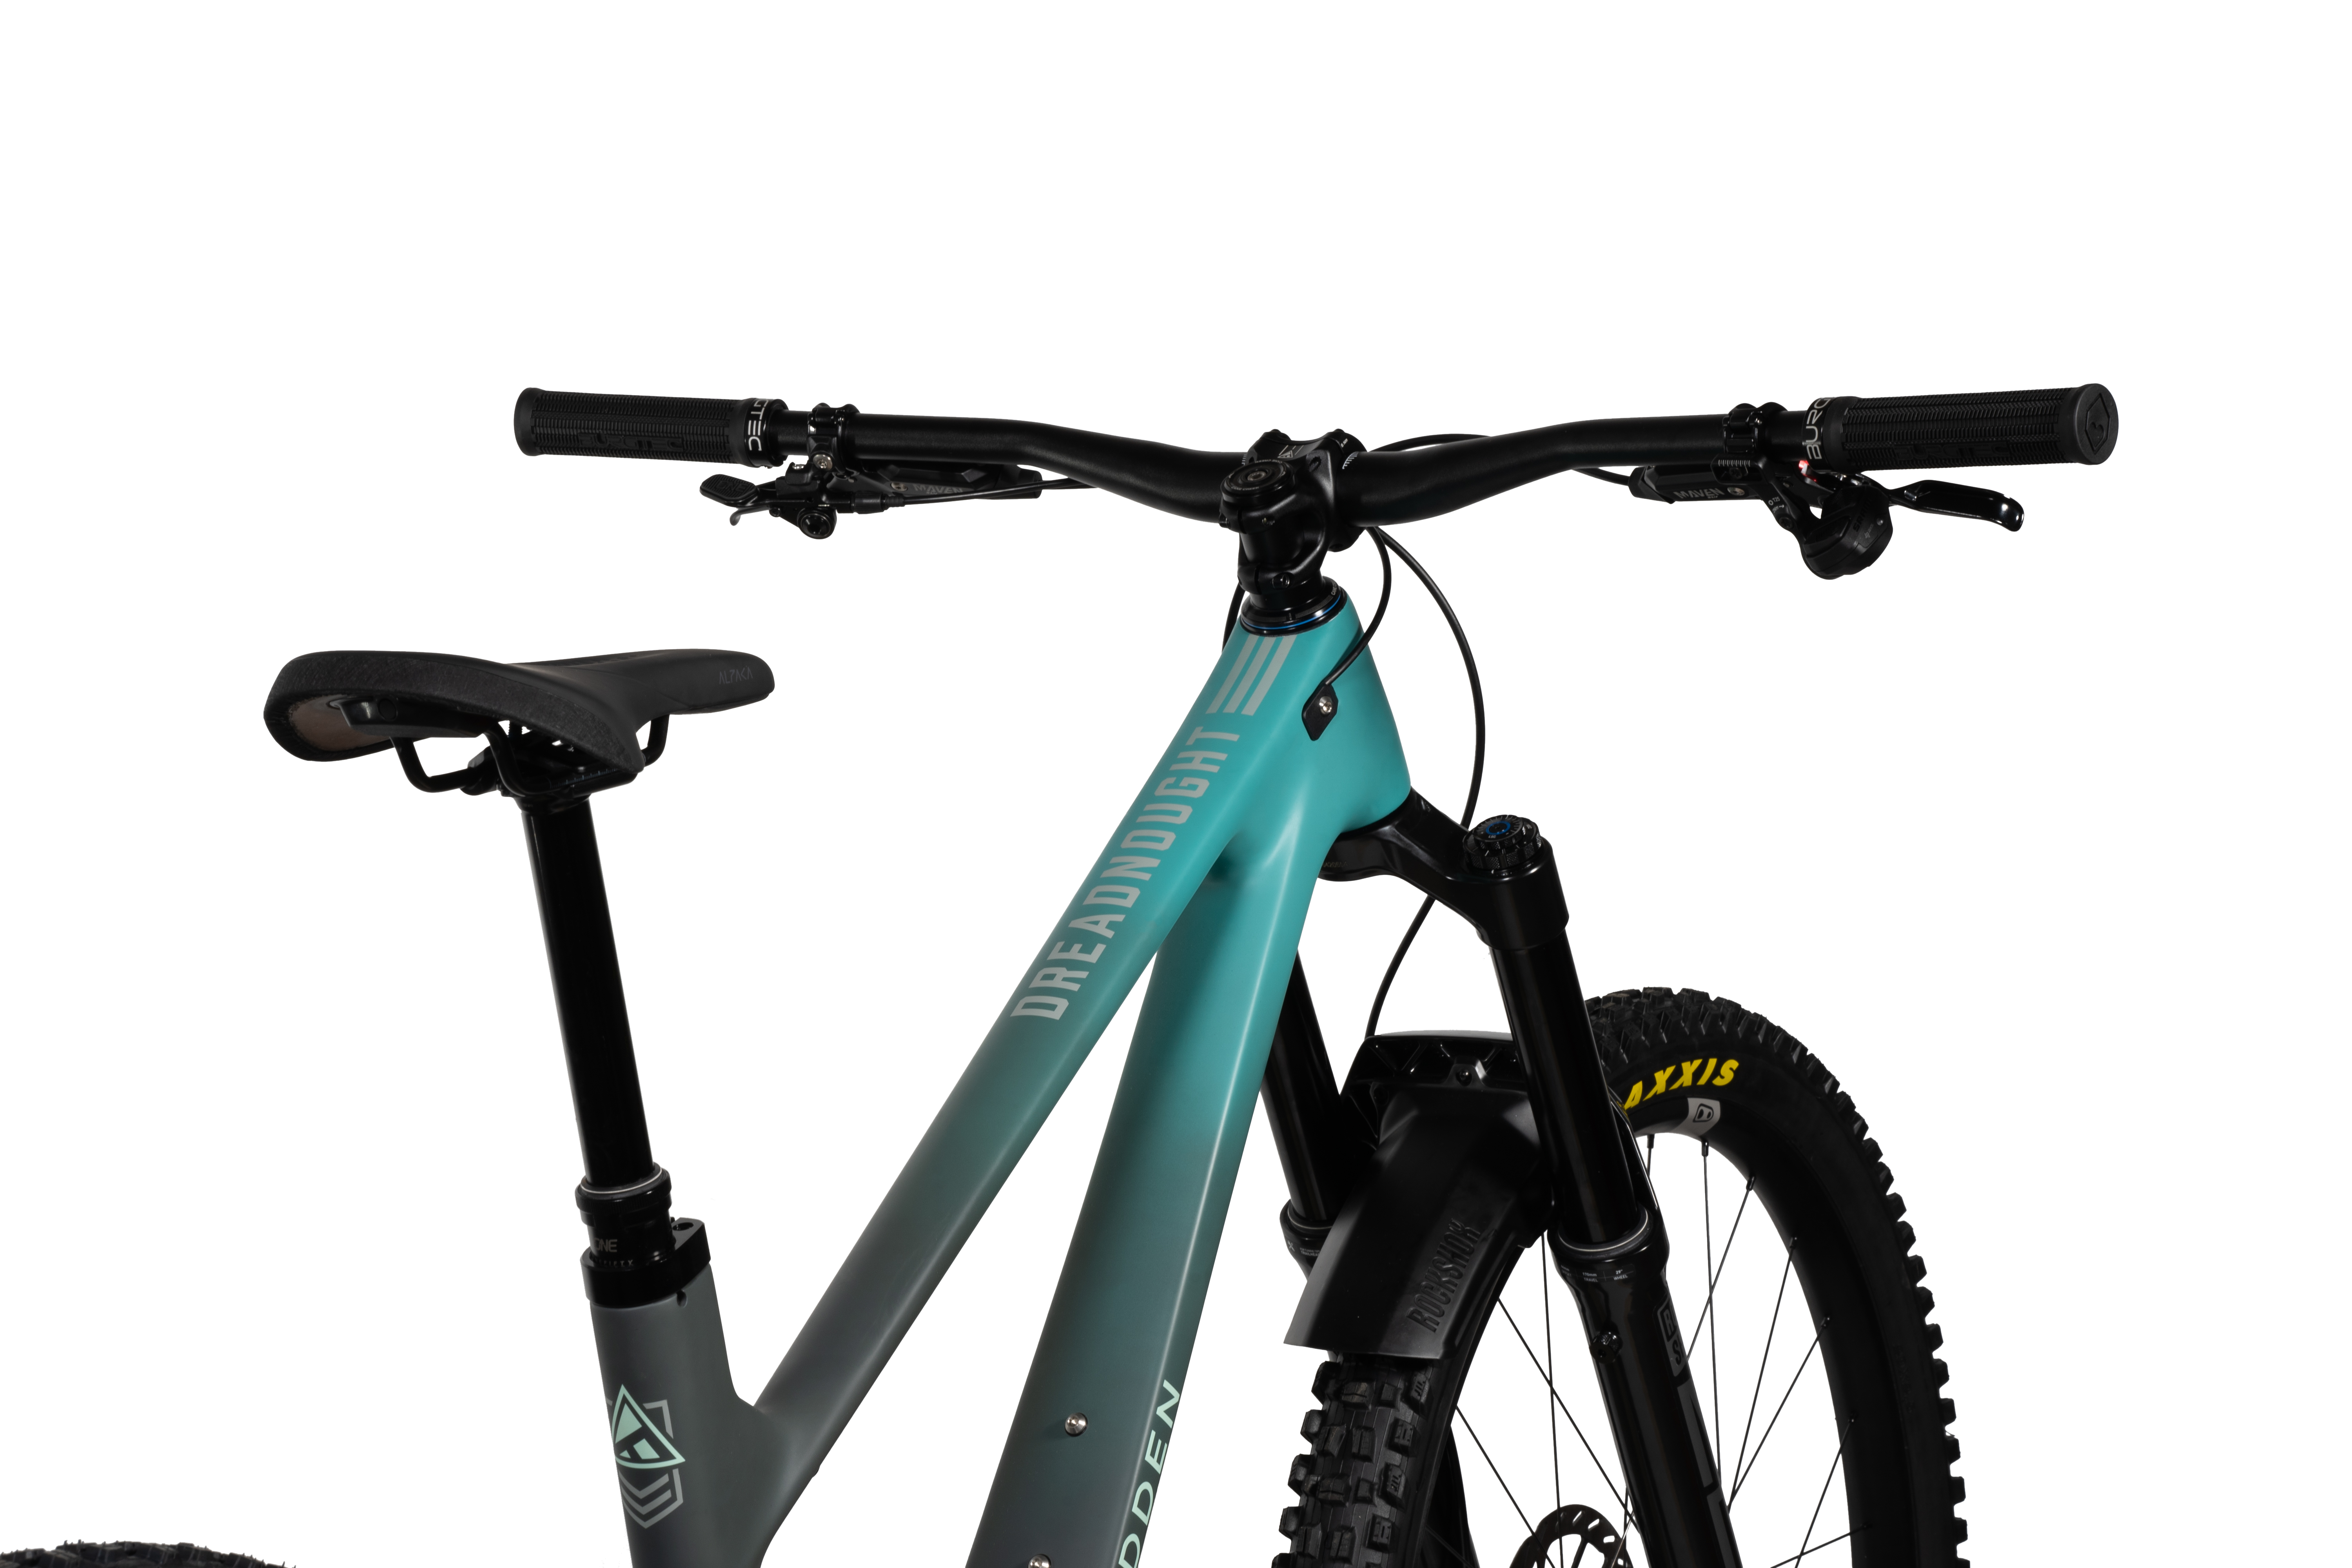
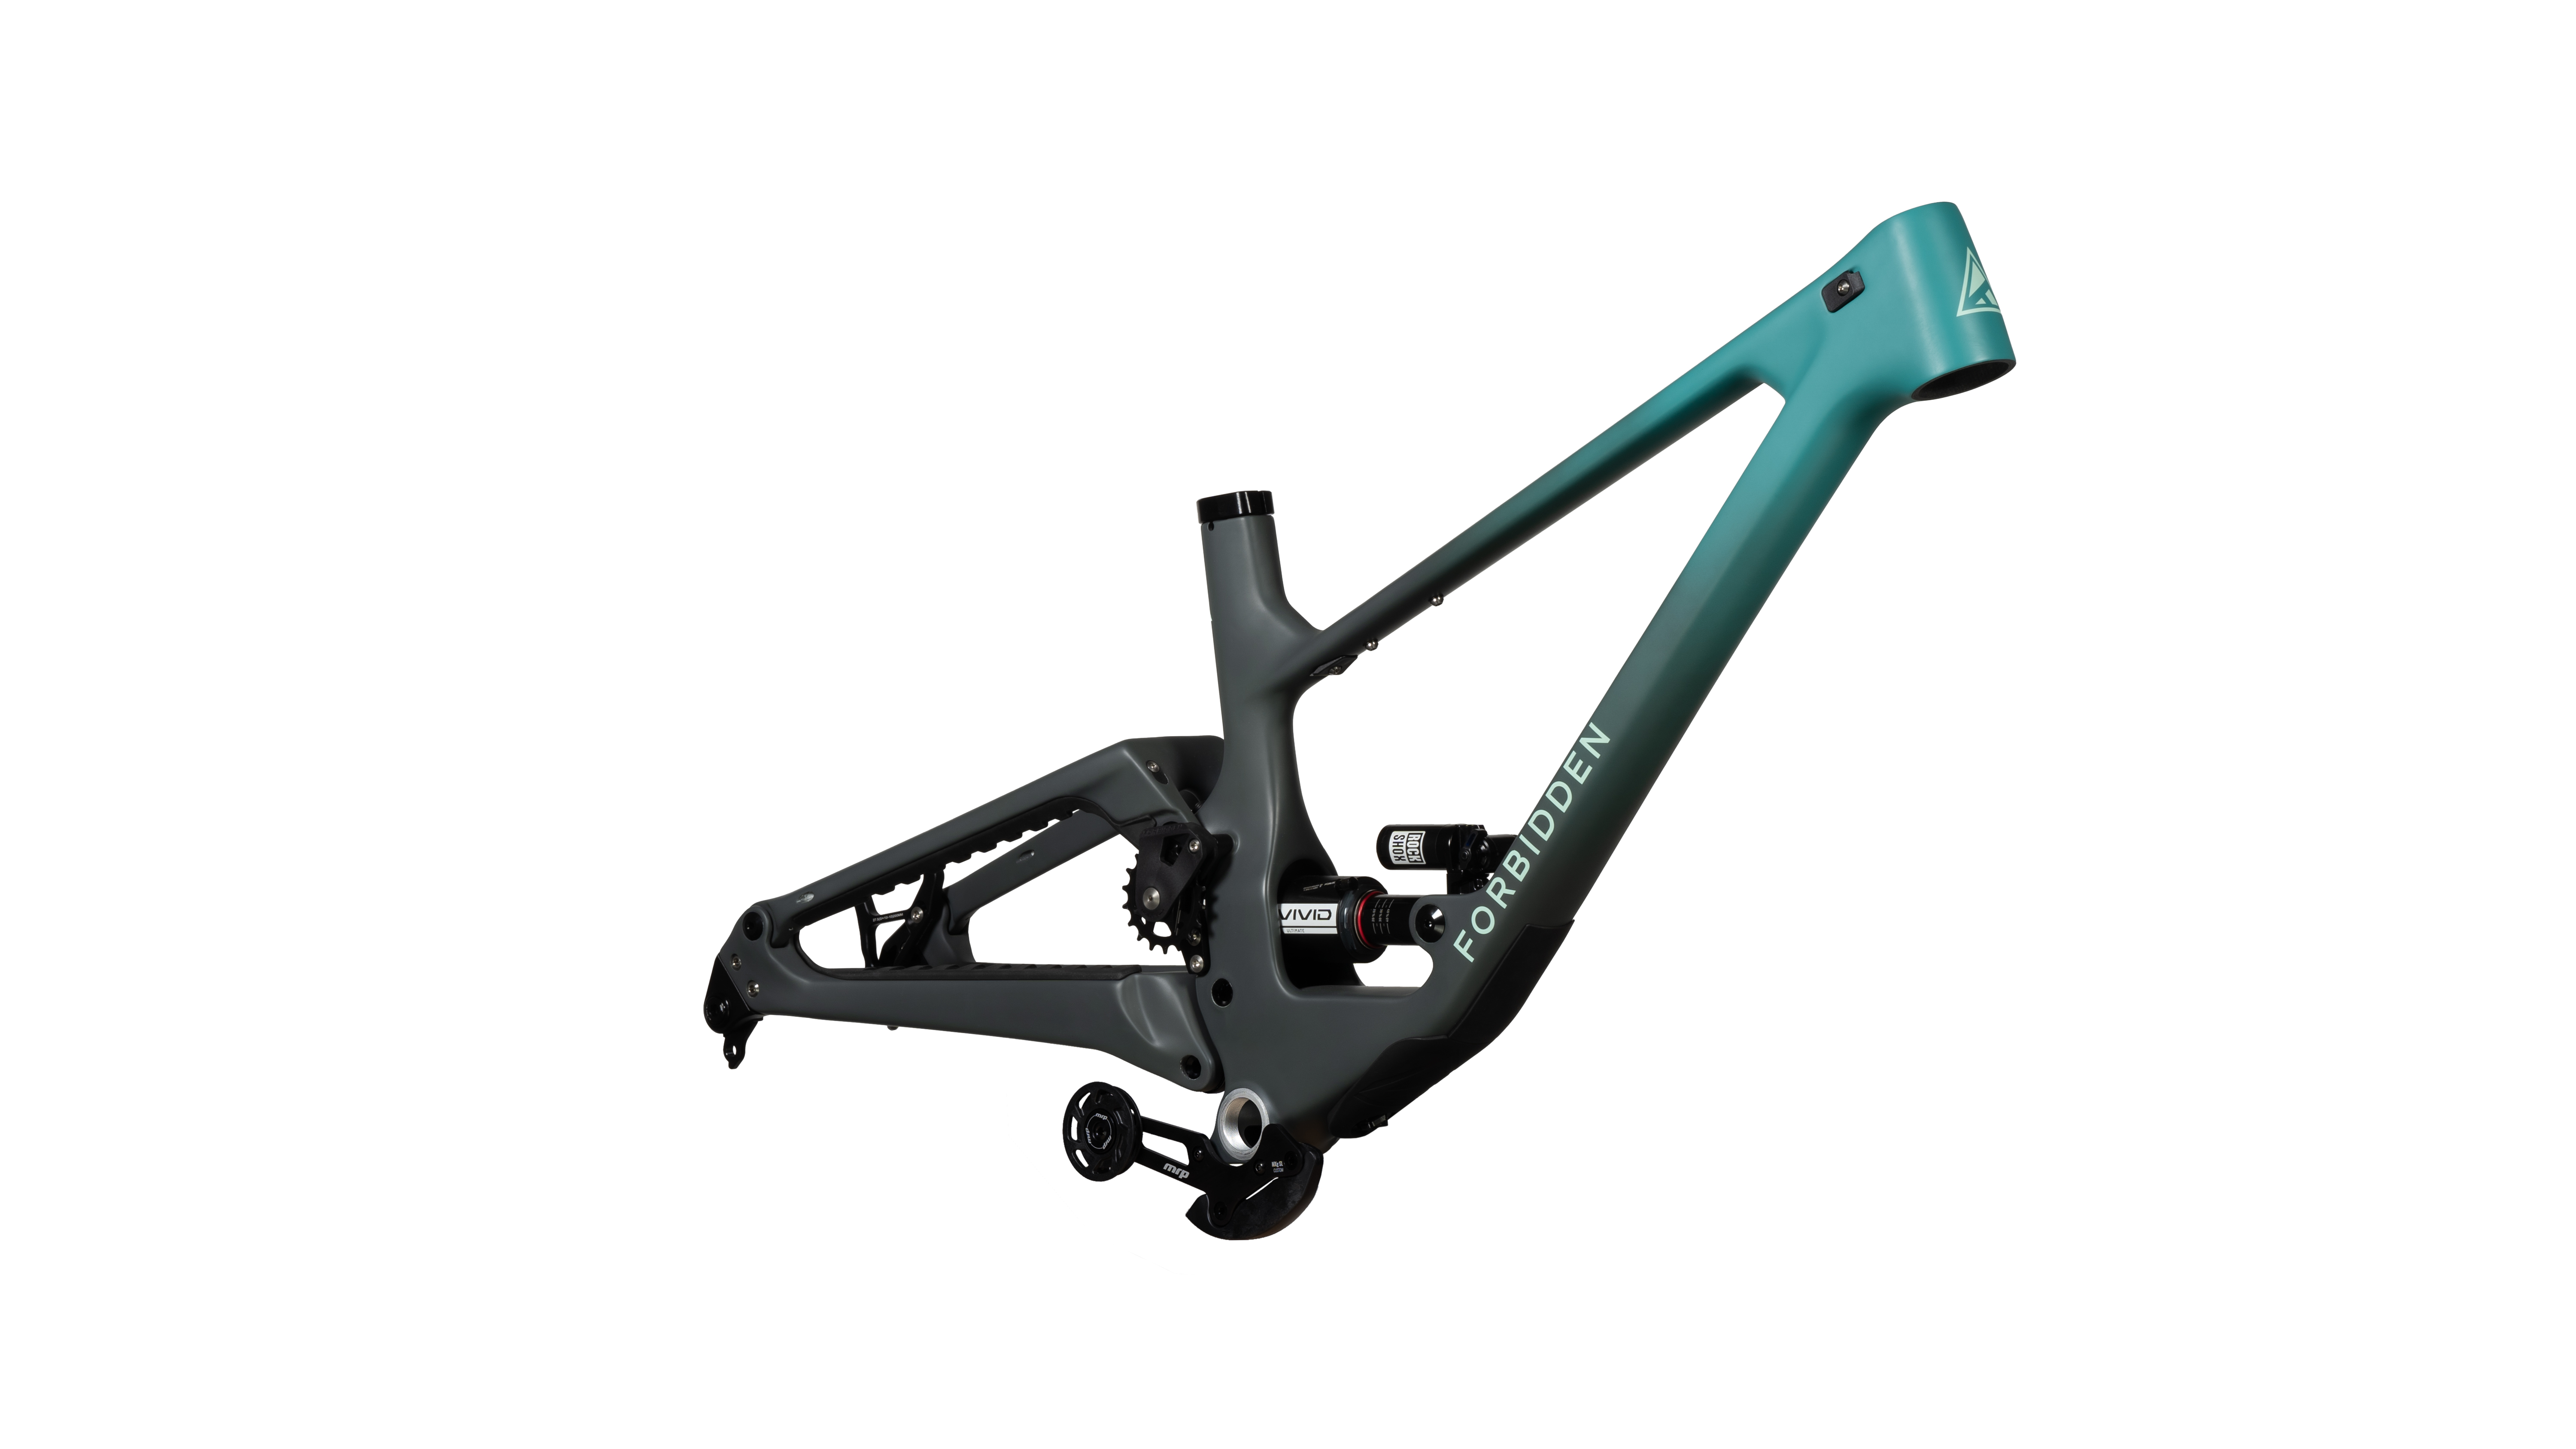
Dreadnought now sports an inverted four-bar suspension design. This evolution was necessitated by our desire to retain the ride characteristics of the original Dreadnought while optimizing certain ride characteristics. At the same time, we bring Dreadnought in line with our S-sizing.
Dreadnought now sports an inverted four-bar suspension design. This evolution was necessitated by our desire to retain the ride characteristics of the original Dreadnought while optimizing certain ride characteristics. At the same time, we bring Dreadnought in line with our S-sizing.
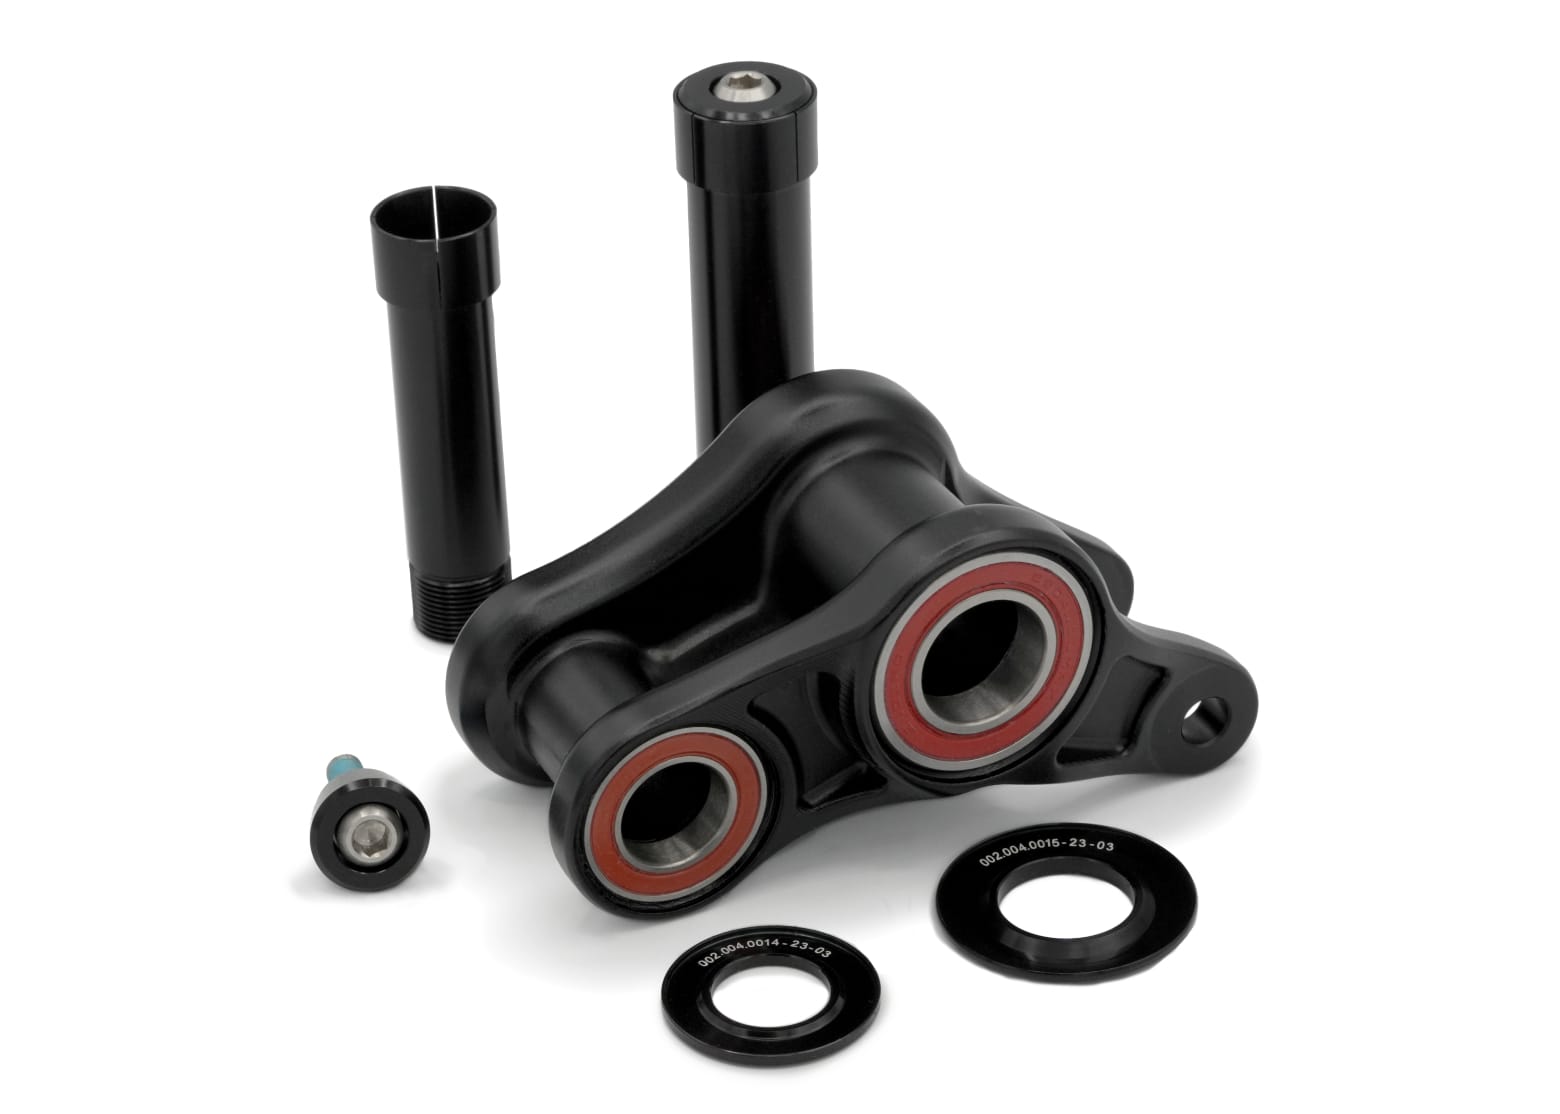
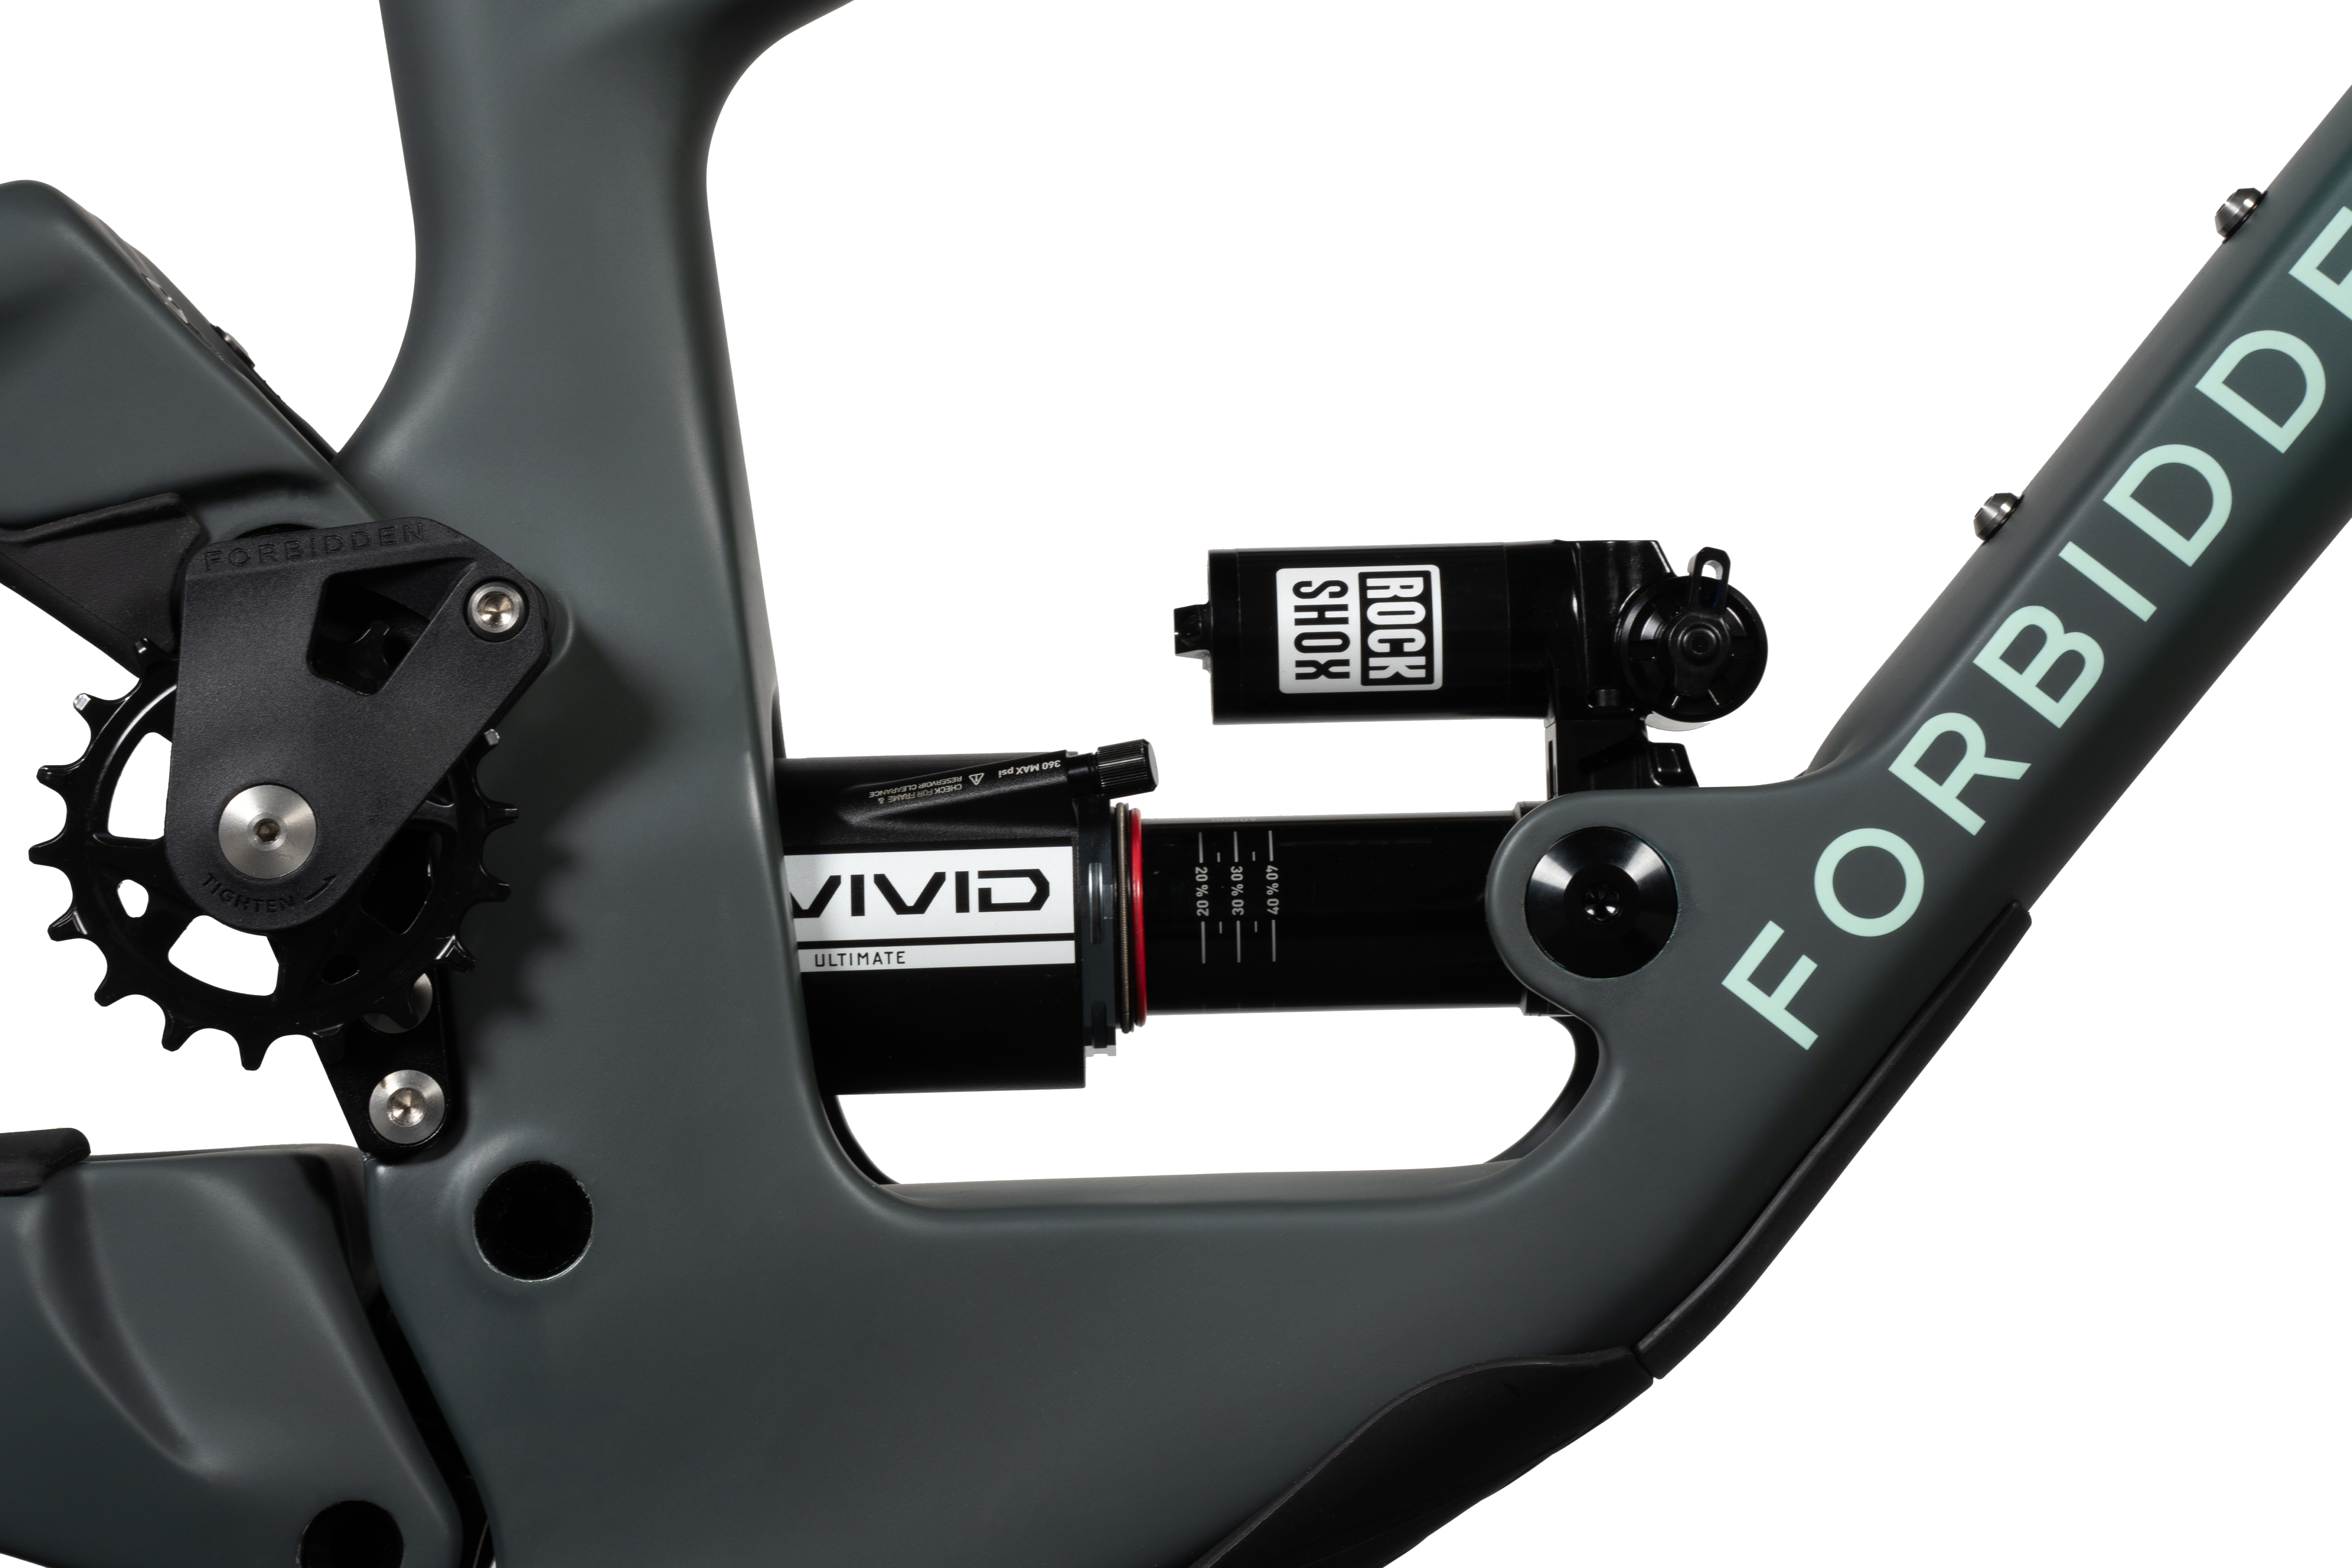
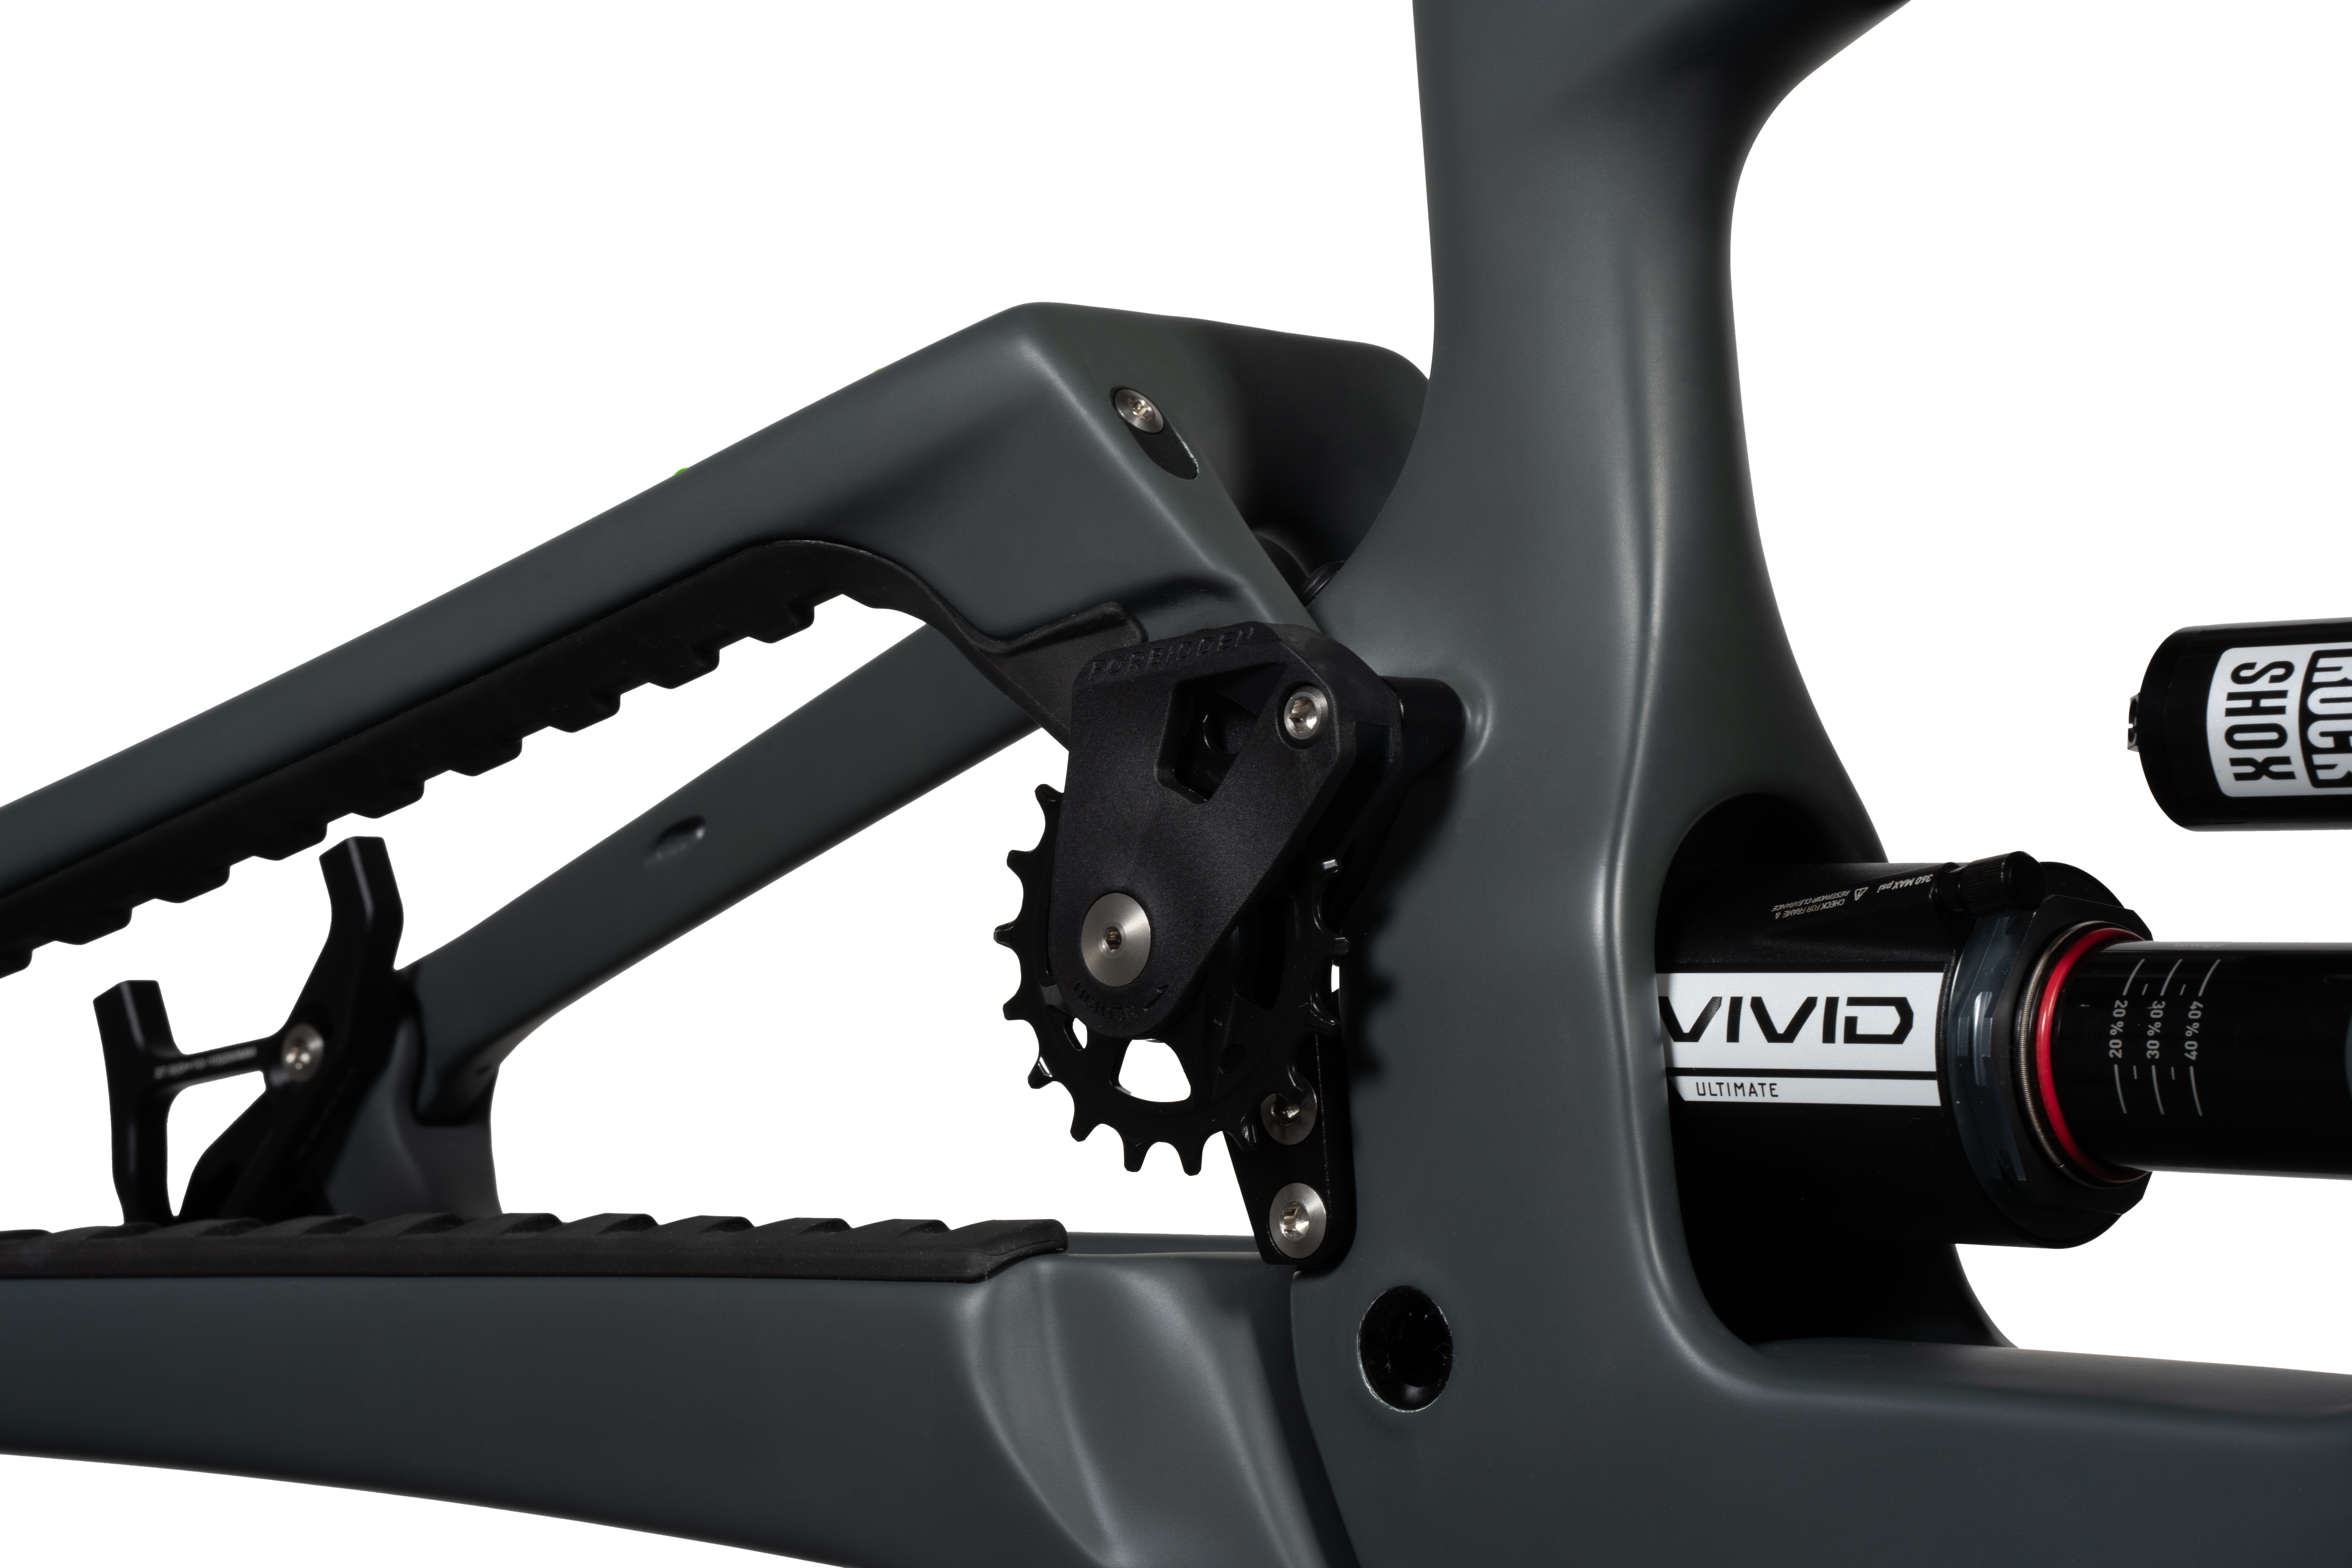
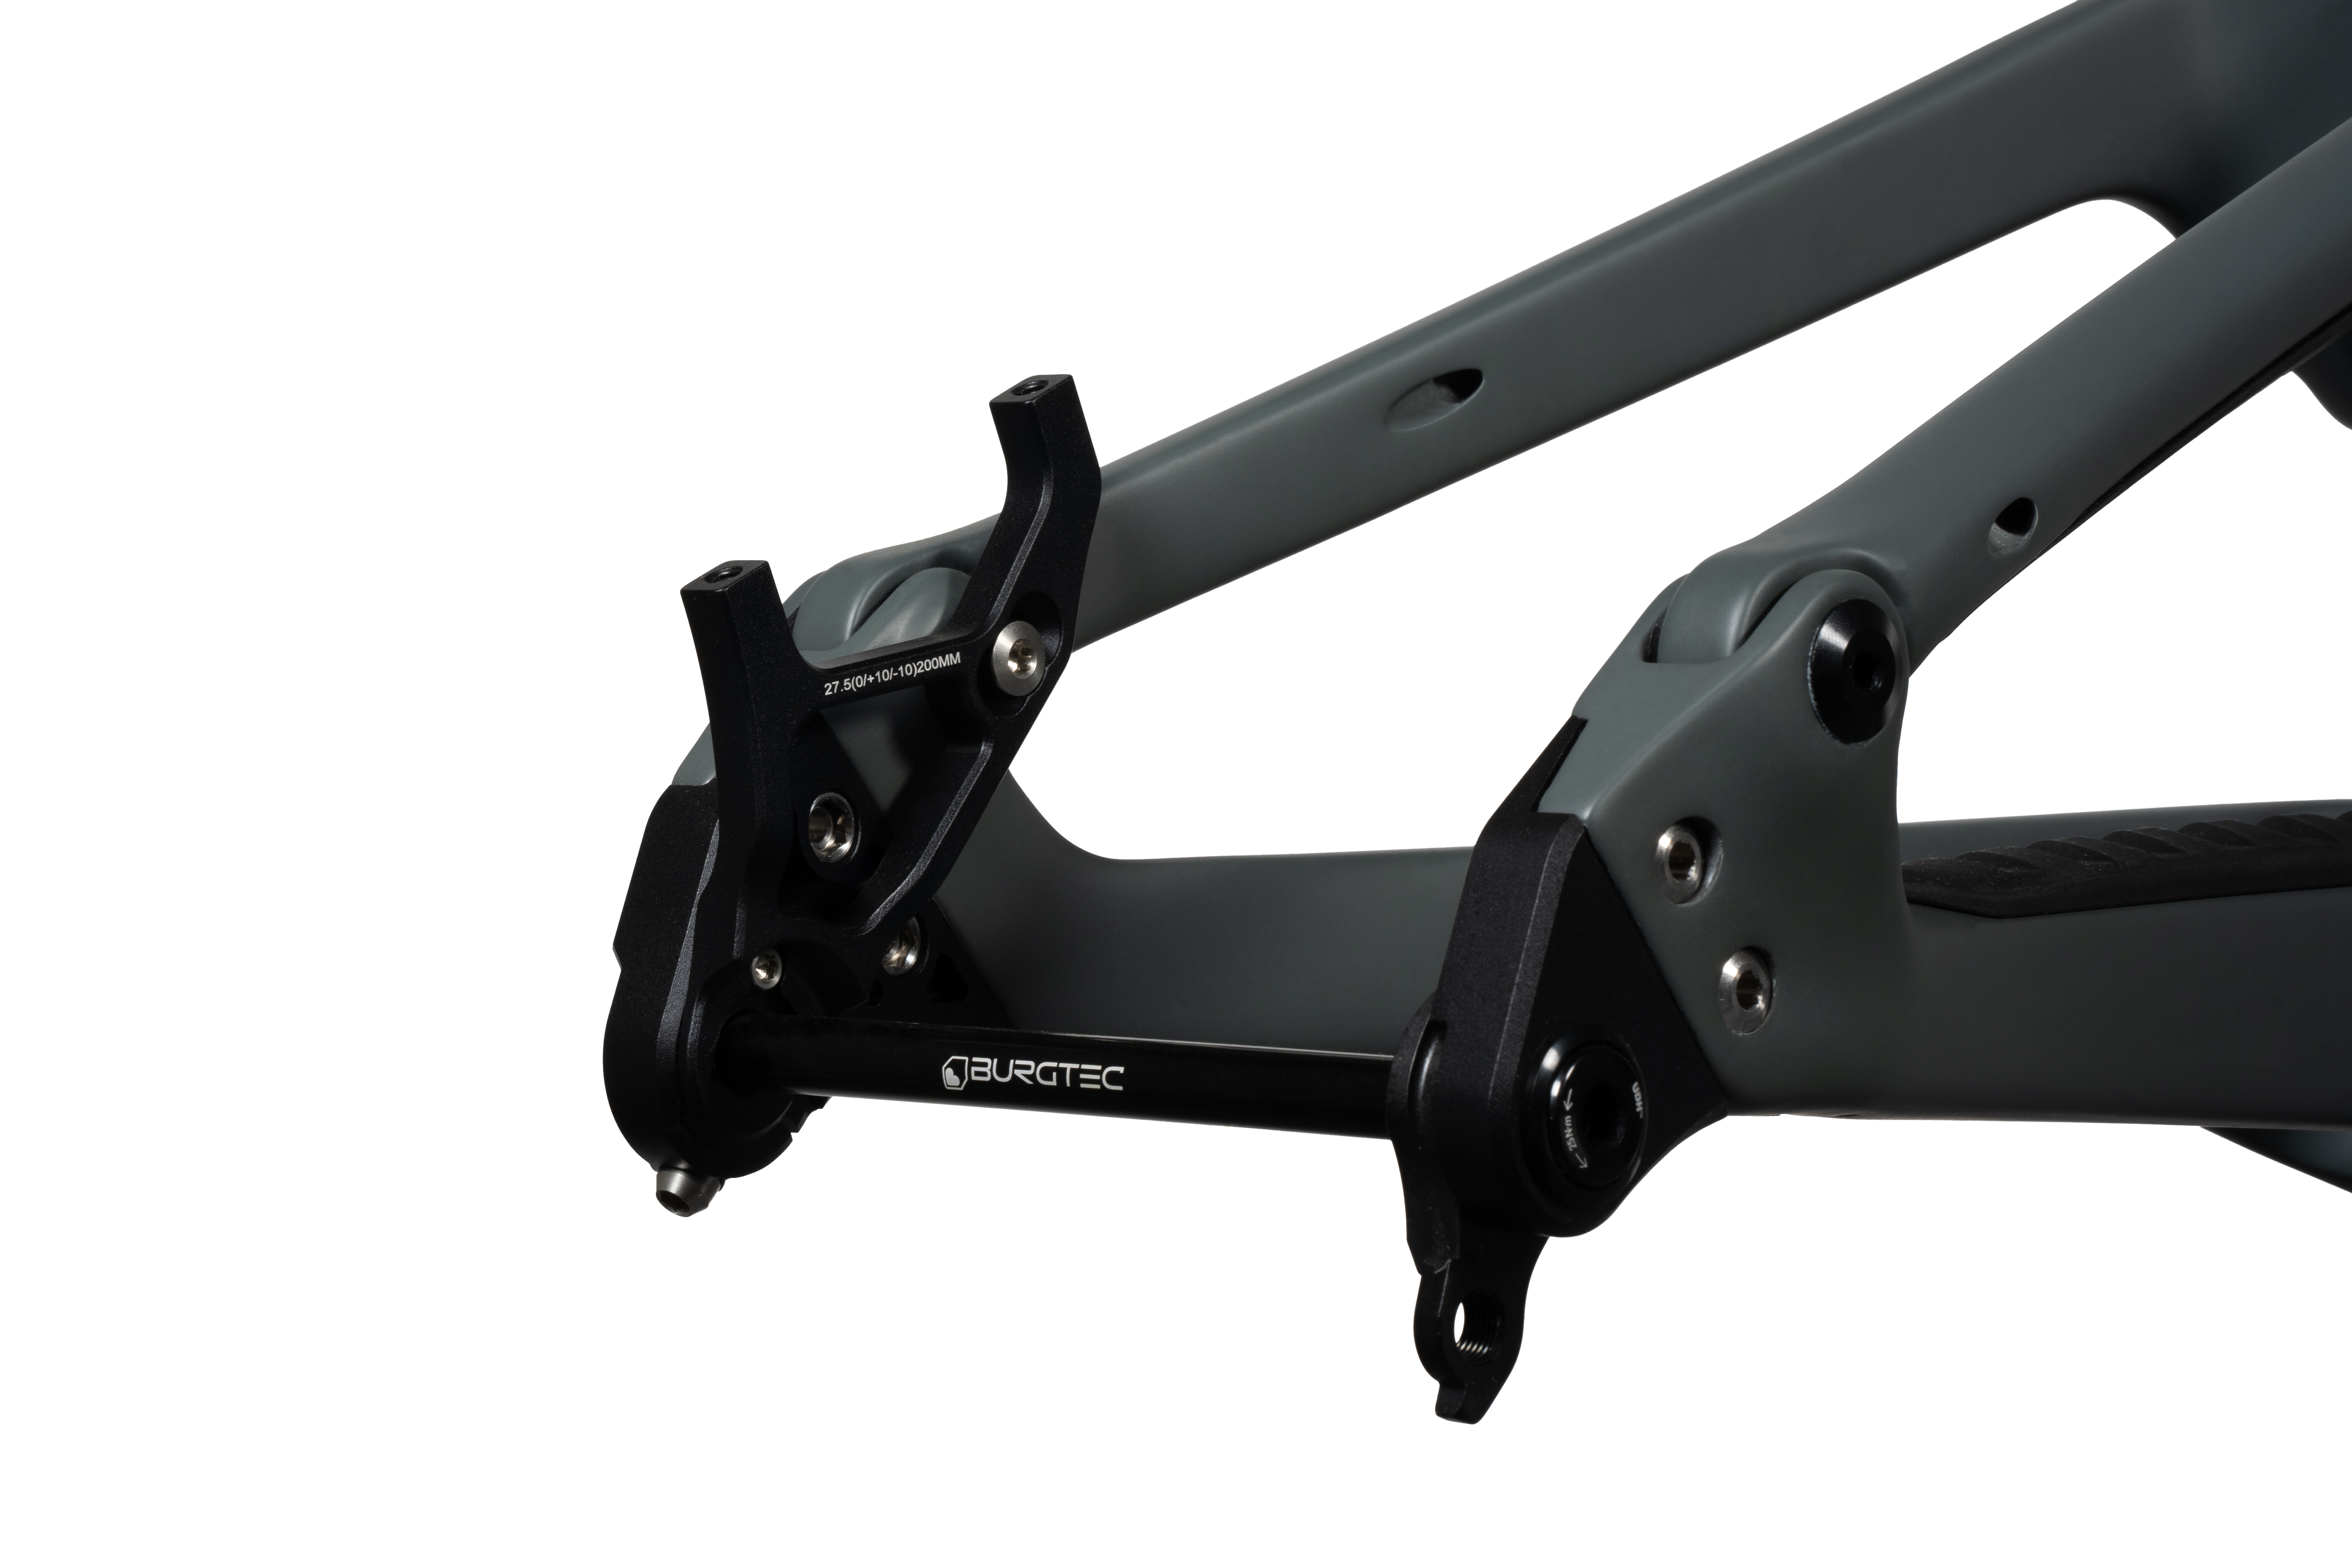
02
Hardware
Hardware
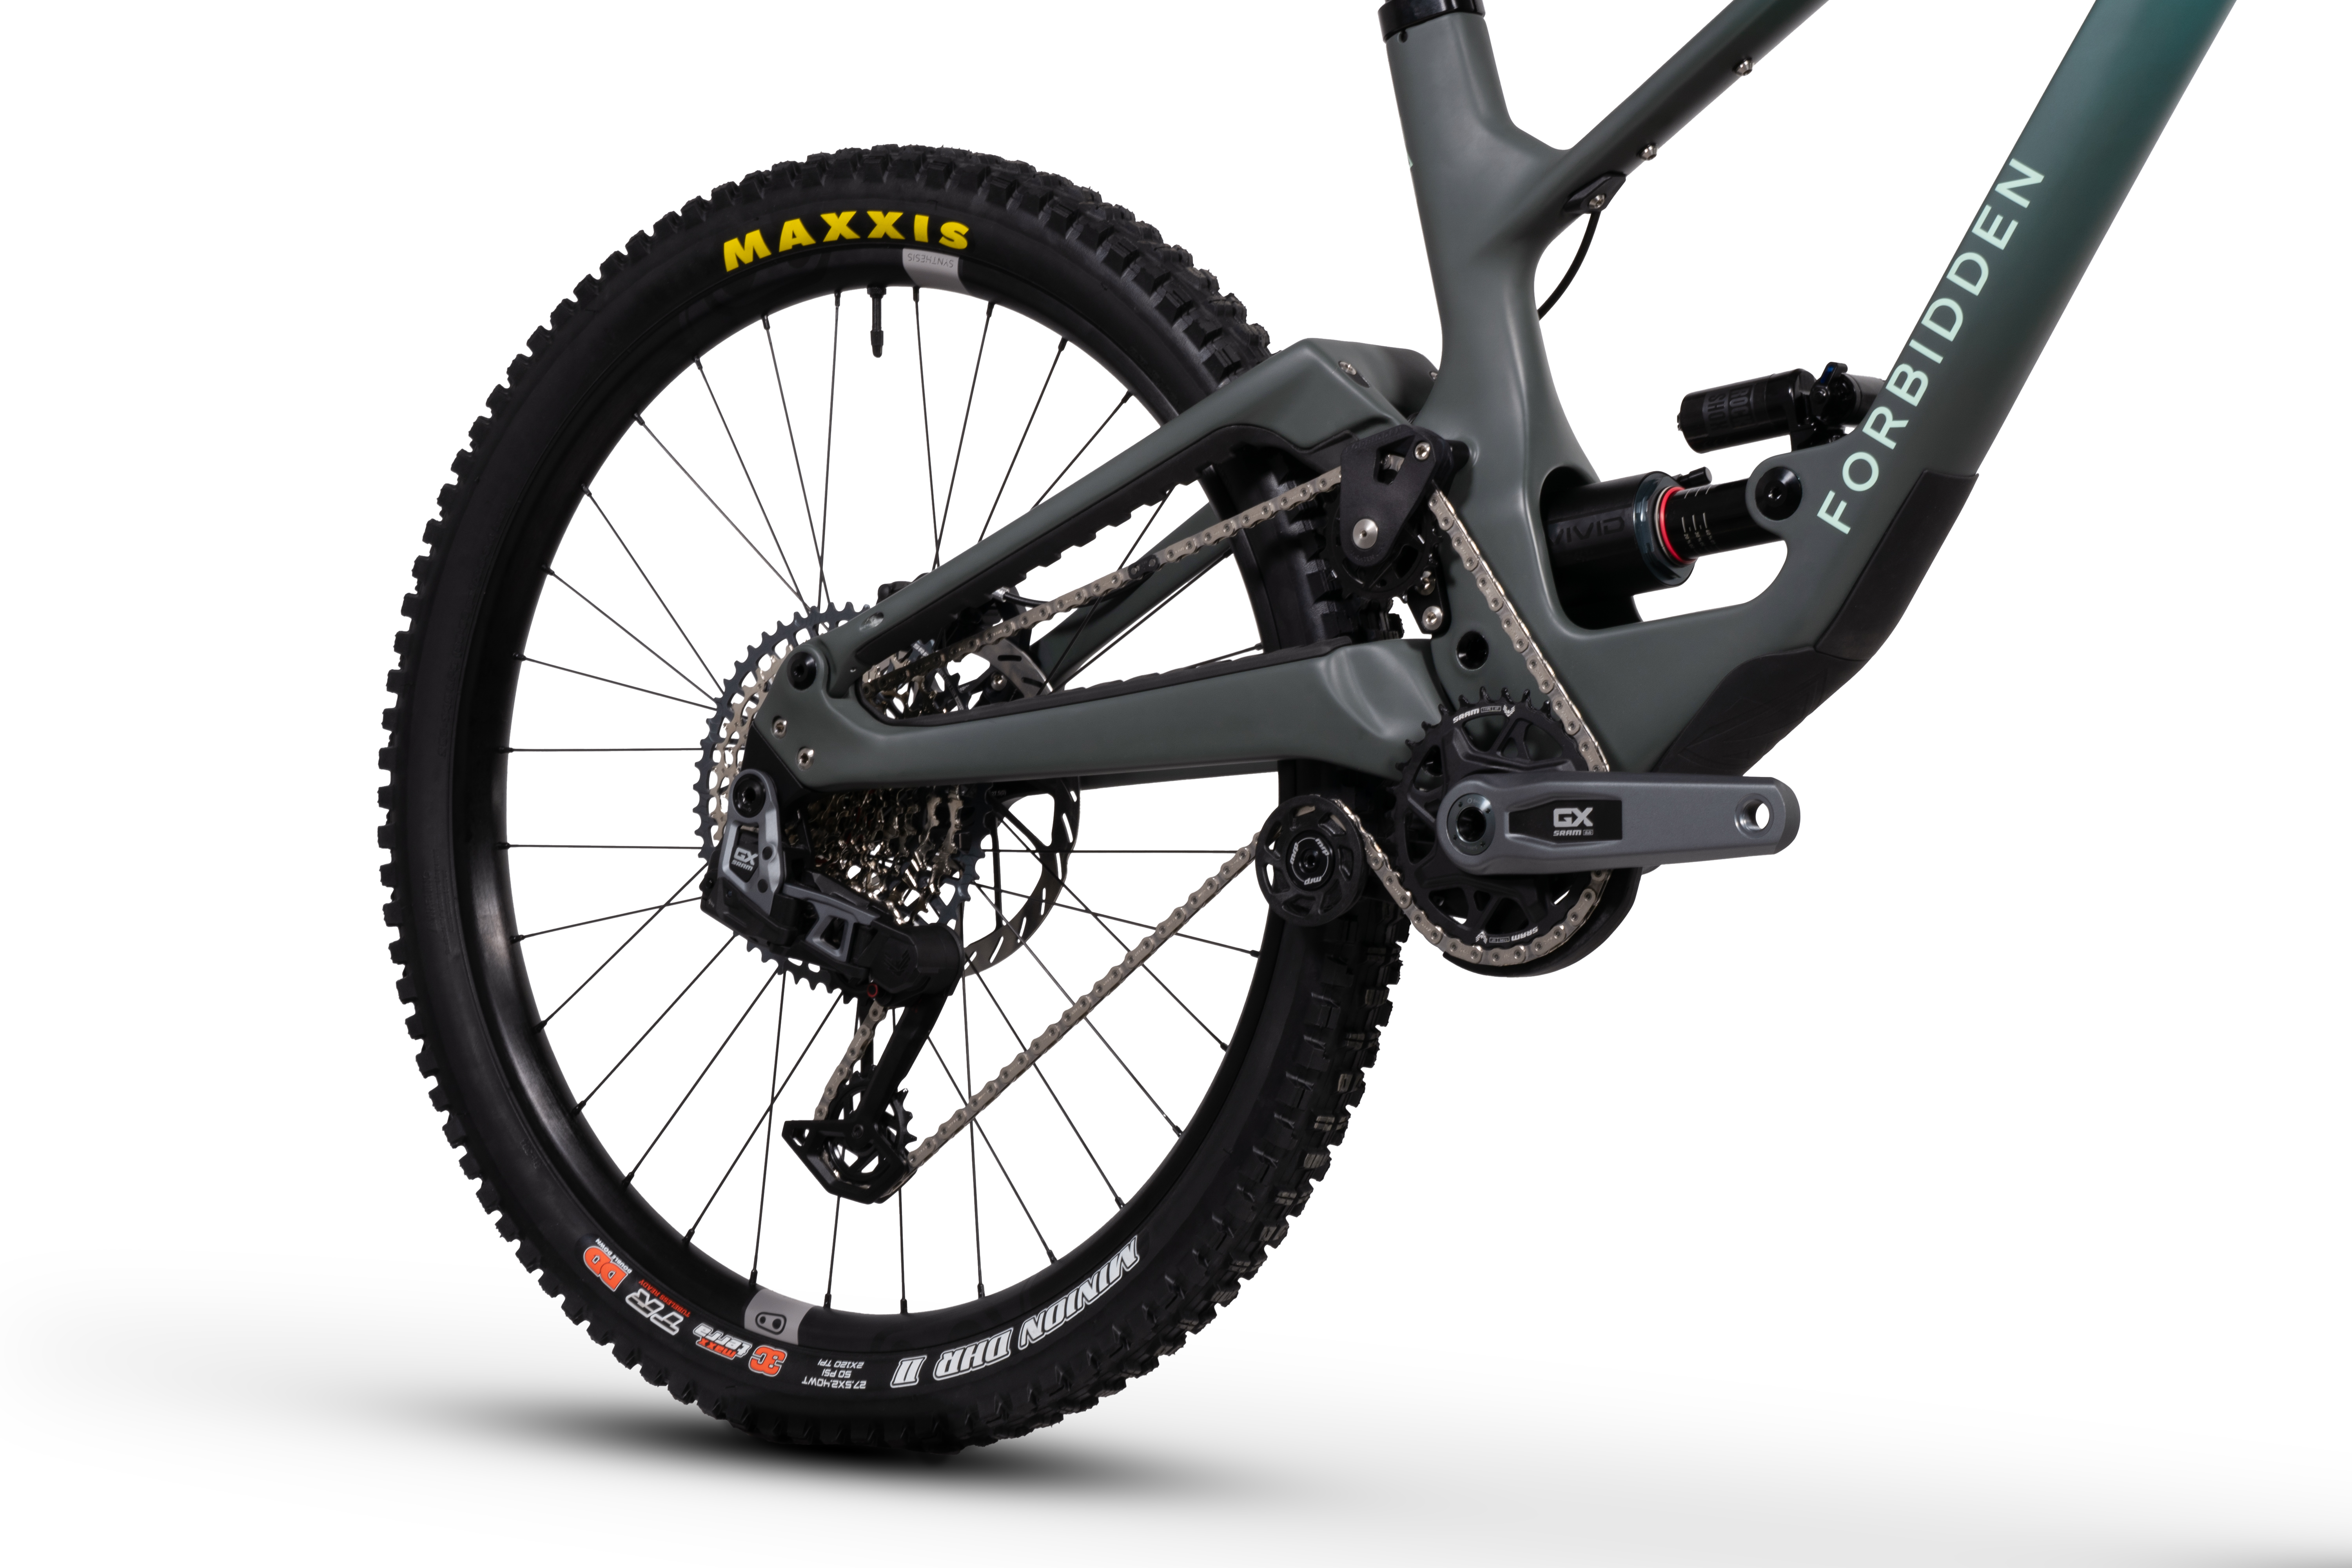
The bearing-in-rocker design of our new forged V2 Rate Control Linkage allows us to use locking collet axles and oversized bearings for easy maintenance and dependability. This option isn’t the lightest but trading a few grams for a long-lasting, easily serviced linkage, was the practical choice.
The bearing-in-rocker design of our new forged V2 Rate Control Linkage allows us to use locking collet axles and oversized bearings for easy maintenance and dependability. This option isn’t the lightest but trading a few grams for a long-lasting, easily serviced linkage, was the practical choice.
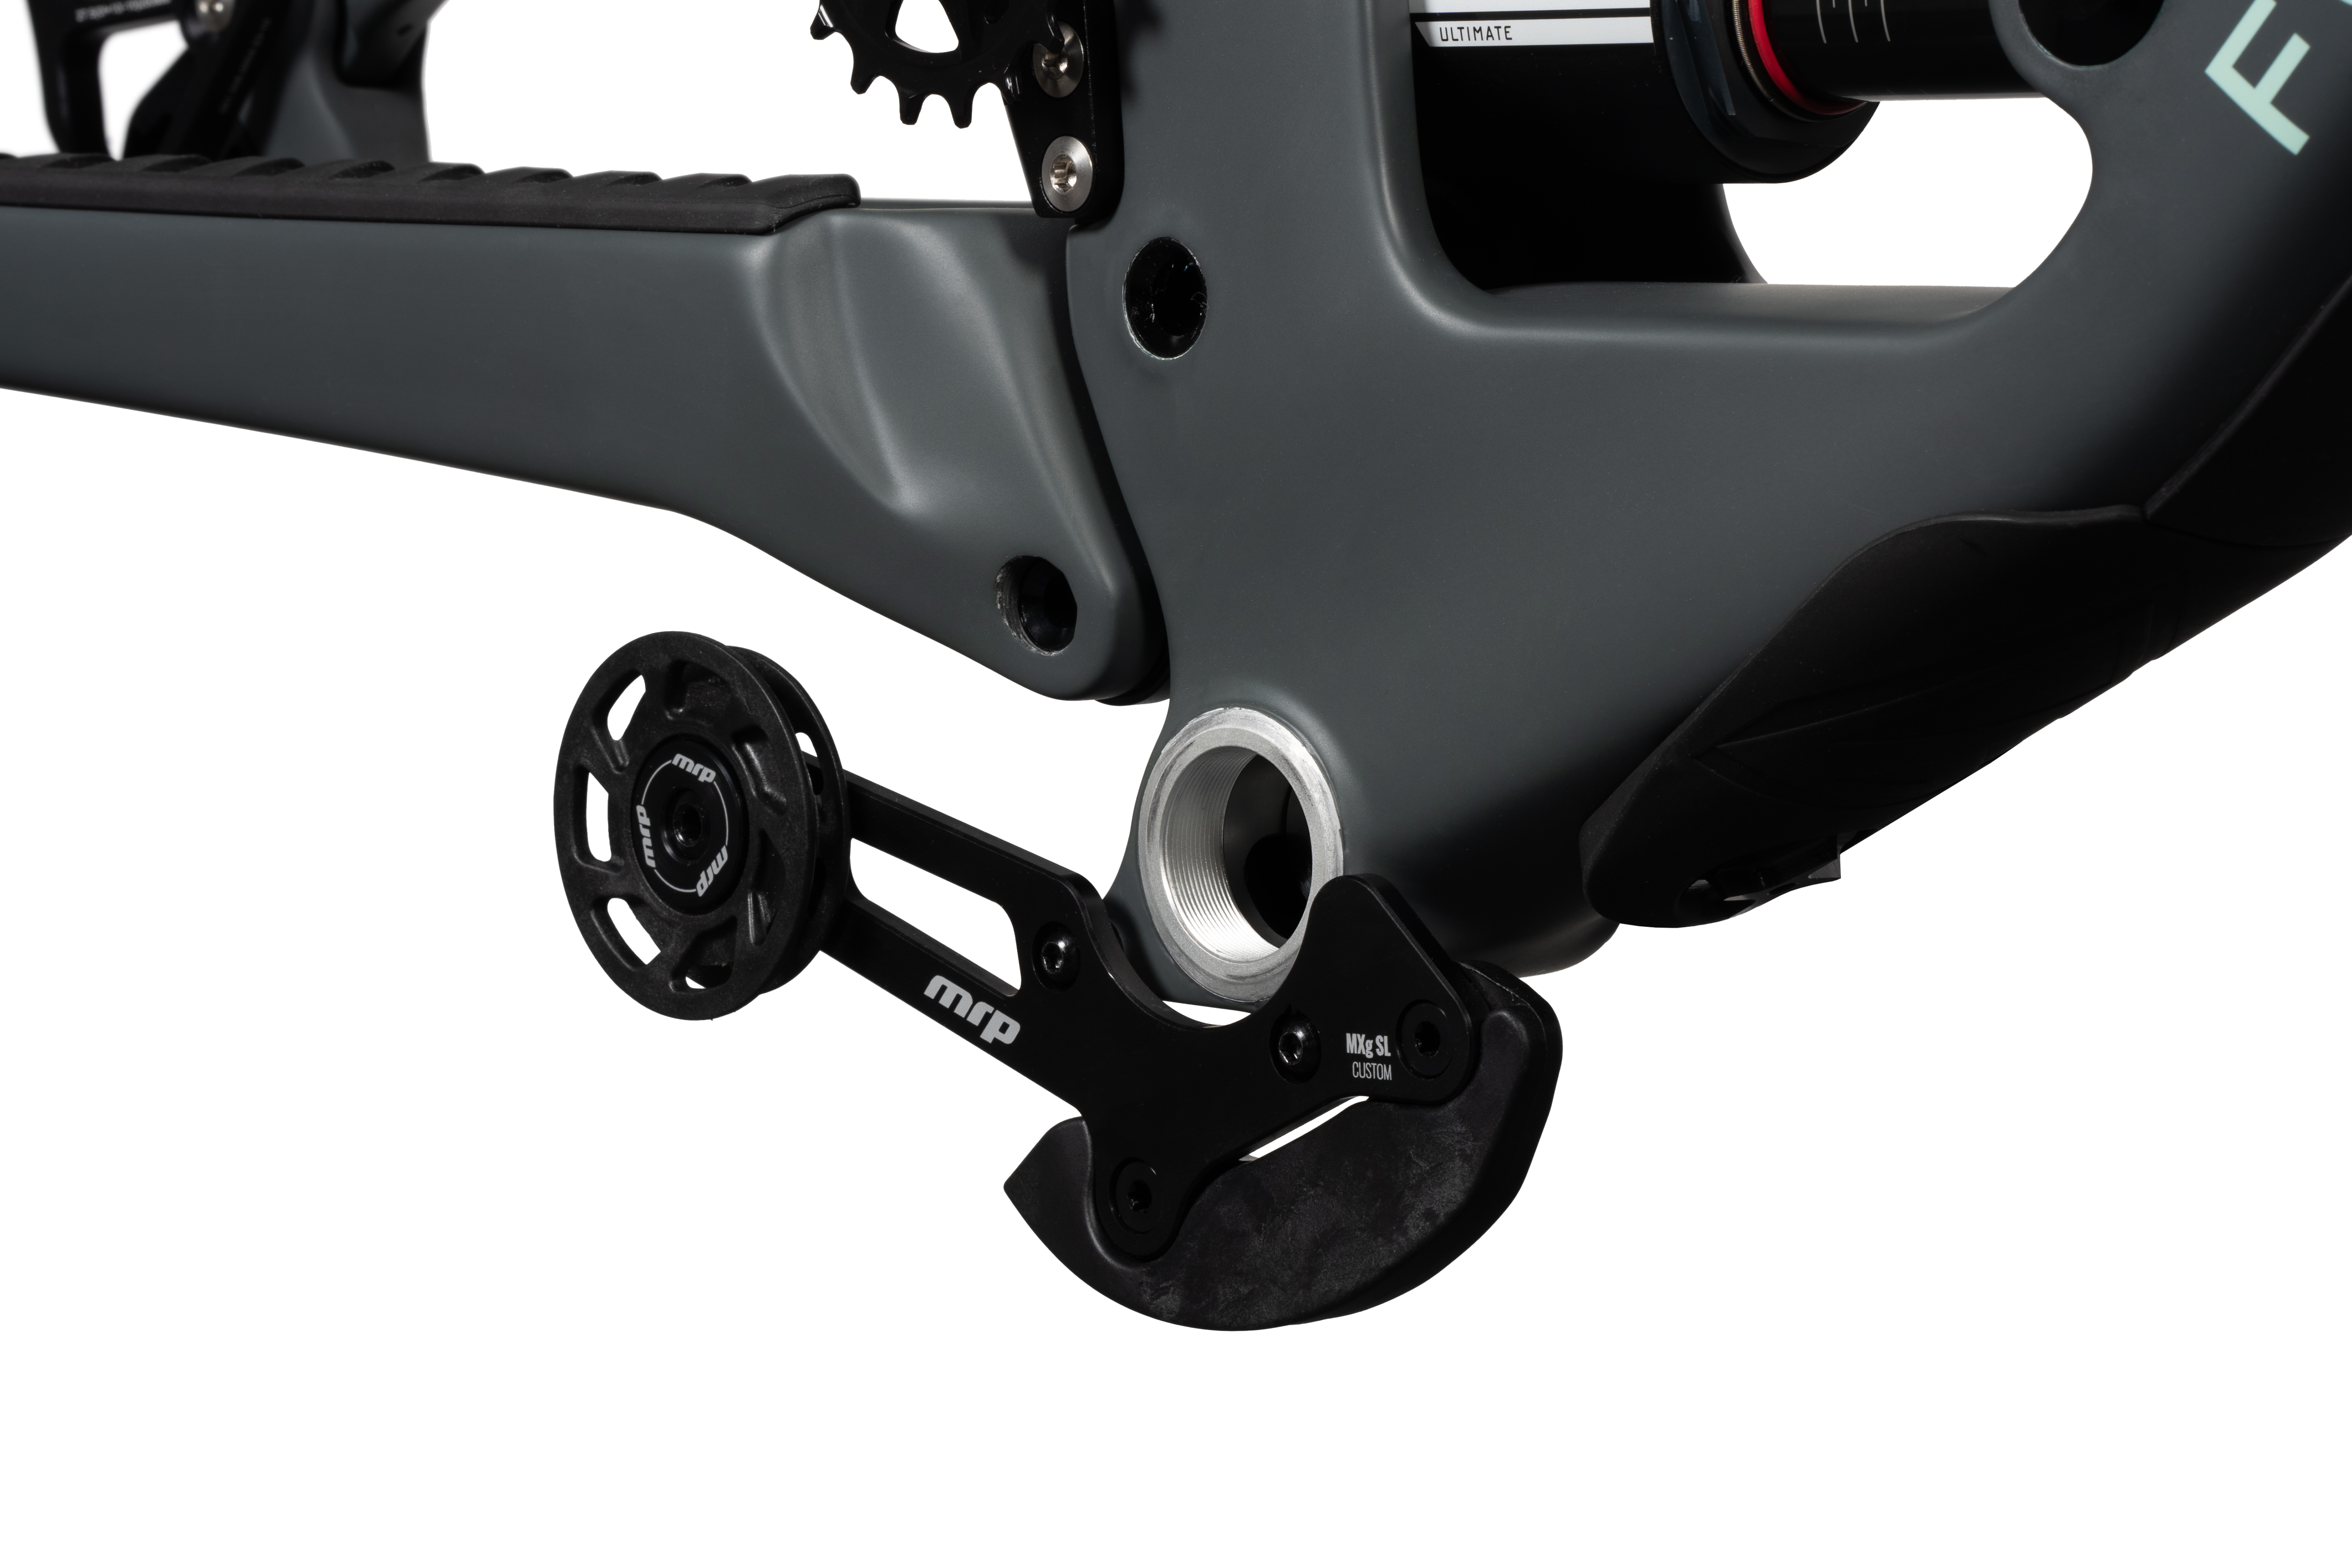
03
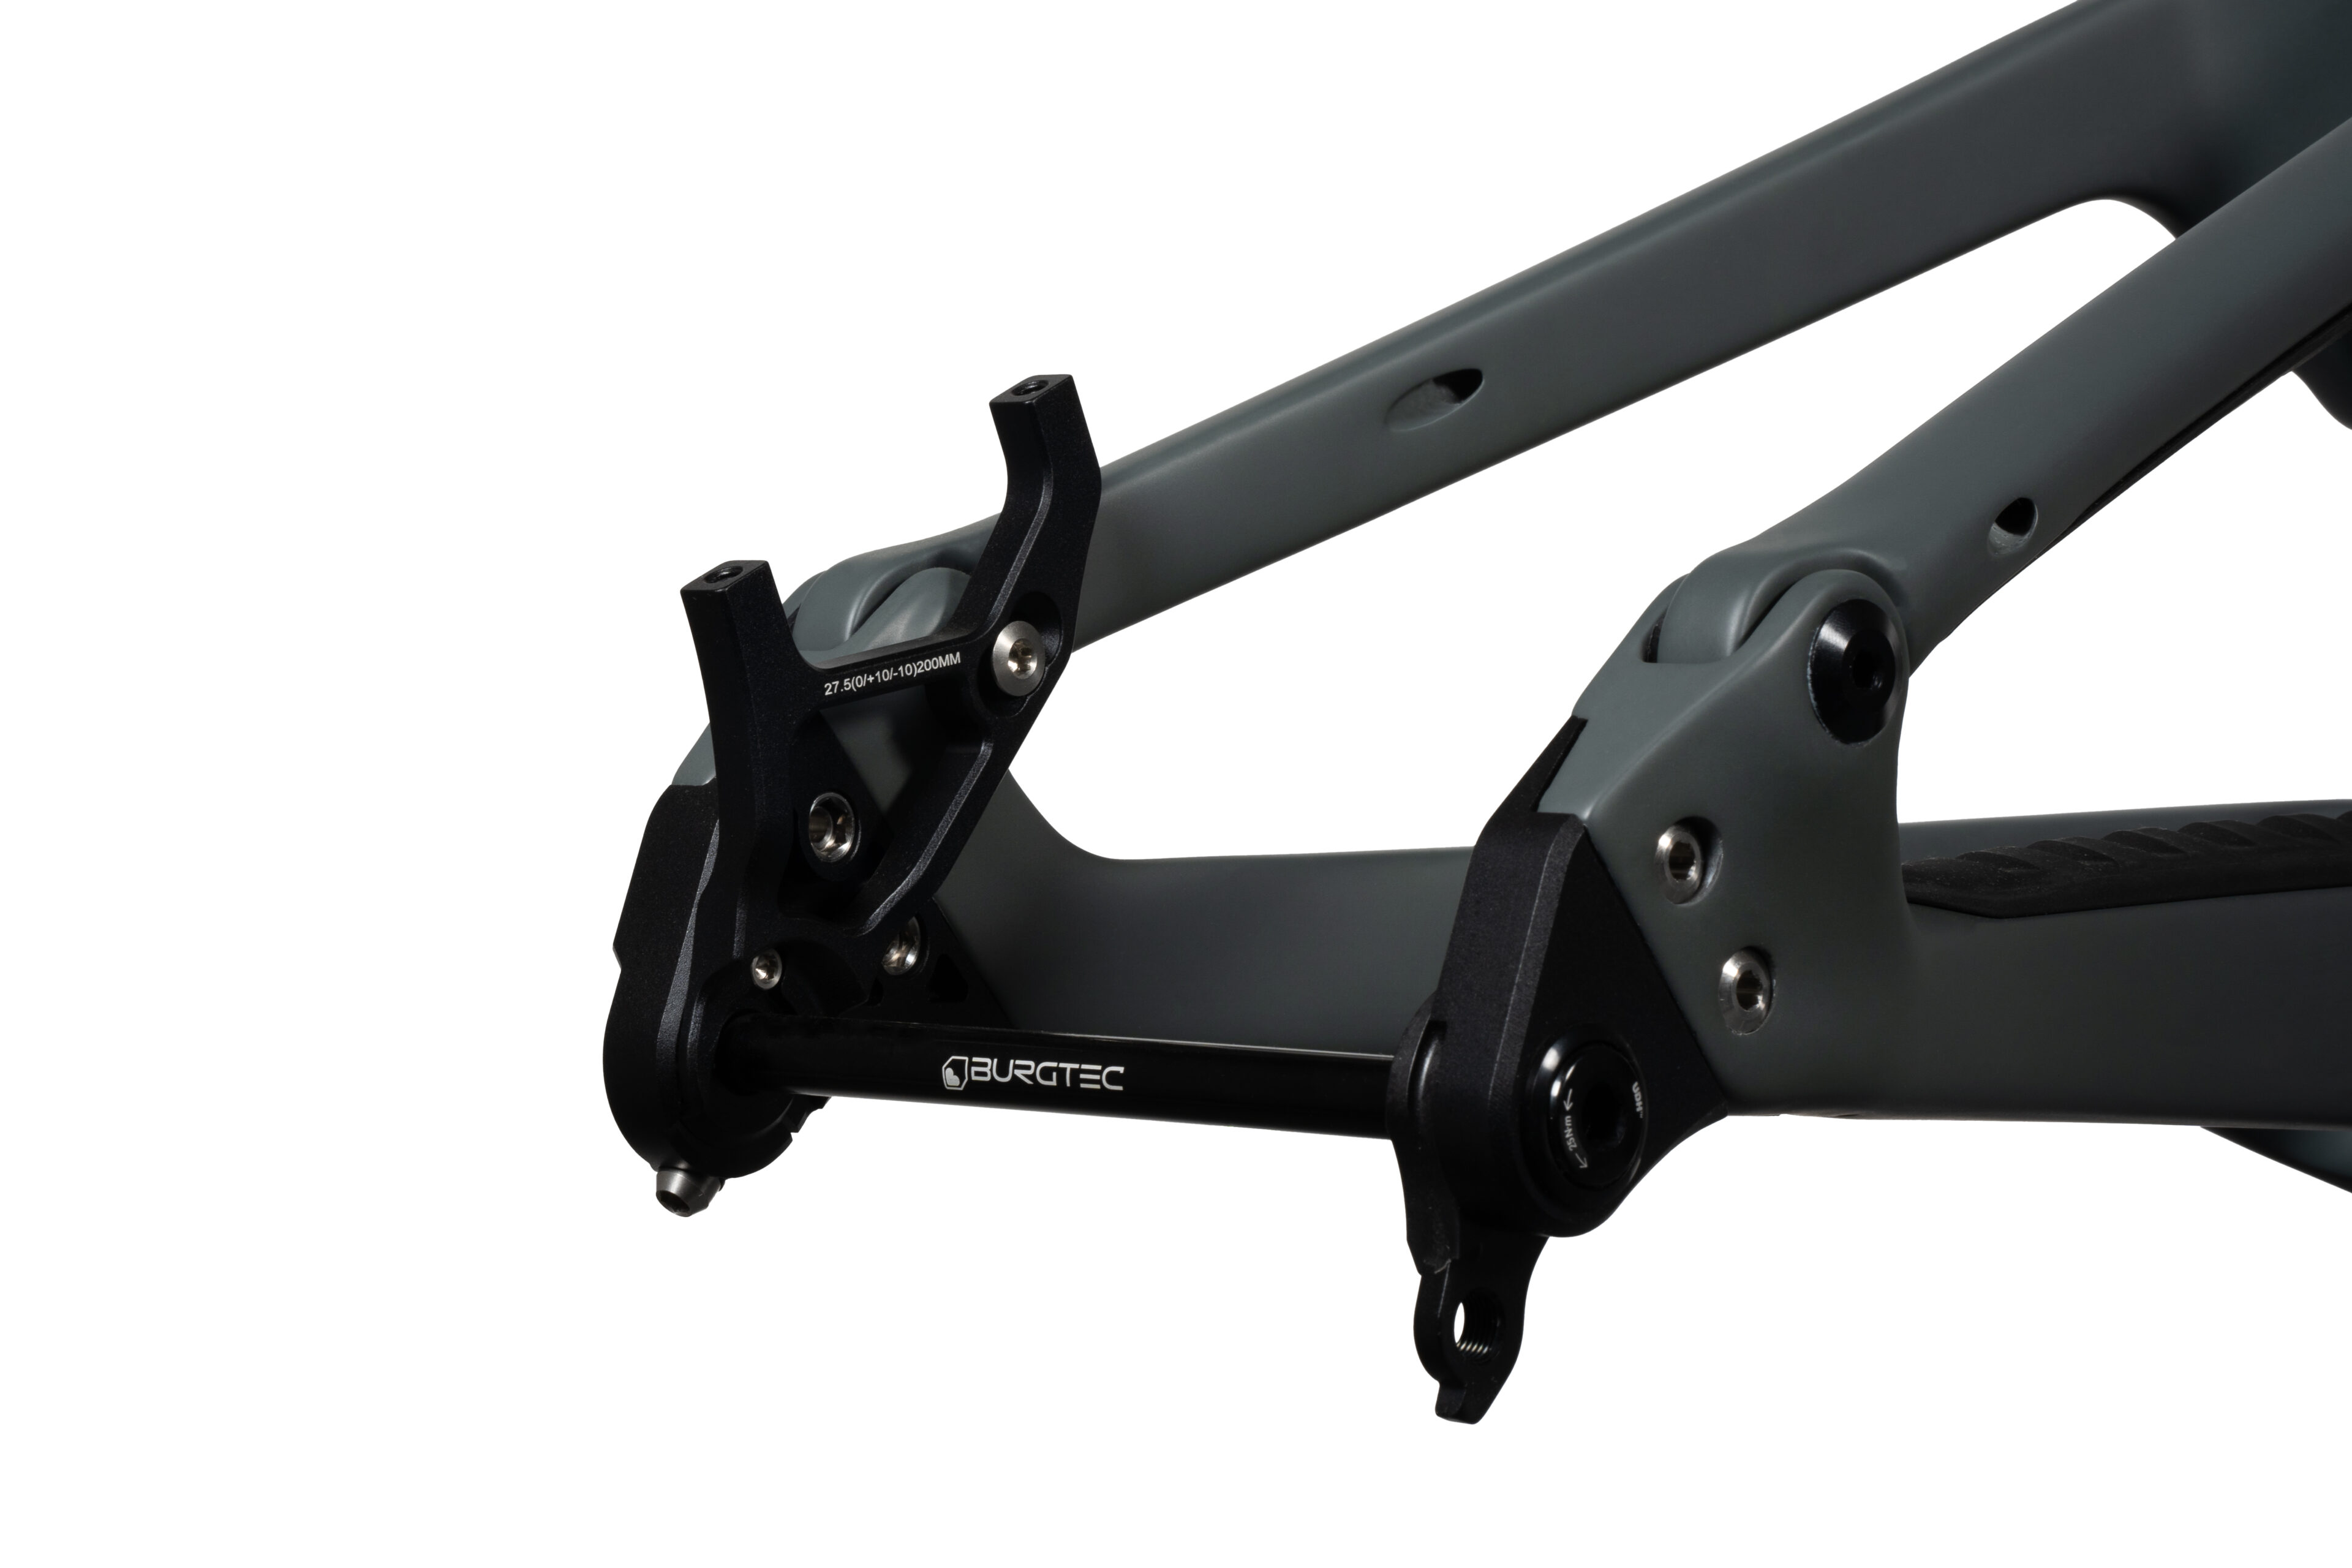
Modular Dropouts
Modular Dropouts
Wheel size configuration changes are achieved via modular dropouts. Meaningful geometry and weight bias adjustments are also be made via 27.5” +10mm, 27.5” -10mm, and 29” +10mm dropouts. Giving riders the option to customize weight bias and handling characteristics to suit riding style or terrain type. 200mm direct brake mount included as standard. Framekits are sold with MX and 29” dropouts.
Wheel size configuration changes are achieved via modular dropouts. Meaningful geometry and weight bias adjustments are also be made via 27.5” +10mm, 27.5” -10mm, and 29” +10mm dropouts. Giving riders the option to customize weight bias and handling characteristics to suit riding style or terrain type. 200mm direct brake mount included as standard. Framekits are sold with MX and 29” dropouts.
04
Cable Routing
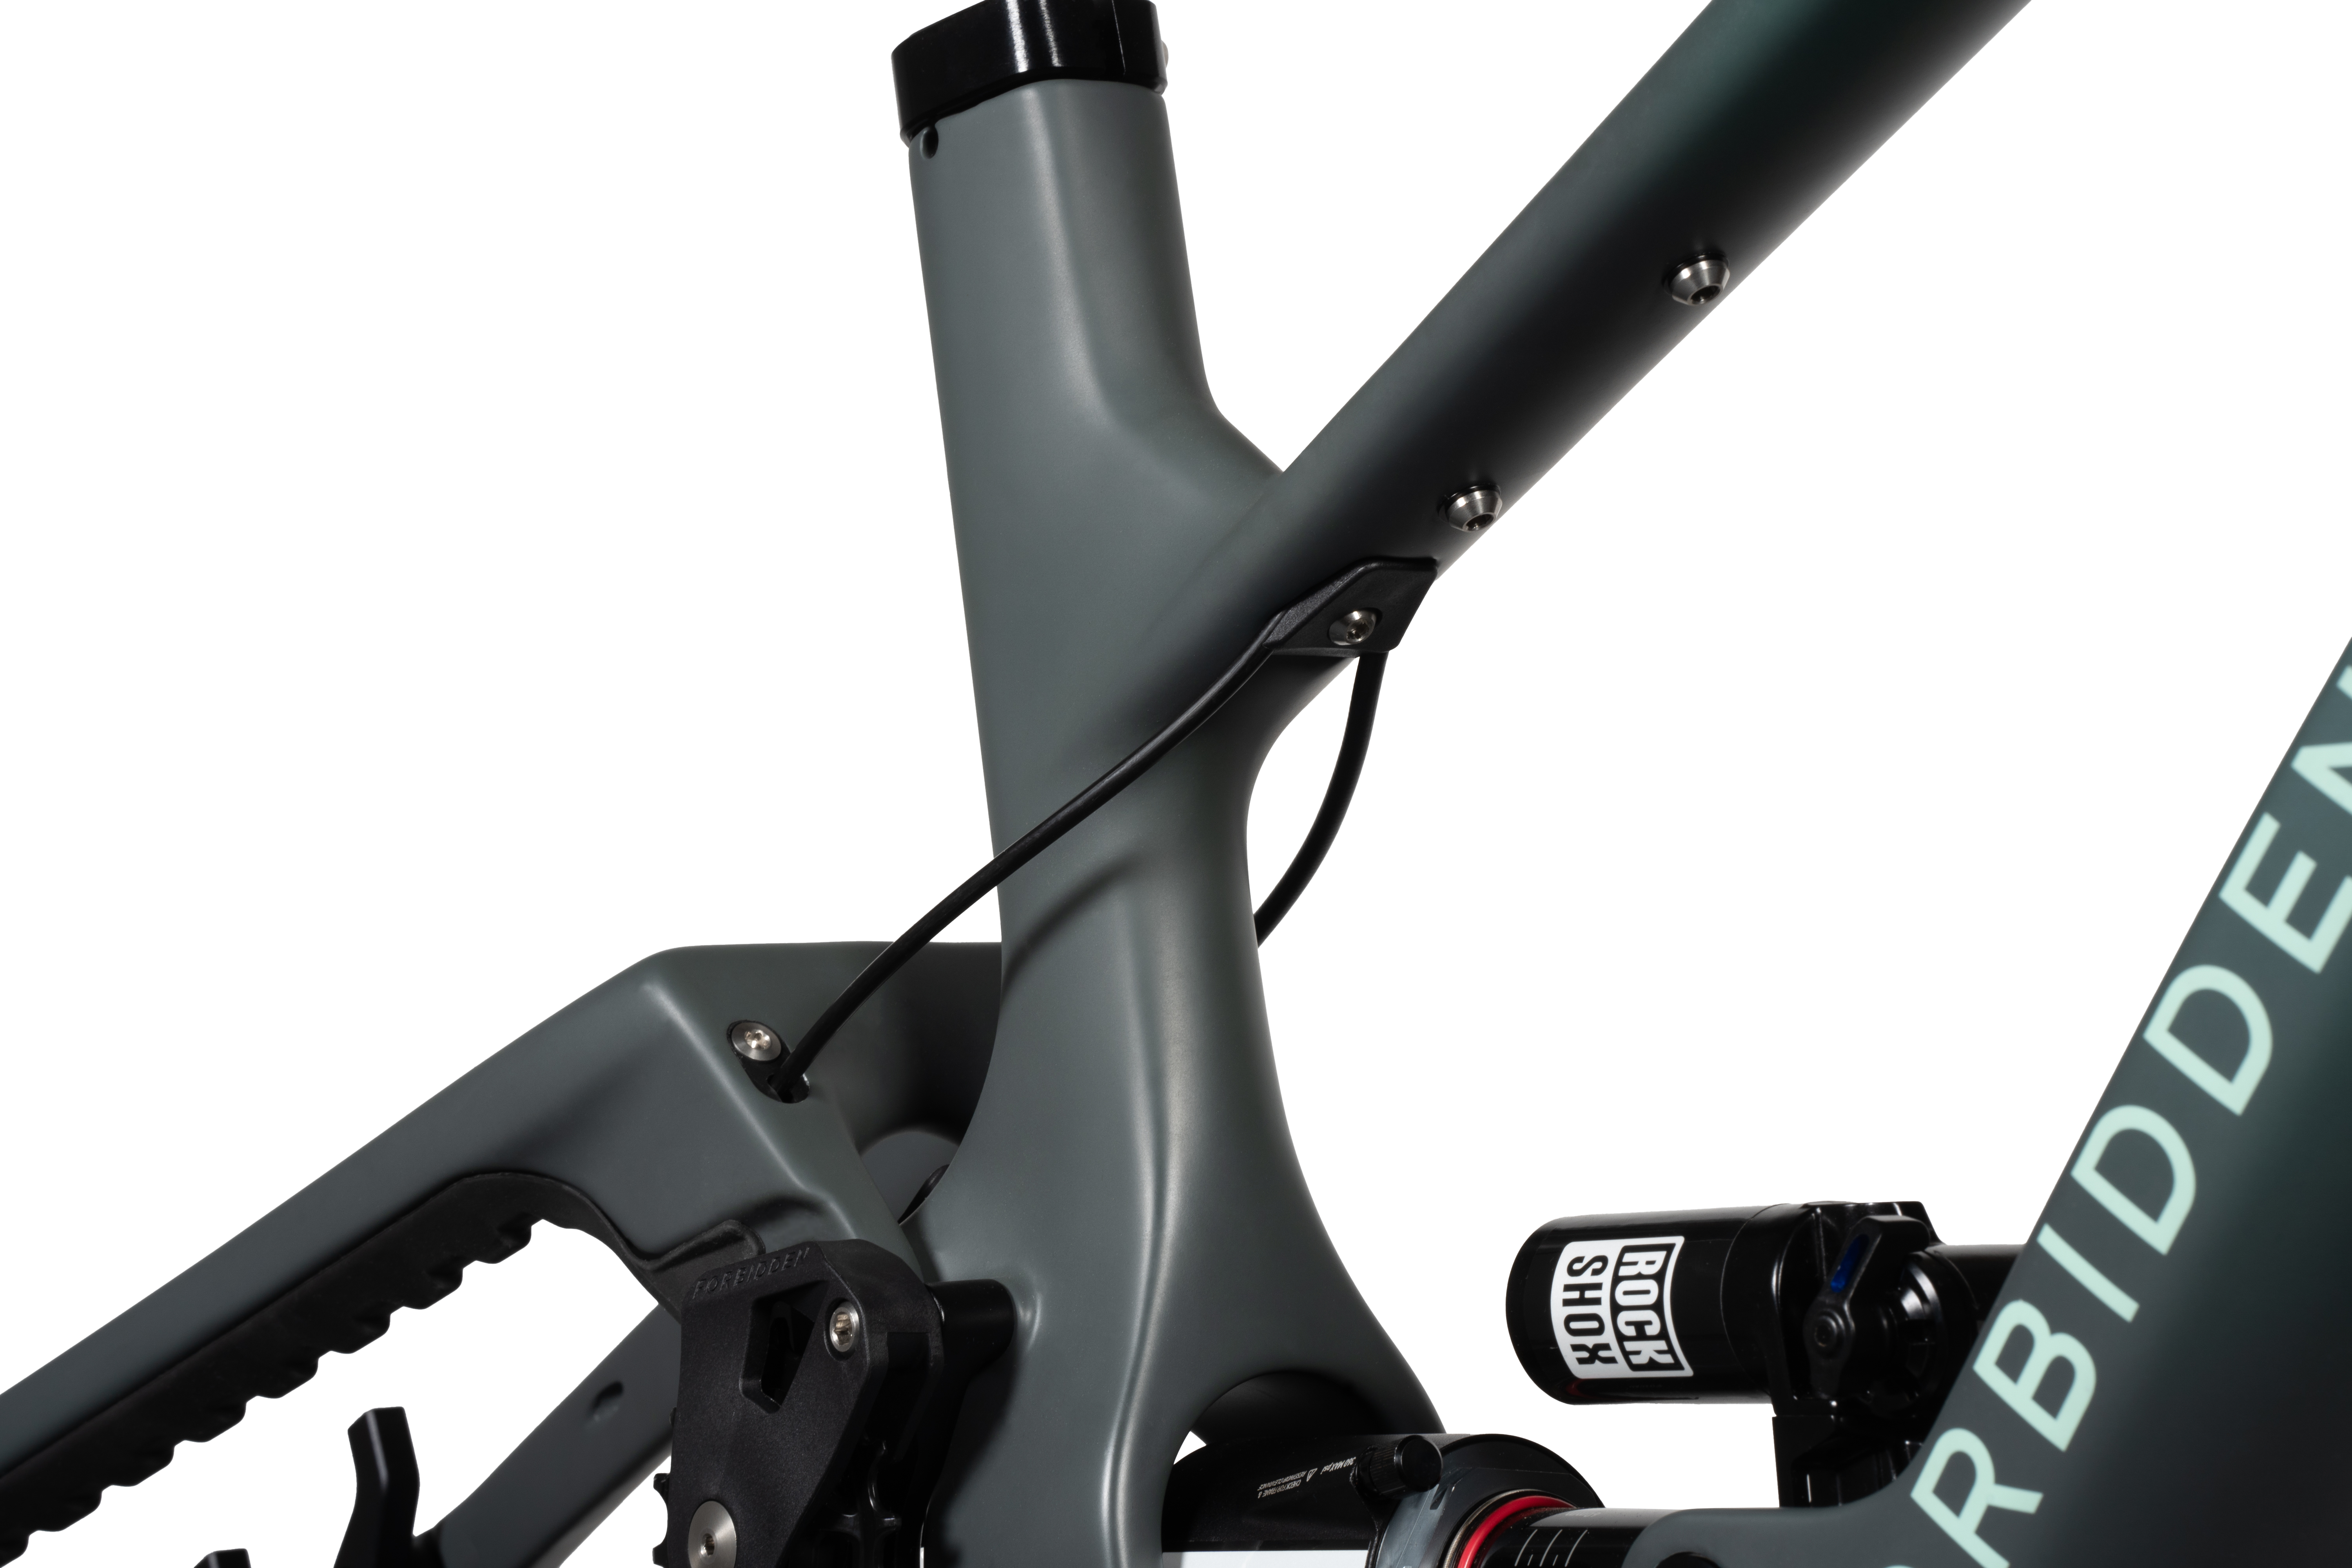
Cable Routing
Our adaptable cable routing allows you to neatly route the cables and hoses no matter where in the world you come from or with what hand you operate your rear brake with. New for V2 bikes is the inclusion of clamping hose/cable ports on the rear triangle. This ensures no unwanted movement anywhere along the frame.
Our adaptable cable routing allows you to neatly route the cables and hoses no matter where in the world you come from or with what hand you operate your rear brake with. New for V2 bikes is the inclusion of clamping hose/cable ports on the rear triangle. This ensures no unwanted movement anywhere along the frame.
05
Water Bottle Fitment
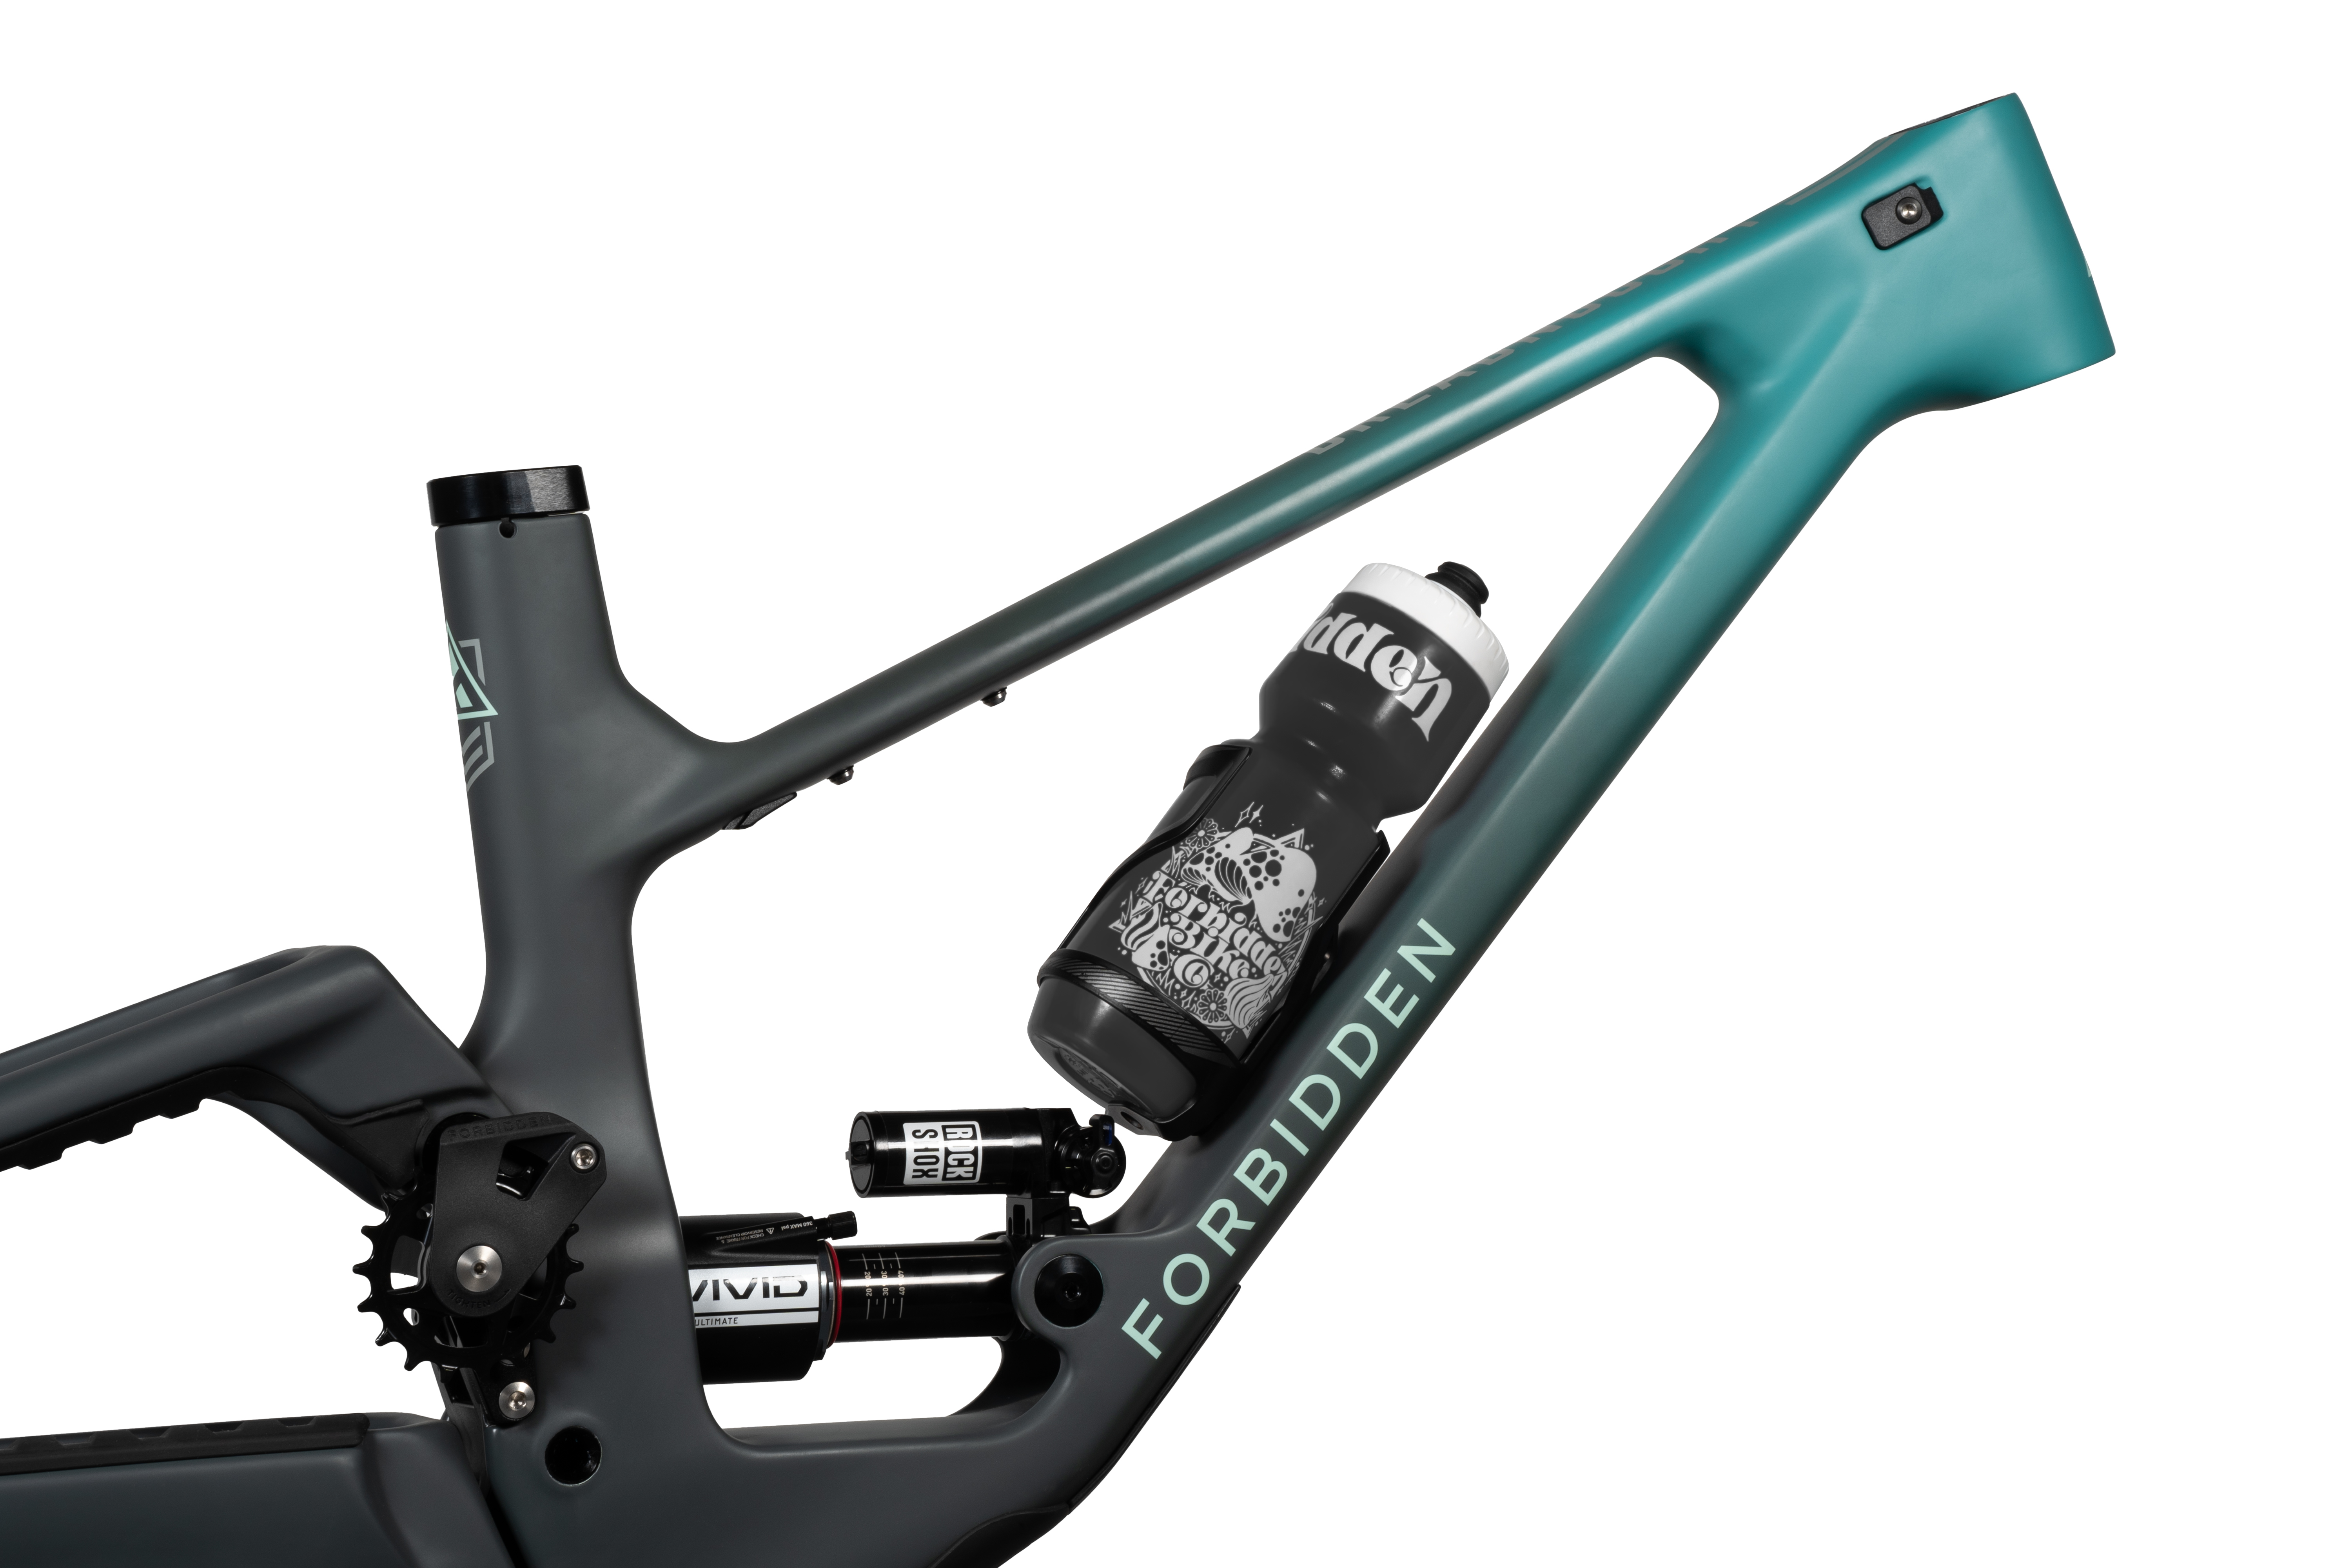
Water Bottle Fitment
Even our smallest Dreadnought frame size can fit a full-size 26oz water bottle. Remember, hydration is your friend, but sweaty backs most definitely are not.
Even our smallest Dreadnought frame size can fit a full-size 26oz water bottle. Remember, hydration is your friend, but sweaty backs most definitely are not.

06
Frame Protection
Frame Protection
A quiet bike is a fast bike and a clean bike is less prone to problems, so we developed a full suite of custom frame protection to keep the noisy bits quiet and the hard to clean bits free from crud.
A quiet bike is a fast bike and a clean bike is less prone to problems, so we developed a full suite of custom frame protection to keep the noisy bits quiet and the hard to clean bits free from crud.
07
Accessory Mount
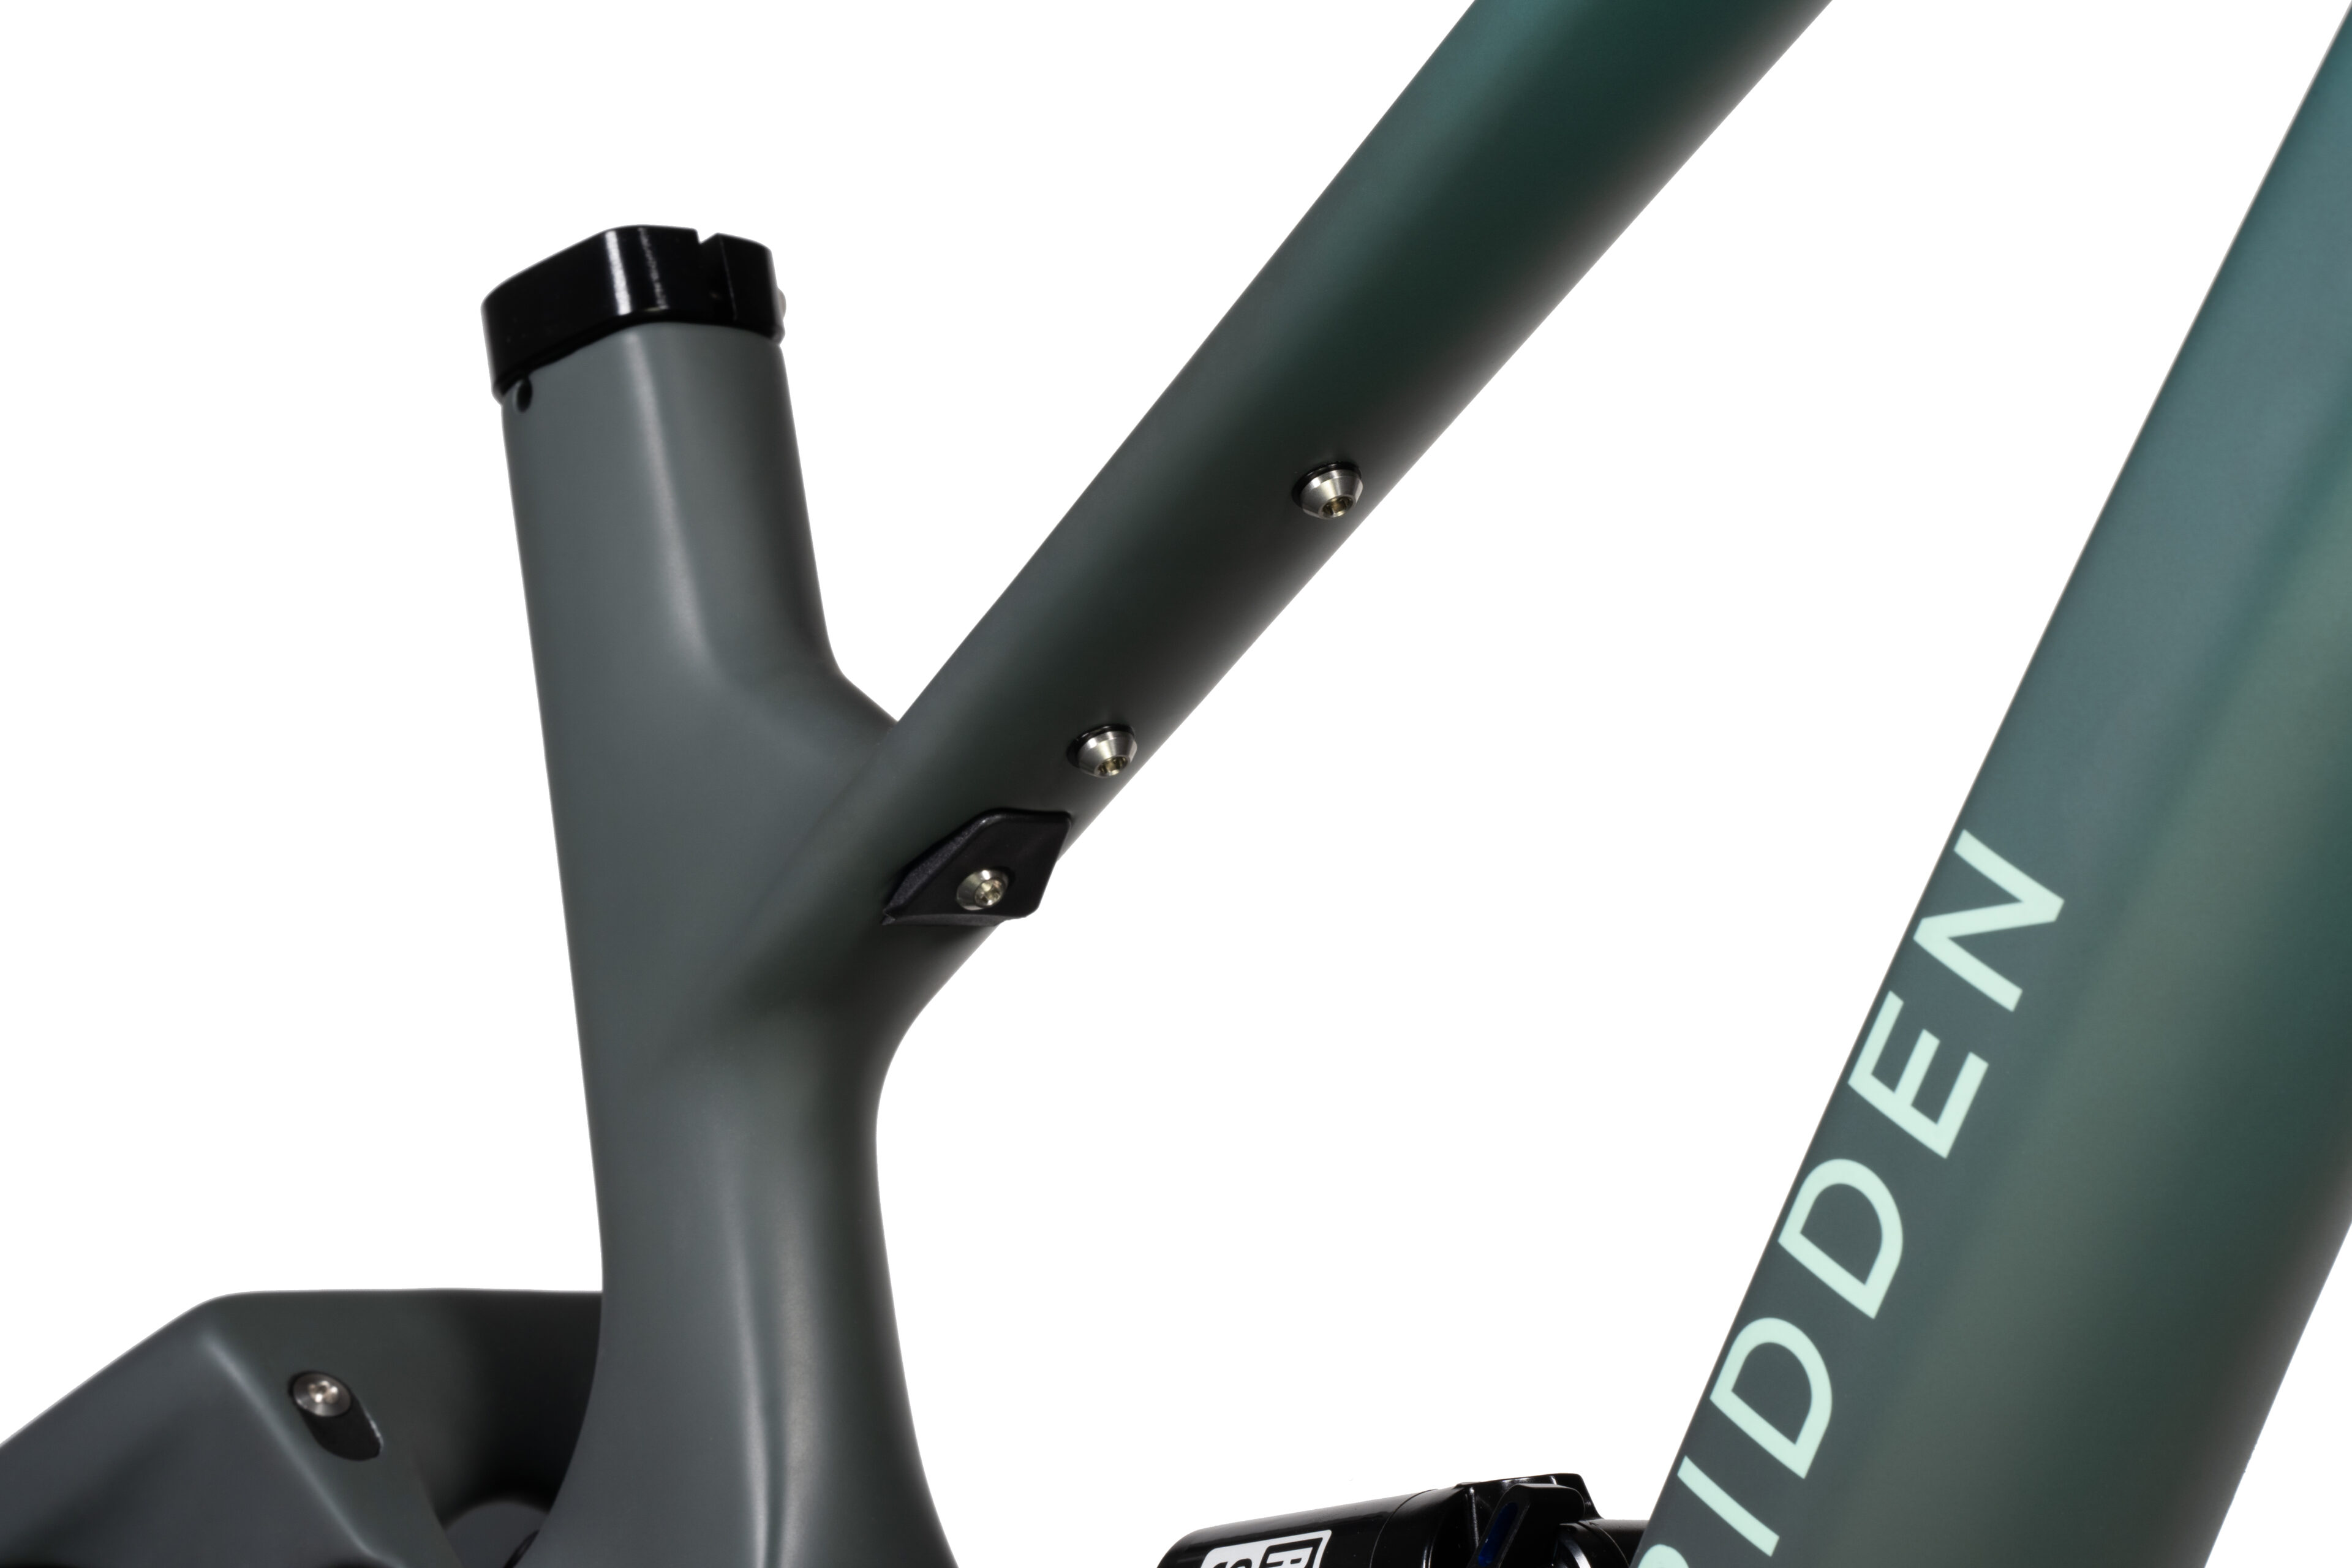
Accessory Mount
The ‘under the top tube’ mounting screws allow for the attachment of various accessory mounting solutions; pump, tools, a banana, the kitchen sink, go crazy, just don’t hang a water bottle there, please.
The ‘under the top tube’ mounting screws allow for the attachment of various accessory mounting solutions; pump, tools, a banana, the kitchen sink, go crazy, just don’t hang a water bottle there, please.
08
Sensible Standards
Sensible Standards
Threaded BB, Boost rear wheel spacing, press in headset cups – we only use what makes sense from a design and durability standpoint. You won’t find any questionable trends here – looking at you headset cable routing.
Threaded BB, Boost rear wheel spacing, press in headset cups – we only use what makes sense from a design and durability standpoint. You won’t find any questionable trends here – looking at you headset cable routing.